
A consistent and fast client onboarding workflow helps every new client get the same clear, organized experience. Documenting your workflow makes it consistent, but speed comes from automation.
This guide explains what a client onboarding workflow is, the full client onboarding process, what to automate at each stage, and how to automate it with no code or via an API. You’ll also learn how to measure the results.
What is a Client Onboarding Workflow?
A client onboarding workflow is the repeatable set of steps your team follows after a prospect becomes a client. It defines what happens, who owns each step, what information is needed, and what triggers the next step.
Onboarding is often the first part of your service that the client experiences. A smooth process sets clear expectations and gives clients confidence in working with you.
Workflow vs. Process vs. Checklist
These terms are closely related, but they serve different purposes.
- A process is the overall set of activities. For example, collecting client information, signing an agreement, and scheduling a kickoff call.
- A workflow shows how those activities move from one step to the next. It includes owners, triggers, and timing.
- A checklist is a simple list of tasks someone needs to complete within the workflow.
For example, your workflow might trigger a welcome email after a sales handoff. The checklist for that step could include sending the email, reviewing the intake form, and confirming the kickoff date.
The Client Onboarding Process Flow, Step by Step
A clear client onboarding process flow gives every team member the same starting point and shows exactly when ownership changes. The flow below starts when a prospect is ready to become a client:
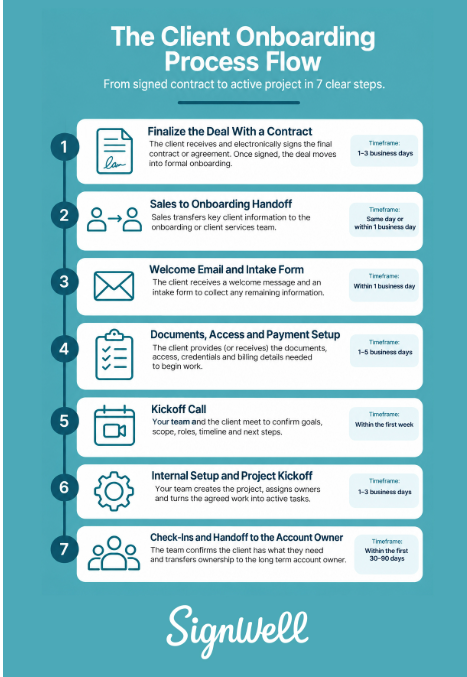
1. Finalize the Deal With a Contract
- What happens: The client receives the final contract, statement of work, or other agreement documents for electronic signature. Once the documents are signed, the deal can move into formal onboarding. Automating this step can save time immediately. Use a reusable contract template, add the appropriate signer(s), set the signing order if needed, and send automatic reminders until the document is completed.
- Owner: Sales team, or possibly operations or client services.
- Trigger: The client has agreed to move forward, and the final terms are ready.
- Typical timeframe: One to three business days.
(For more on automating the sales side of the process, check out our guide on sales contract automation.)
2. Sales to Onboarding Handoff
- What happens: Sales transfers the information needed to serve the new client, including scope, goals, contacts, timeline, pricing, and any commitments made during the sales process. This prevents important details from being lost between teams.
- Owner: Sales and the onboarding or client services team.
- Trigger: The required contract or agreement has been completed.
- Typical timeframe: Same day or within one business day.
3. Welcome Email and Intake Form
- What happens: The client receives a welcome message explaining what comes next, along with an intake form to collect any remaining information the team needs.
- Owner: Onboarding or client services.
- Trigger: The sales handoff is complete.
- Typical timeframe: Within one business day.
4. Documents, Access, and Payment Setup
- What happens: The client receives or provides the documents, account access, credentials, billing details, and other information needed to begin work. Each step should be broken out separately so the team can see what is complete and what still needs attention.
- Owner: Operations, finance, IT, or the delivery team.
- Trigger: The client completes the required intake steps.
- Typical timeframe: One to five business days.
5. Kickoff Call
- What happens: Your team meets with the client to confirm goals, scope, communication preferences, roles, timeline, and immediate next steps. The kickoff call should answer practical questions early, including who owns what, how updates will be shared, and what success looks like.
- Owner: Account manager, project manager, or onboarding lead.
- Trigger: The required information and setup tasks are complete enough to begin the working relationship.
- Typical timeframe: Within the first week.
6. Internal Setup and Project Kickoff
- What happens: Your team creates the project, assigns owners, adds the client to the right systems, and turns the agreed work into active tasks. This stage turns information from sales and onboarding into a clear working plan for the people delivering the service.
- Owner: Project manager, operations lead, or delivery team.
- Trigger: The client kickoff is complete, and the team has the information needed to begin delivery.
- Typical timeframe: One to three business days.
7. Check-Ins and Handoff to the Account Owner
- What happens: The team checks that the client has everything they need, resolves any early issues, and transfers ownership from onboarding to the long-term account owner. The handoff should include the client’s goals, open issues, important decisions, and the next scheduled communication.
- Owner: Onboarding lead and account owner.
- Trigger: Initial setup is complete, and the client has reached the agreed onboarding milestone.
- Typical timeframe: Within the first 30 to 90 days, depending on the business.
Where Manual Client Onboarding Breaks Down
Manual onboarding works well when you have a small number of clients, but problems appear as your client volume grows. Common issues include:
- Agreements sit unsigned because someone has to remember to follow up.
- Nobody can say which stage a client is at without asking around.
- Every team member runs onboarding slightly differently.
- Handoffs between sales, delivery, and support drop information.
- Important client details live in emails, spreadsheets, and personal notes.
- The workload grows directly with client count because more people mean more manual follow-up.
A documented workflow gives your team a consistent process, and automation removes repetitive work.
What to Automate in Your Client Onboarding Workflow
You do not need to automate every part of your onboarding workflow at once. Start with repetitive actions that follow clear rules.
1. Intake and Data Collection
Send intake forms automatically when a client reaches the right stage. Use the answers to update your CRM, project tool, or client record so your team does not enter the same information twice. You can also automatically create follow-up tasks when information is missing.
2. Agreements and eSignatures
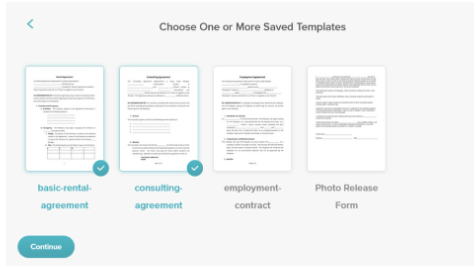
Use document templates to prepare agreements with the right client information and send them for signature. When the agreement is complete, the workflow can automatically move the client to the next stage. This reduces the chance that a signed agreement sits unnoticed in an inbox.
3. Reminders and Follow-ups
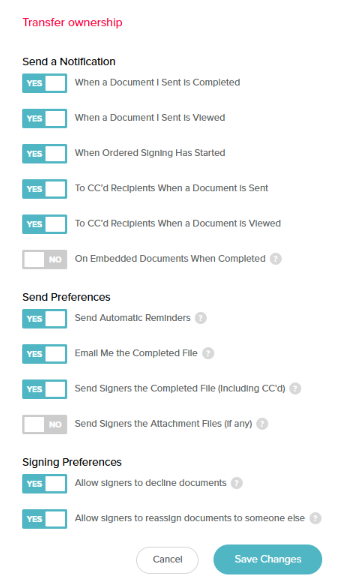
Automated reminders are useful when a client has not completed an intake form or signed an agreement. Set a clear schedule of reminders. For example, send a reminder after three days, another after seven days, then create an internal task for someone to follow up personally.
4. Internal Task Creation
A completed step can automatically create the next set of internal tasks. For example, when an agreement is signed, your workflow can create tasks to set up billing, platform access, schedule a kickoff, and prepare the project workspace.
5. Status Visibility
Automate updates so anyone involved can see where a client is in the onboarding process. A single status view can show whether the client is waiting for an agreement, completing intake, ready for kickoff, or fully onboarded.
How to Automate Your Client Onboarding Process
You can often build a first version of your client onboarding automation in a couple of weeks. The goal is to start with one clear workflow, test it, and improve it.
1. Map the Workflow You Actually Run Today
Start by documenting what your team does now. Talk to sales, onboarding, delivery, and client services. List every step, handoff, document, and decision point. Do not automate an idealized process that nobody actually follows.
2. Standardize Before You Automate
Automation works best when the underlying process is consistent. Define the owner, trigger, expected result, and timeframe for each stage. Decide which information must be collected before the workflow can proceed.
3. Turn Your Documents Into Templates
Review the documents you send during onboarding. For documents that use the same structure, create reusable templates with fields for names, dates, pricing, addresses, and other client details.
4. Automate the Signing Step First
The agreement step is often a good place to begin. Set up a template, define the signing order, and add automatic reminders. Then connect the completed signature to the next action in your workflow.
For example, a completed agreement could update the client record, notify the onboarding team, and create kickoff tasks.
5. Connect the Tools With Triggers
Use the trigger in one system to start an action in another.
For example: CRM deal marked closed → Create onboarding record → Send welcome email → Send agreement → Agreement completed → Create setup tasks.
No-code automation tools can connect many common business apps. SignWell integrates with more than 5,000 apps through Zapier, or you can use the SignWell API to connect systems directly.
6. Test With One Client Type, Then Expand
Do not launch a new workflow for every client type at the same time. Choose one common client journey and run several real clients through it. Watch for unclear ownership, missing triggers, duplicate messages, and exceptions. Fix those issues before creating new workflows or branches.
7. Measure and Iterate
Track the numbers that show whether onboarding is becoming faster and more consistent. Here are some useful metrics to track:
- Time from closed deal to signed agreement
- Time from signed agreement to kickoff
- Average total onboarding time
- Percentage of clients completing onboarding on time
- Number of manual follow-ups per client
- Number of clients stuck at each stage
- Client satisfaction after onboarding
Build Client Onboarding Automation with an eSignature API
Some teams onboard clients inside their own product, portal, or internal tool. In that case, an API can integrate the signing step into your existing workflow.
A practical SignWell integration usually follows a simple sequence:
- Your application identifies a client who is ready to sign.
- Your application creates a document from a template or generates a dynamic document.
- SignWell sends the document or provides an embedded signing experience inside your app.
- The client signs the document.
- A webhook notifies your system that the document has been completed.
- Your application automatically starts the next onboarding step.
SignWell supports embedded signing, allowing clients to complete the signing process within your product or portal. The API can also send documents through the standard signing flow.
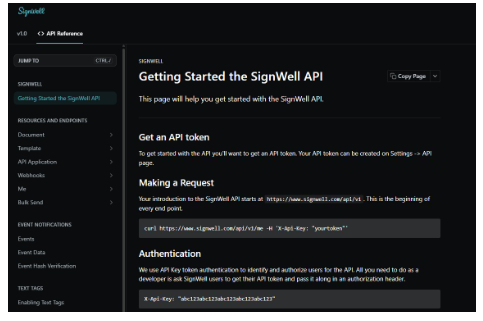
For developers, SignWell provides official SDKs for Ruby, Node, Python, and PHP. There is also a CLI for terminal and CI/CD workflows, as well as an MCP server for compatible AI clients. Test mode is unlimited, so you can build and test without sending real documents.
For example, a software company could automatically create a customer agreement when an account reaches a certain setup step. After the client signs, a document_completed webhook can update the account and notify your team. SignWell webhooks support document events such as sent, viewed, signed, completed, declined, and more.
For more details, see the SignWell API, SignWell for Developers, and our eSignature webhooks guide.
Client Onboarding Workflow Checklist
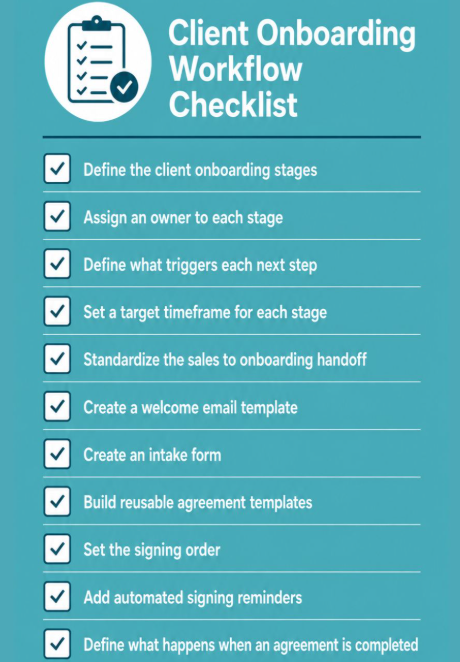
- Define the client onboarding stages
- Assign an owner to each stage
- Define what triggers each next step
- Set a target timeframe for each stage
- Standardize the sales-to-onboarding handoff
- Create a welcome email template
- Create an intake form
- Build reusable agreement templates
- Set the signing order
- Add automated signing reminders
- Define what happens when an agreement is completed
- Create templates for internal setup tasks
- Automate task creation where possible
- Create one view showing each client’s onboarding status
- Test the workflow with one client type
- Track onboarding time and delays
- Review and improve the workflow regularly
Automate the Signing Step of Onboarding With SignWell
The signing step is one of the fastest parts of client onboarding to automate. It also offers the best payoff.
SignWell is one of the best electronic signature software programs because it lets you create reusable document templates, set signing orders, and send automated reminders to your signers. You also get a full audit trail and a mobile-friendly signing experience.
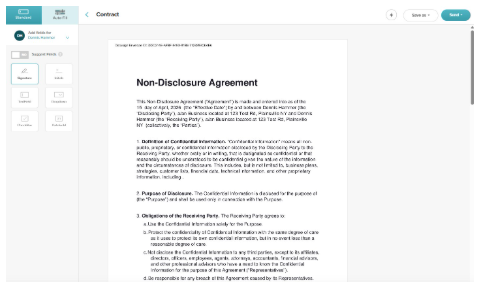
Teams can connect SignWell to other tools, including more than 5,000 apps through Zapier. For custom workflows, the SignWell API lets you build signing directly into your product or internal systems. SignWell’s developer tools also support templates, embedded signing, and real-time document events.
SignWell supports eSignature workflows designed to meet requirements under the ESIGN Act, UETA, and eIDAS, subject to the applicable use case and legal requirements.
SignWell also offers transparent pricing and a free plan, so you can start with the signing workflow that best fits your business.
Try SignWell or check out SignWell pricing.