Here’s How to Add a Signature in Google Sheets (We Cover 3 Methods)
8 mins
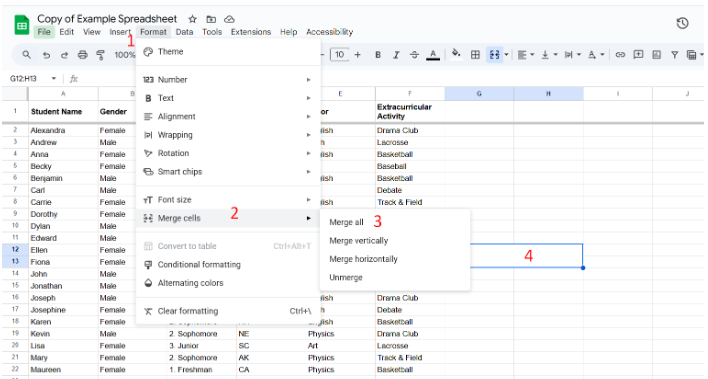
Add signatures to Google Sheets using three practical methods: SignWell for secure, legally binding eSignatures; Google’s built-in drawing tool for simple visual signatures; and a signature add-on for quick insertions. SignWell also supports multi-signer workflows, reminders, templates, audit trails, and secure document storage for streamlined approvals.
If you have ever needed someone to approve a budget, confirm a timesheet, or sign off on a project directly inside Google Sheets, you already know how confusing it can feel. Google Sheets is great for collaboration, but it is not designed for formal signatures.
That said, there are reliable ways to add a signature to a Google Sheet, depending on your needs. In this SignWell article, we cover three practical methods, explain when to use each, and show you how to achieve a clean, secure, and professional result.
But first…
At SignWell, we have helped more than 65,000 businesses and supported over 10 million document signings, which gives us deep experience in eSignature workflows and document efficiency. Our work with teams of all sizes gives us clear insight into the simplest ways to add secure signatures inside Google Sheets using practical, real-world methods.
We recommend using SignWell because it’s fast, secure, and intuitive. Our platform lets you add legally binding signatures to Google Sheets in just a few clicks, giving you full control over your document workflow.
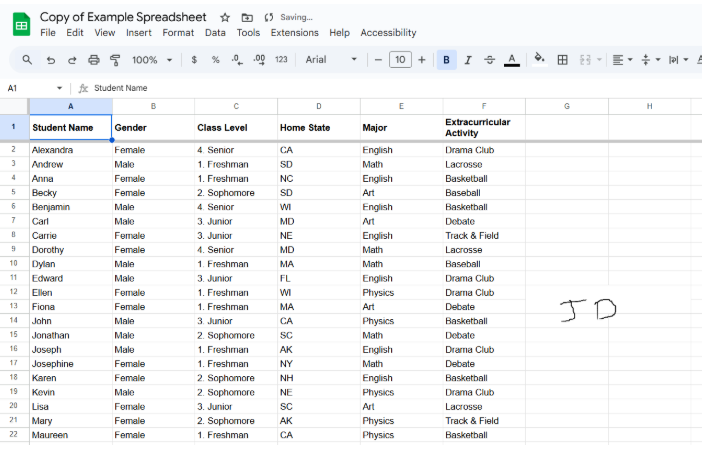
Before signing, prepare the sheet you want to eSign. Go to the top menu in Google Sheets, and click File > Download > PDF. This converts your sheet into a format ready for signing while preserving its layout.
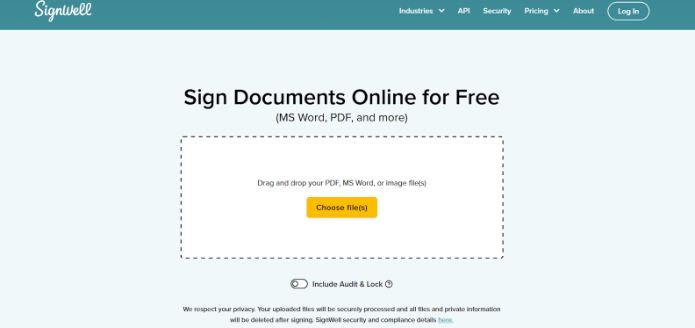
While uploading, you’ll see a toggle option:
After setting your preferences, click Sign Document to begin placing your signature on the sheet.
After your sheet loads, it opens in a preview where you can drag and drop fields:
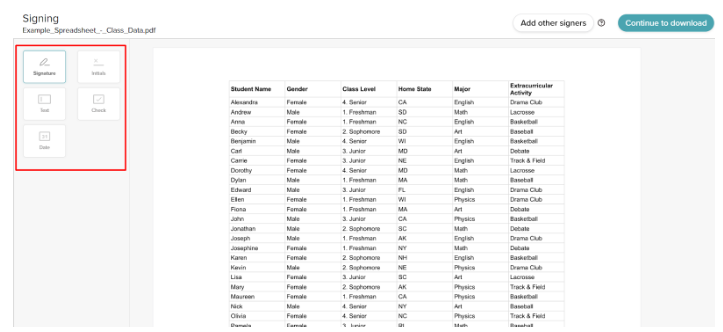
Place the Signature field in the appropriate location on your sheet (e.g., near the bottom where approvals are required).
You have three options to create your eSignature:

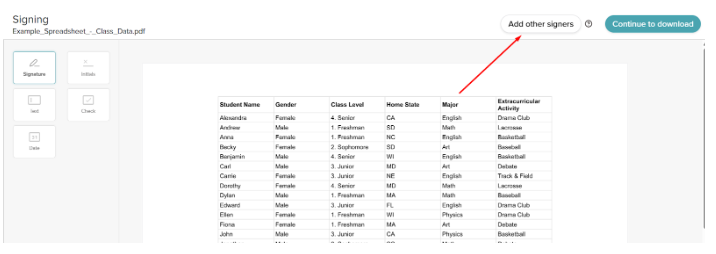
If other people need to sign, click Add Other Signers at the top right. This feature requires a free SignWell account, which also unlocks advanced workflow tools like setting signing order, using templates, bulk sending, reminders, and secure document storage.
Once your signature is in place, click Continue to Download at the top right. SignWell processes your document in seconds. On the download page, you’ll see options to either:
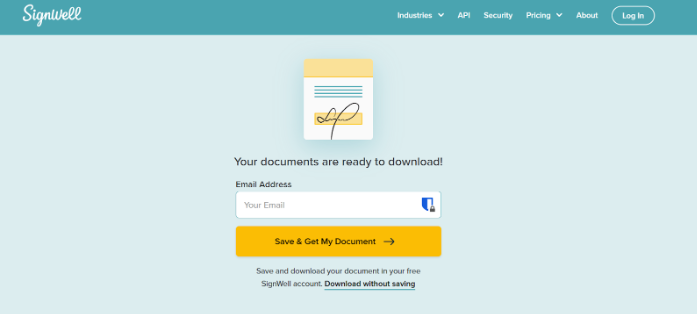
Your signed Google Sheet is now ready and fully secure.
Also see our article on How to Electronically Sign a PDF
For quick approvals or informal agreements, Google Sheets lets you add a visual signature for free. This method is simple and fast, but does not provide the security, audit trail, or legal validity that SignWell offers.
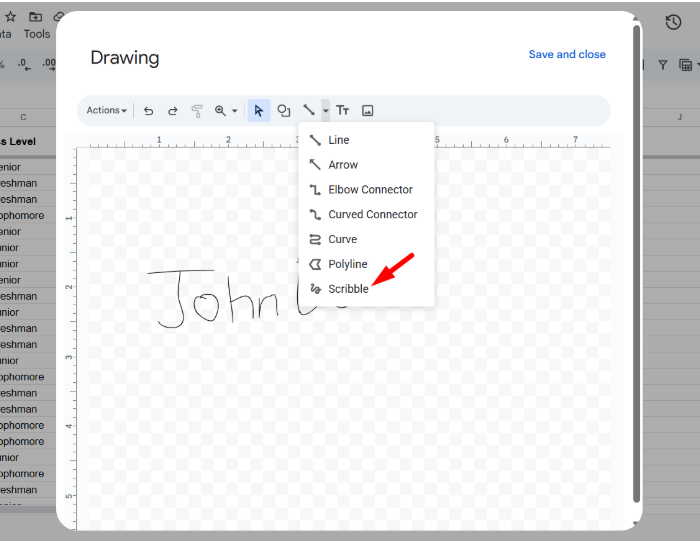
In the canvas’ toolbar, click the down arrow next to the line icon and select Scribble.
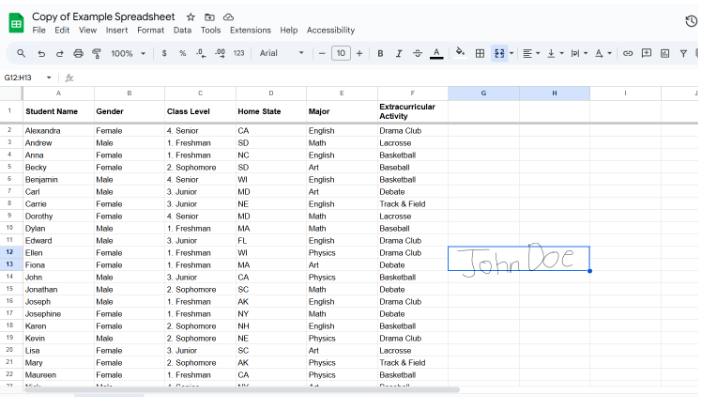
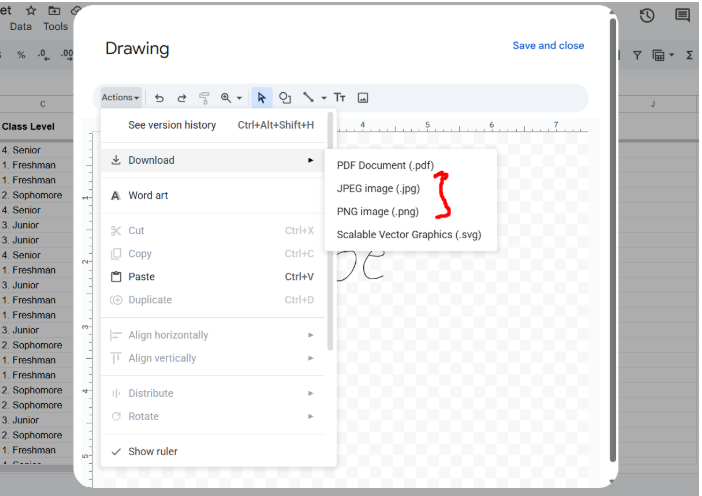
Save your signature as an image for future use. Click the signature and either select the three-dot menu and choose Edit or simply double-click it to reopen the drawing canvas. Then go to Actions > Download to save your signature as a PNG or JPEG.
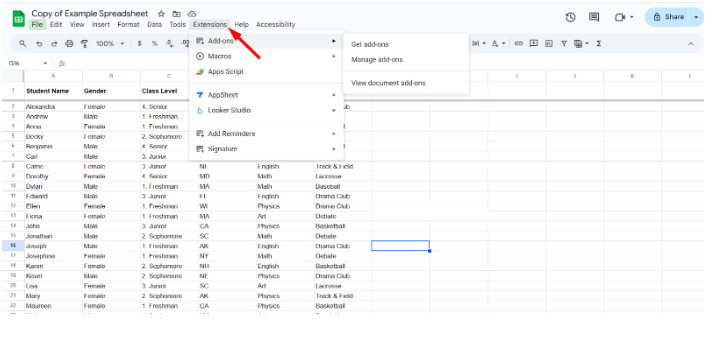
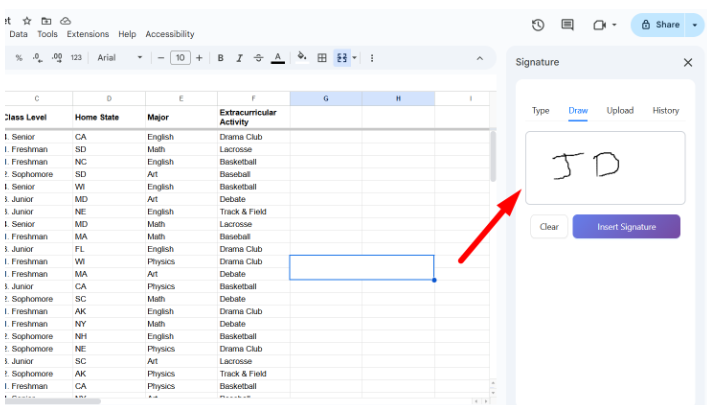
For another free option, you can use a Google Sheets add-on to insert a signature. Like Method 2, this approach is simple but not legally binding and does not provide security, audit trails, or full compliance.
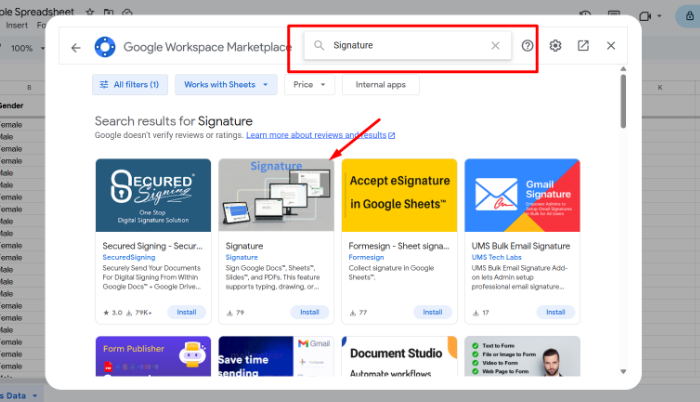
Locate the add-on named exactly “Signature,” click it to read details, and then click Install.
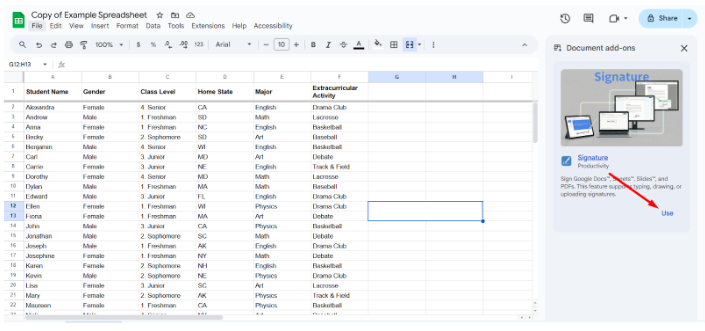
2. Click the Use button in the sidebar. The interface will switch to options for adding your signature:
Also see our article on how to easily sign Google Docs.
A drawn signature or typed text inside Google Sheets does not meet legal standards for most agreements. SignWell signatures are legally binding under U.S. ESIGN laws and international standards. This includes bank-level encryption, identity verification options, and a secure signing ceremony. If you ever need to prove who signed and when, the documentation is already built in.
Also see our article on how to verify eSignatures
A screenshot or image pasted into a spreadsheet offers no proof of authenticity. SignWell automatically generates a complete audit trail for every document. This record includes timestamps, IP addresses, signer actions, and tamper detection.
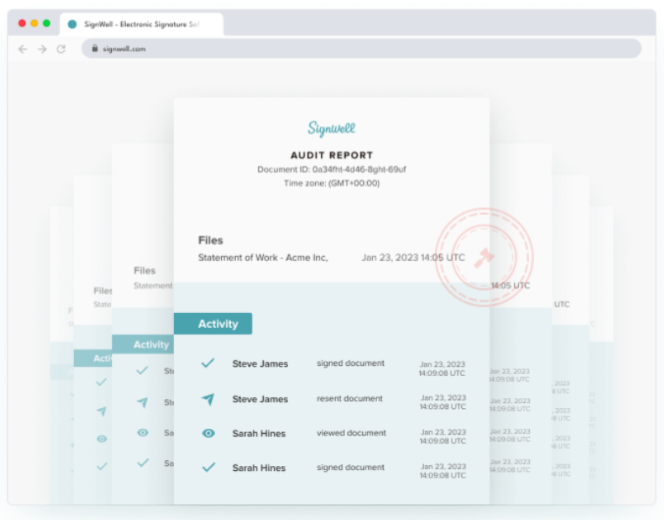
For example, if you are collecting approvals from multiple team members, each action is documented so nothing can be disputed later.
SignWell cuts out the back-and-forth of emailing files, inserting images, or waiting for someone to sign and return a sheet manually. You simply upload your Google Sheet, place signature fields, and send it out.
Signers receive a clean guided experience that shows them exactly where to sign. This keeps projects moving forward instead of getting stuck because someone missed a step.
We’ve broken down how eSignature can benefit businesses of all sizes.
Google Sheets add-ons provide only basic functionality and are not designed for multi-signer workflows. SignWell lets you add multiple signers, set the signing order, and assign specific fields to each person. For example, if you need a department head to sign first and a client to sign second, SignWell handles that automatically and sends notifications at every step.
One of the biggest time sinks in document workflows is chasing people who forget to sign. SignWell sends automatic reminders, tracks signer progress, and notifies you the moment a document is completed. This is especially useful for approvals that must happen quickly, like budget sheets, internal authorizations, or client onboarding forms.
If you frequently send out similar Google Sheets, such as monthly reporting sign-offs or vendor approval forms, SignWell templates save enormous time. You set up the fields once and reuse the template whenever you need it. This eliminates repetitive layout work and ensures every document is consistent and error-free.
Google Sheets signatures added through drawings or add-ons leave you with no secure record. SignWell stores your completed documents in a secure dashboard where you can quickly search, organize, and download anything you need.
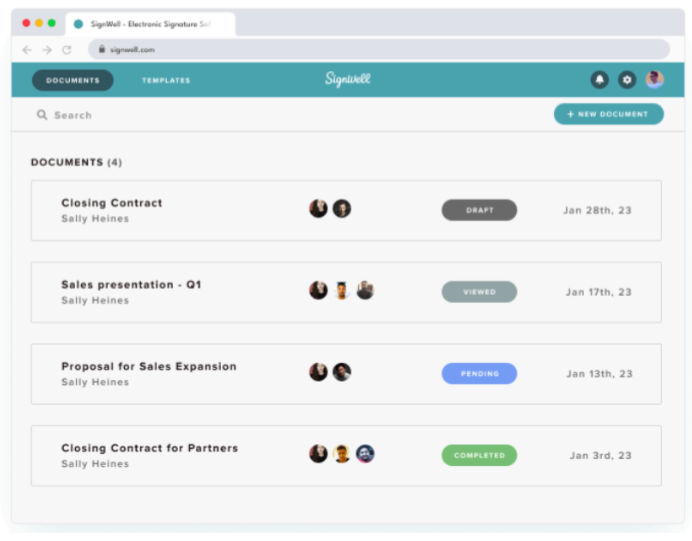
This makes audits, compliance checks, and internal reporting significantly easier. Everything is protected and accessible in one place rather than scattered across emails or shared folders.
Google Sheets requires workarounds like drawings or add-ons to create a signature, which can be limiting. SignWell accepts almost any document format you work with, including PDFs generated from Google Sheets, Excel files, and standard forms. This means you can keep your existing workflow, convert your sheet when needed, and still get a fully compliant, professionally signed document every time.
Adding signatures directly in Google Sheets can be frustrating, slow, and prone to errors, especially when multiple approvals are needed. Without the right tools, you risk unprofessional-looking documents, lost approvals, and compliance headaches.
SignWell makes it simple and secure. With legally binding eSignatures, automated workflows, templates, and audit trails, SignWell ensures every signature is tracked, every document is compliant, and your team can collaborate without delays. Whether it’s internal approvals or client-facing forms, our platform handles the heavy lifting for you.
Ready to save time and get documents signed securely? Sign up for SignWell today—It’s FREE.
businesses served
customer support satisfaction
documents signed