
Gone are the days when signing a PDF meant printing it out, signing it by hand, and then uploading it and emailing it back to the sender. If you need to sign a PDF (or get someone else’s signature), there are a number of ways that you can do this electronically.
You can create a signature using programs you may already have on your computer, or you can use an electronic signature tool created specifically to sign documents online.
But, what’s the best way, and what are your options? We’ll go over the various methods you can use here, and how to choose the right one for you.
What’s the Best Way To Sign A PDF Online?
Is there really a best way to sign a PDF electronically? It depends on your specific situation.
Do you have something that you need to sign quickly, that does not really need to be very official, like a personalized letter? Some of the low-tech methods, like signing in Preview or with Acrobat Reader might be fine for this type of situation (though an electronic signature tool would be just as effective). Do you need to sign a contract or other official document? Do you need to collect signatures from others, or get consent or approval on something? In these cases, you’re much better off using an electronic signature tool.
Here are three common ways to sign a PDF online, and the advantages and disadvantages of each, to help you determine which route to take. Keep reading for a quick walkthrough of how each method works as well.
3 Ways to Sign a PDF Online
1. Sign your PDF using Preview
If you’re on a Mac, you can simply open a PDF in Preview and insert a signature this way. You’ll be able to use your trackpad to create a signature, or you can use your webcam to take a picture of your signature, upload it, and insert it into the document with Preview.
If you just need to sign something yourself, and it’s not a document that you are particularly concerned about being legally valid and binding, this can be an okay method to use. It’s easy and straightforward—but has some significant disadvantages.
Signing a PDF using Preview (the default PDF viewer on macOS) is straightforward. You can add your signature directly to the document.
Here’s a step-by-step guide on how to sign a PDF using Preview:
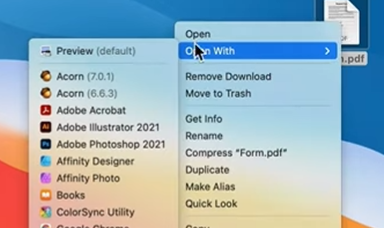
Step 1:Open the PDF file in Preview: Locate the PDF file on your Mac and double-click on it to open it in Preview. If Preview is not set as the default PDF viewer, you can right-click on the PDF file, select “Open With,” and choose Preview from the list of applications.
Step 2: Access the Markup Toolbar: Once the PDF file is open in Preview, navigate to the top menu bar and click the “View” menu. Select “Show Markup Toolbar” from the dropdown menu or press “Command + Shift + A” on your keyboard. This will reveal the Markup Toolbar at the top of the Preview window.
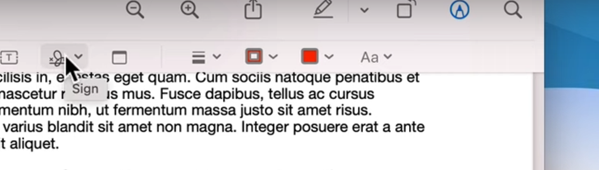
Step 3: Click on the Signature icon: The “Markup Toolbar” has a series of icons. Look for the icon that resembles a fountain pen or signature and click on it. This icon is used to add annotations, including signatures.
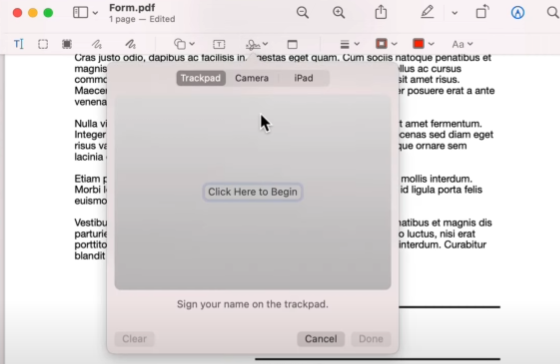
Step 4: Create a new signature: If you haven’t already set up a signature in Preview, you’ll need to create one. Click on the “Create Signature” option. A window will pop up, allowing you to add your signature using your Mac’s trackpad or by holding up a piece of paper with your signature to your Mac’s built-in camera. Choose your preferred method and follow the on-screen instructions to create your signature.
Step 5: Insert your signature into the PDF: After creating it, it will appear as a draggable blue box in the Preview window. Click on your signature and drag it to the location within the PDF where you want it to appear. You can resize and reposition your signature by clicking and dragging its corners.
Step 6: Save the signed PDF: Once you’ve placed your signature in the desired location, go to the “File” menu and select “Save” to save the changes to the PDF. Alternatively, you can use the keyboard shortcut “Command + S” to save the document.
Step 7: Export the signed PDF (optional): If you need to send the signed PDF to someone else or save it in a different format, you can export it from Preview. Go to the “File” menu, select “Export as PDF” or “Export…”, and choose the desired file format and location to save the signed PDF.
Advantages:
- Easy to use and already available to you (if you’re on a Mac)
- Quick to set up and insert
Disadvantages:
- Only available if you’re using a Mac computer
- It isn’t a great way to collect signatures from multiple people
- Not a legally-binding electronic signature—it can’t be audited or verified and doesn’t meet electronic signature requirements
2. Use Acrobat to Sign Your PDF
If you have Acrobat, you can also use its built-in signature tool to sign a PDF. This process is similar to using Preview to sign your document—it’s just a different tool. And, just like with Preview, signing a PDF in Acrobat is easy to set up but comes with some big disadvantages—like the fact that it isn’t a legally valid means of signing a document electronically.
Here’s a step-by-step guide on how to sign a PDF using Acrobat:
Step 1: Open the PDF file in Acrobat: Launch Adobe Acrobat and open the PDF document you want to sign.
Step 2: Access the Tools pane: In the top-right corner of the Acrobat window, click on the “Tools” tab to open the Tools pane.
Step 3: Select the “Fill & Sign” tool: In the Tools pane, locate and click on the “Fill & Sign” tool. This will open the Fill & Sign toolbar on the right side of the Acrobat window.
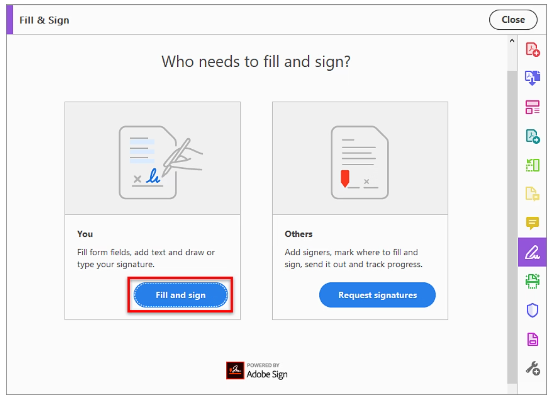
Step 4: Click on the “Sign” icon: In the Fill & Sign toolbar, click on the “Sign” icon, which looks like a pen tip hovering over a line. This will prompt you to add a signature to the document.

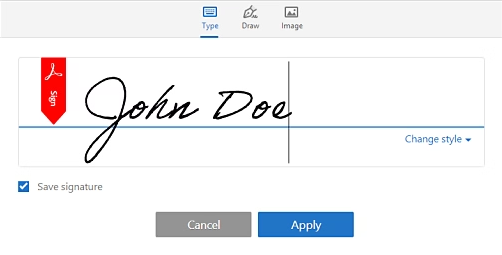
Step 5: Choose how to add your signature: If you already have a digital ID or signature created in Acrobat, you can select it from the drop-down menu. Alternatively, you can click the “Add Signature” option to create a new signature or draw your signature directly onto the document using your mouse or touchpad.
Step 6: Place your signature: After selecting or creating your signature, click on the location within the PDF where you want to insert it. Acrobat will insert your signature as a digital image that you can resize and reposition.
Step 7: Save the signed PDF: Once you’ve placed your signature in the desired location, go to the “File” menu and select “Save” to save the changes to the PDF. Alternatively, you can use the keyboard shortcut “Ctrl + S” (Windows) or “Command + S” (Mac) to save the document.
Step 8: Export the signed PDF (optional): If you need to send the signed PDF to someone else or save it in a different format, you can export it from Acrobat. Go to the “File” menu and select “Save As” or “Export.” Choose the desired file format and location to save the signed PDF.
Advantages
- Built into Acrobat Reader, so if you use Acrobat, it’s part of a tool you already have access to
- Relatively easy to do (though not as easy as the other two options on this list)
Disadvantages
- If you don’t have Acrobat, this isn’t your best option
- It’s not a convenient way to collect signatures from multiple people, so it’s another one that’s really only good if you need to sign something yourself
- Just like with Preview, it is not a legally viable or binding form of electronic signature
3. Sign a PDF with an electronic signature tool
Finally, you can use an electronic signature tool to sign a PDF. This is the most sophisticated method on this list, but you will have to use a third-party tool. This will mean signing up or downloading something before you can sign your document. That said, some tools, like SignWell, don’t require a download, are very easy to set up, and are free with limited use.
Electronic signature tools are your best bet if you need a document signed by multiple people, or if the document in question is something that needs to hold up legally (like a contract or other agreement, for example).
Advantages
- Quick to set up
- Very easy to insert a signature into a PDF (or any type of document)
- Can conveniently be shared with others so you can collect signatures from multiple people
- Some tools, like SignWell, are free for limited use
The signatures adhere to all electronic signature laws and are therefore as binding and valid as pen and paper signatures
Disadvantages
- If you sign more than three documents a month, you’ll pay a fee (for example, with SignWell, you’ll pay a small fee of $15 monthly)
How to Sign a PDF With SignWell
Here’s a step-by-step guide on how to easily sign a PDF document using SignWell:
1. Upload your document
To start signing a PDF with SignWell, you’ll need an account. Don’t worry—it’s totally free to create one, and we let you send and sign three documents each month without paying.
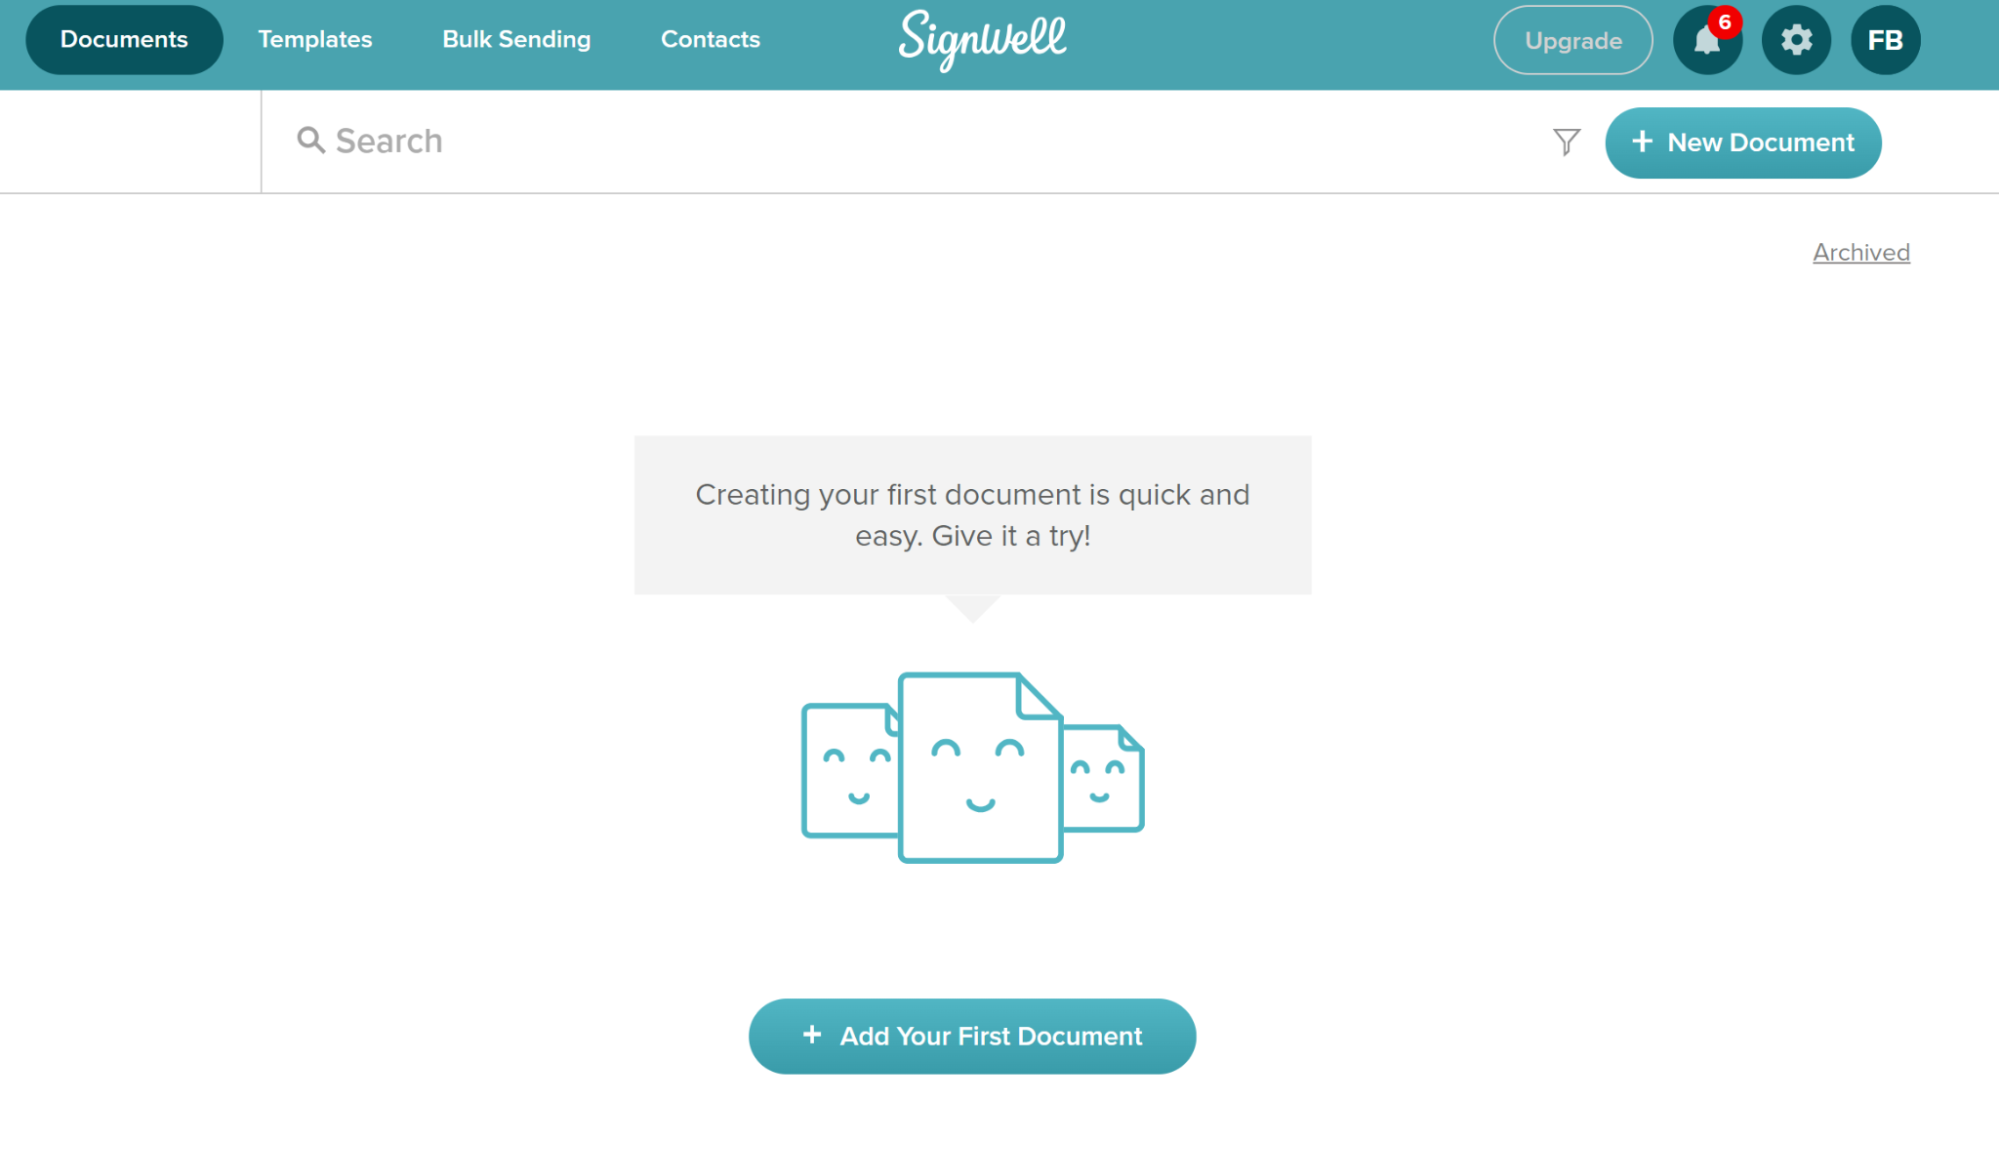
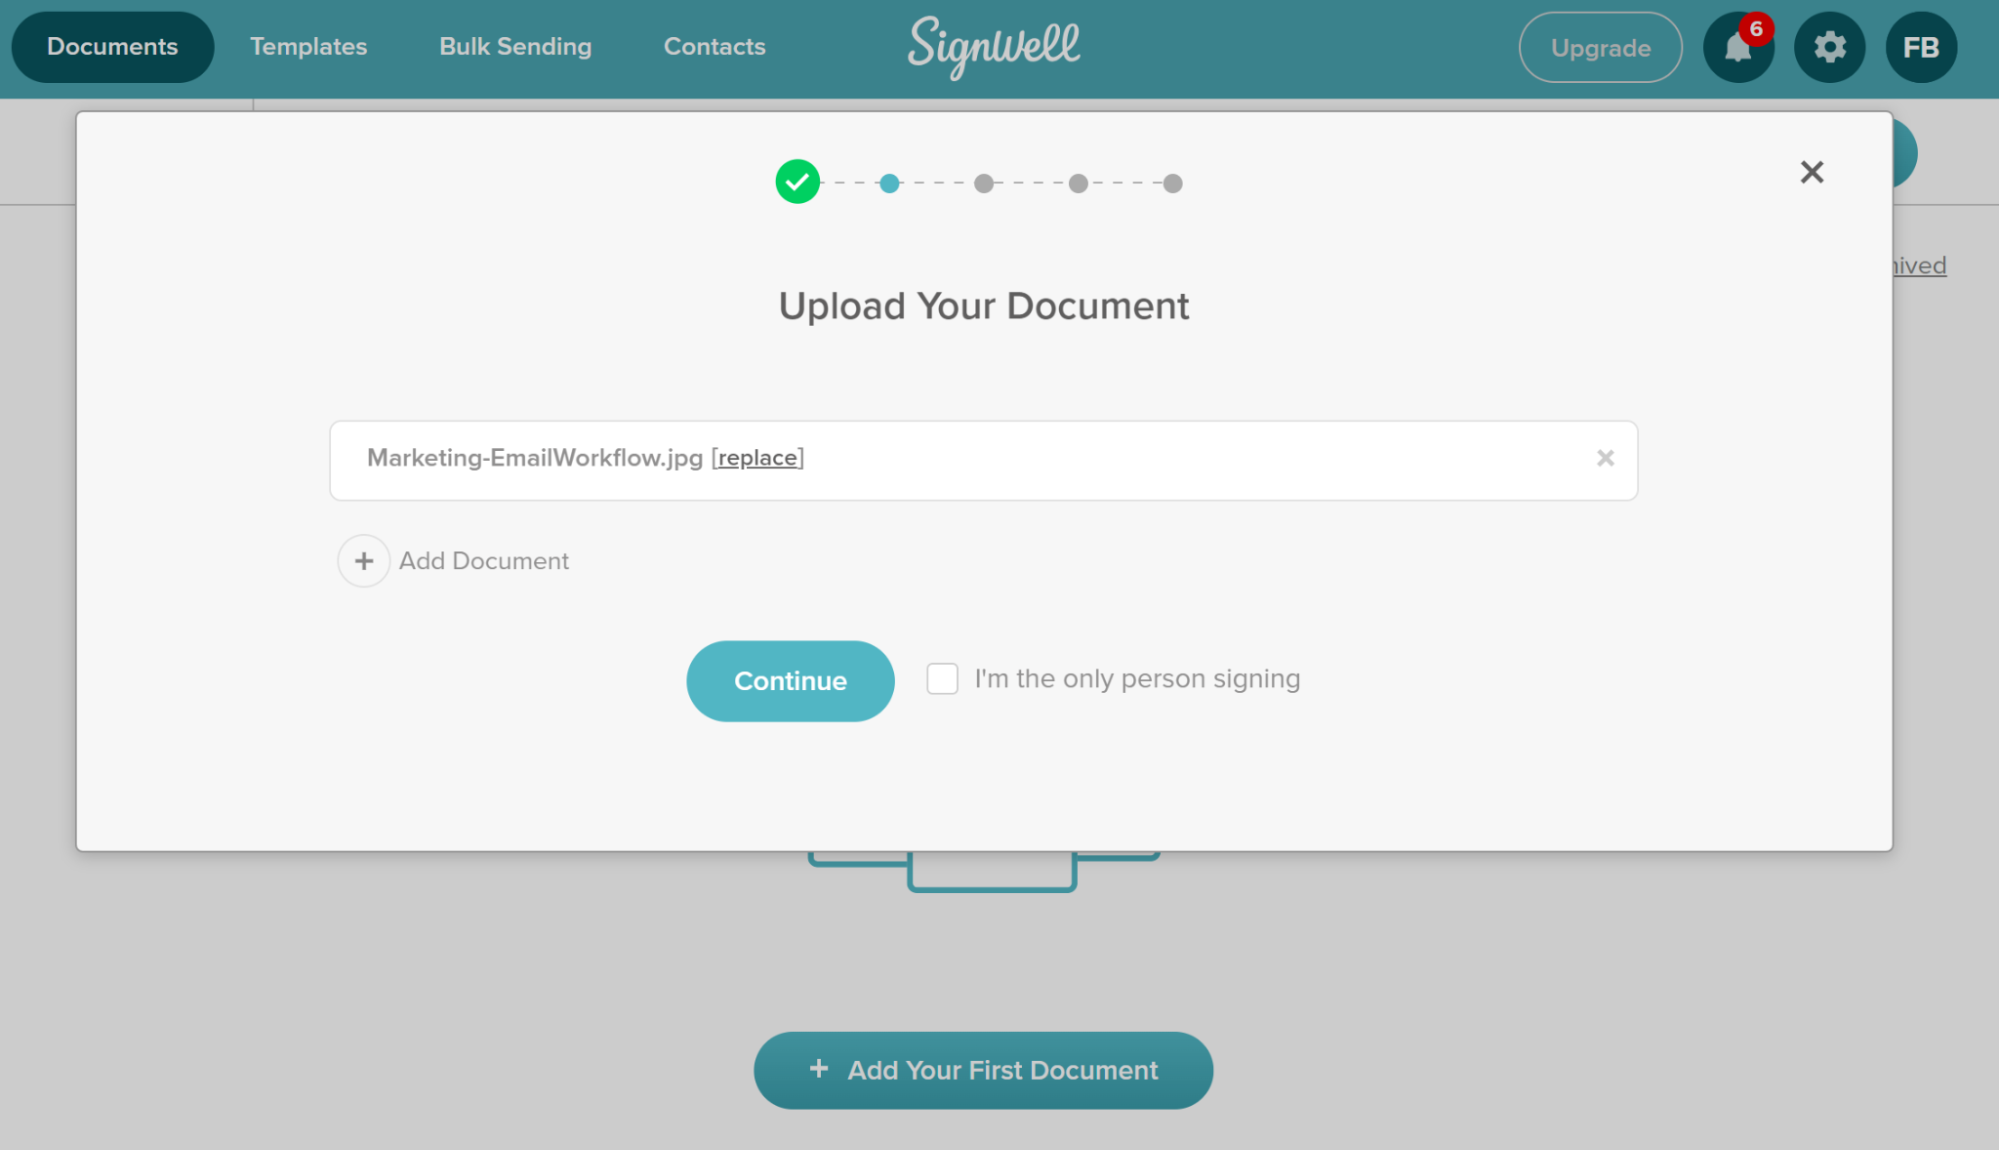
Once you sign up, upload your document by clicking “Add Your First Document.”
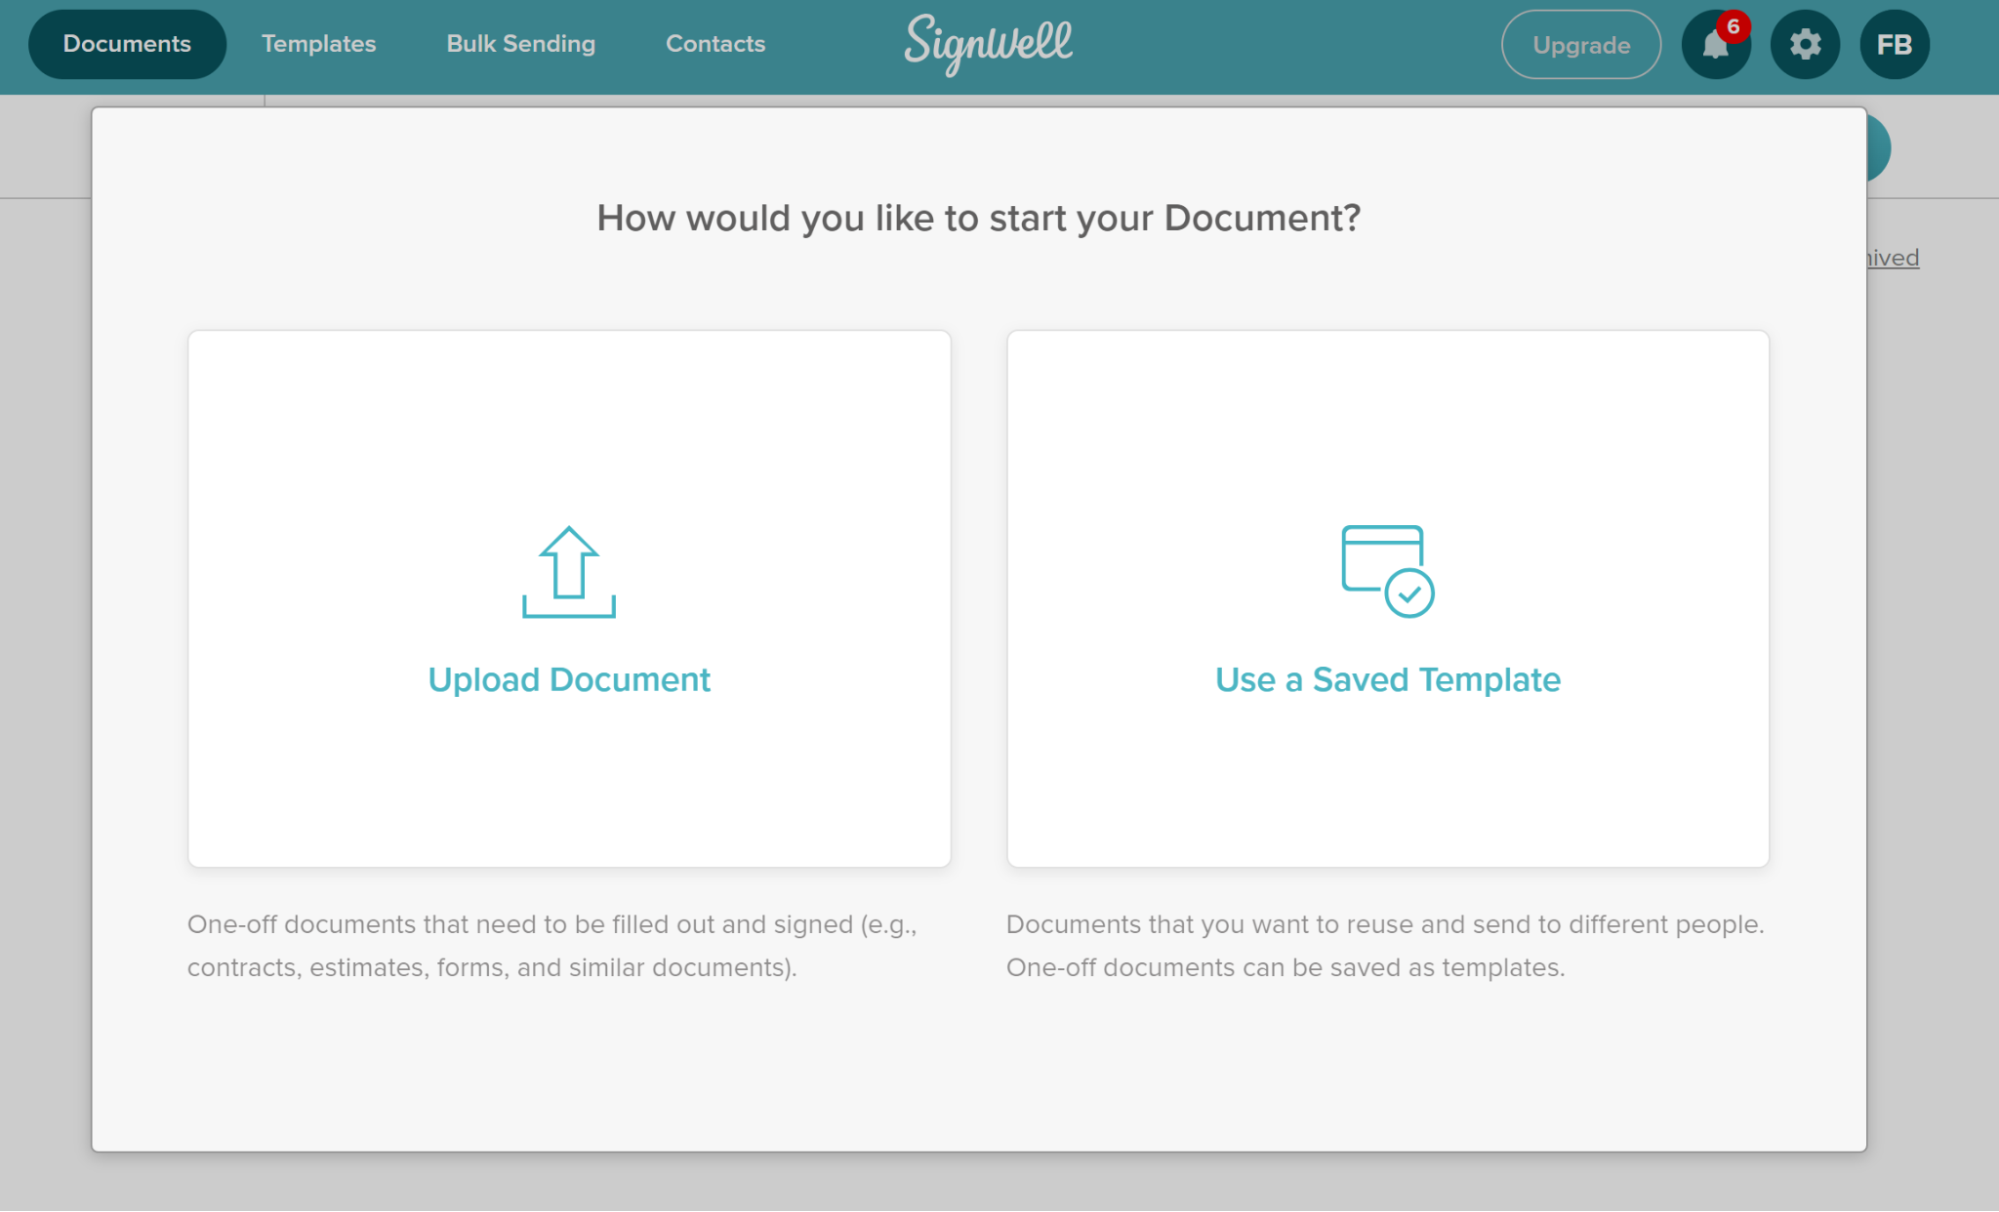
Then, click “Upload Document” to select a PDF from your computer or phone.
2. Add contacts
Once your document is uploaded, you can start the setup process. If you’re the only person signing, check the box next to the “Continue” button. If you need to add contacts, leave this field blank and hit “Continue.”
Next, enter the names and email addresses of everyone who needs to sign. You can add yourself at this stage if you need to.
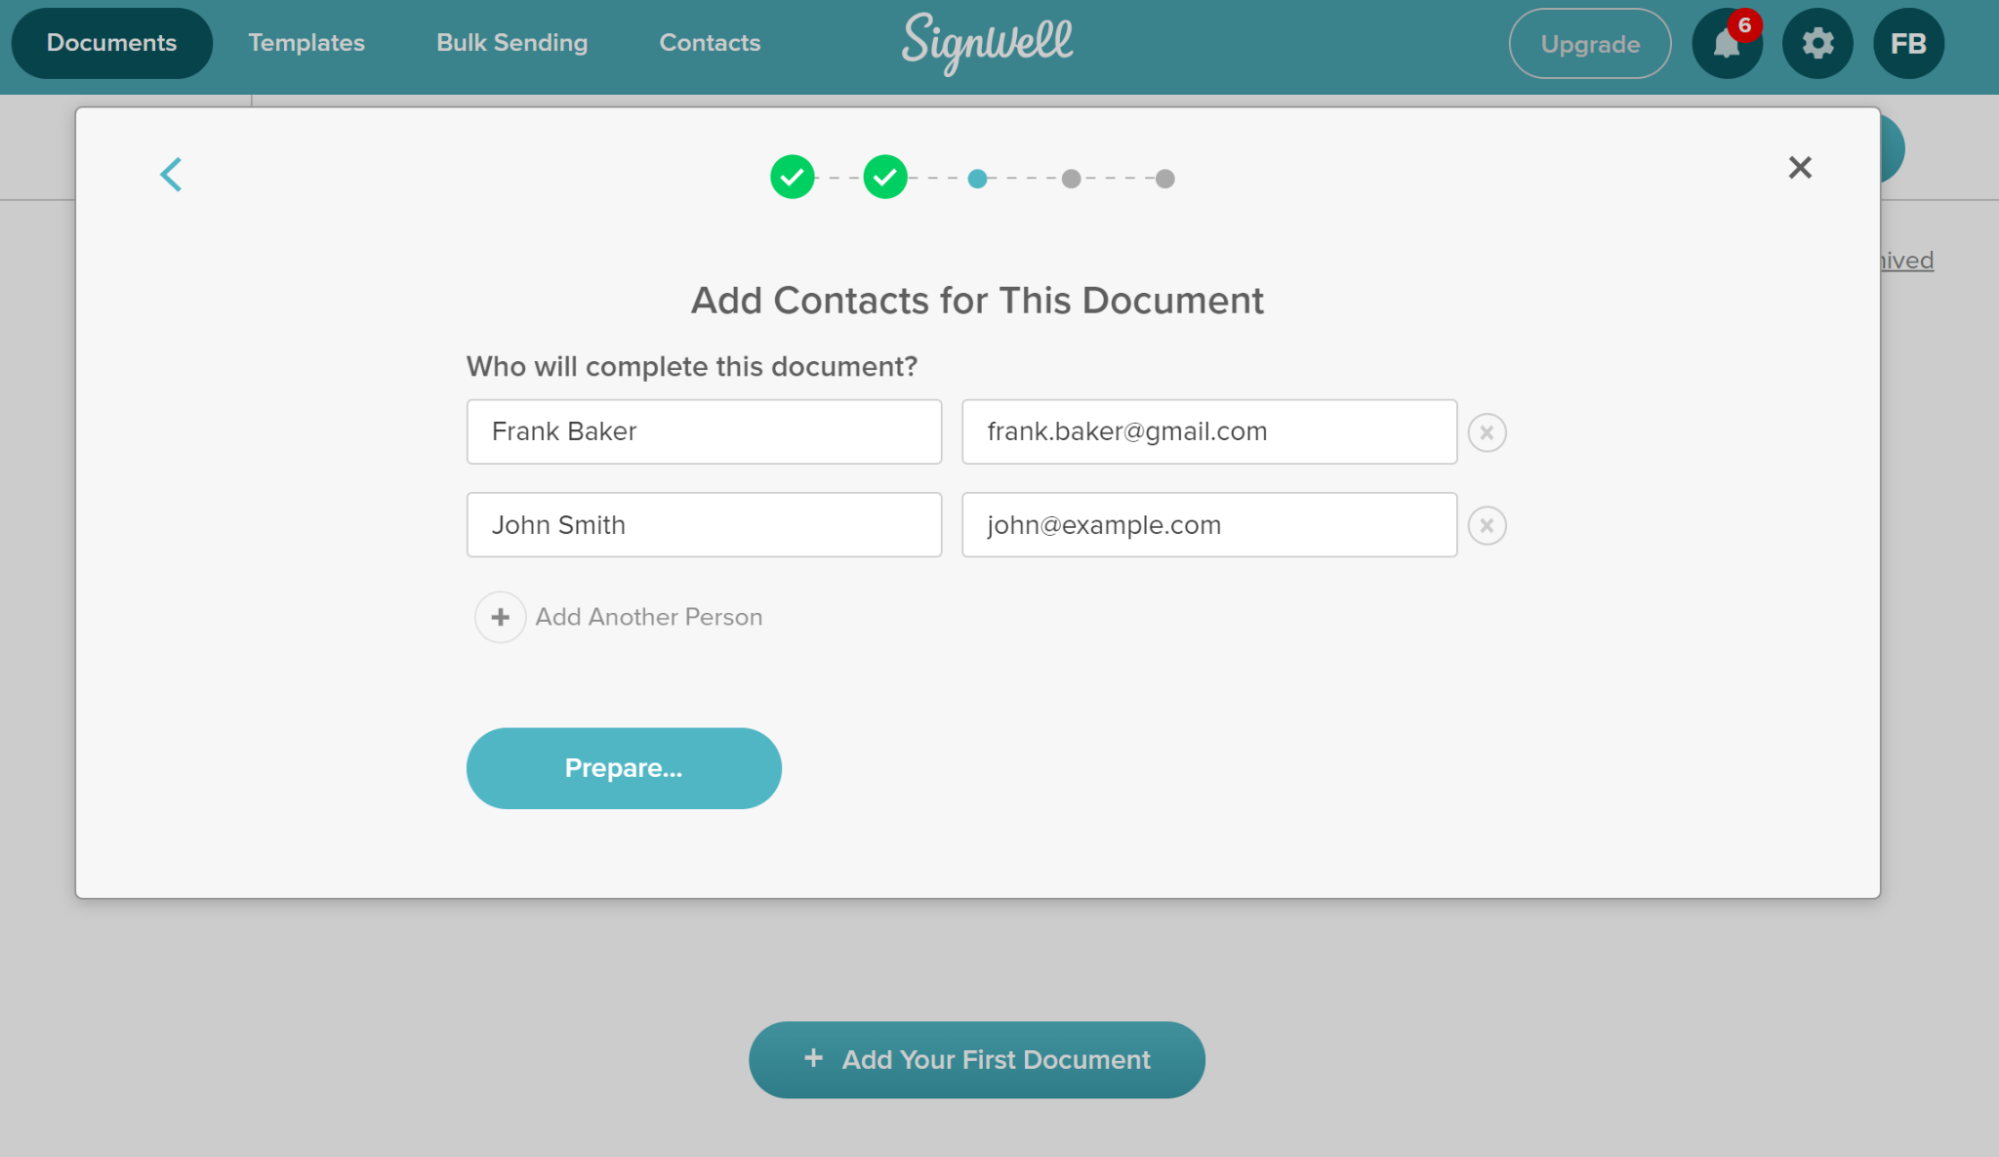
Hit “Prepare” when you’re done to move on to the next step.
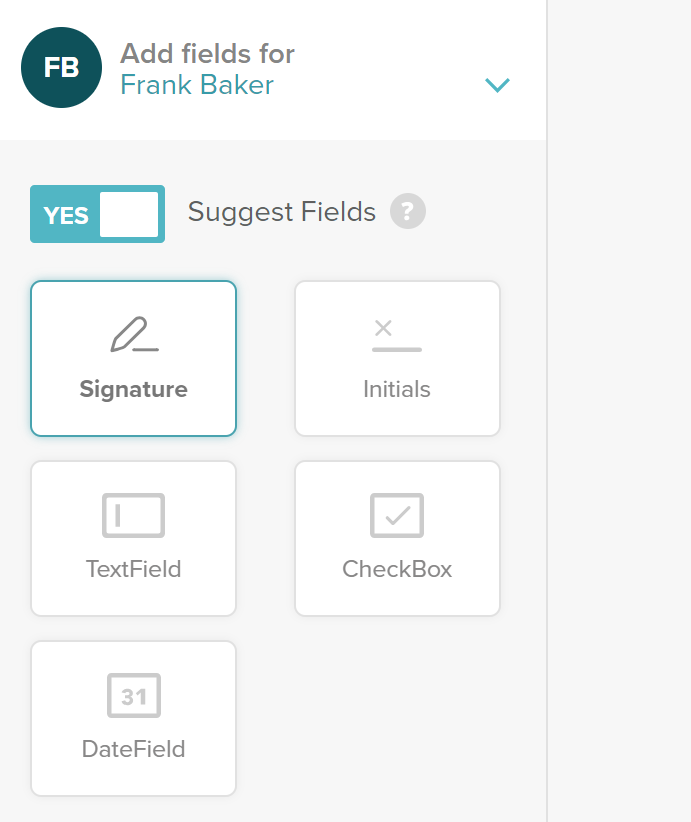
3. Add fields
Next, you need to drag and drop fields onto the document where you want people to sign or provide information. You can add signature fields, date fields, text boxes, checkboxes, and more. Simply click on the desired field type and place it where you want it on the document.
4. Insert your signature
Now, it’s time to insert your signature into the document. Hit “Click to sign.”
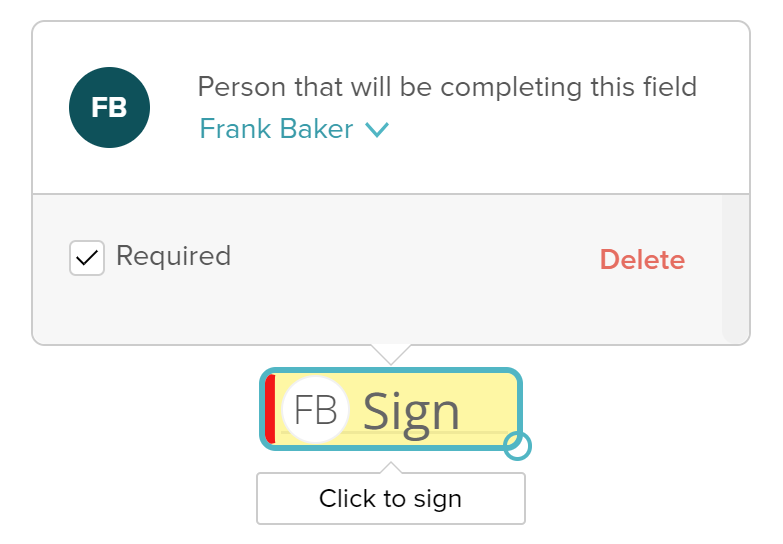
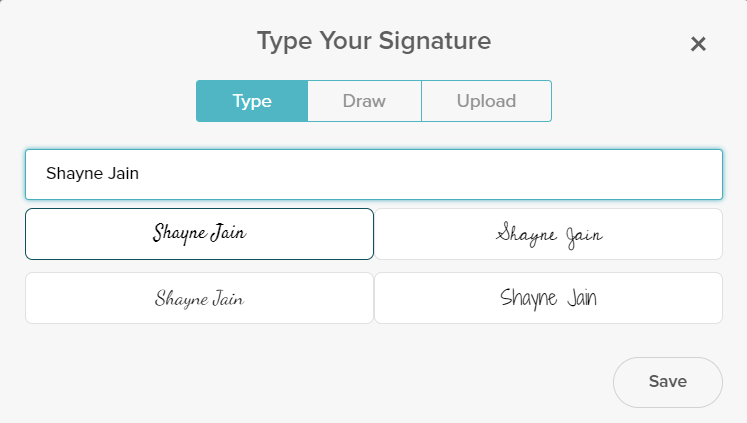
You can choose to type, draw, or upload your signature.
Once you’ve signed the document, take a moment to review it and ensure that everything is correct and as expected before finalizing the process.
Bonus: Use SignWell’s Free PDF Tool
SignWell offers a free, user-friendly online tool that allows you to electronically sign PDFs without the need for printing or scanning. This service is designed to streamline your PDF signing process, making it both efficient and secure.
Key Features:
- Multiple File Uploads: You can upload up to three PDF files simultaneously, facilitating the signing of multiple documents in one session.
- Audit and Lock Option: For enhanced security, SignWell provides an optional audit page that includes a detailed trail of the signing process. Additionally, documents can be digitally encrypted with a certificate from an Adobe Approved Trust List vendor, ensuring tamper-proofing and compliance.
- Wet Sign Effect: To give your electronic signature a traditional appearance, you can apply a ‘wet sign’ background effect, making the document look as though it was printed, signed, and scanned. Please note, this effect is purely aesthetic and should not be used for legal or government documents requiring actual wet signatures.
- Security and Compliance: SignWell prioritizes your privacy and the security of your documents. All uploaded files are processed securely and automatically deleted after signing. The platform complies with stringent electronic signature laws, including ESIGN, UETA, and eIDAS, ensuring that your electronically signed PDFs are legally binding and recognized internationally.
How to Use SignWell’s PDF Signing Tool:
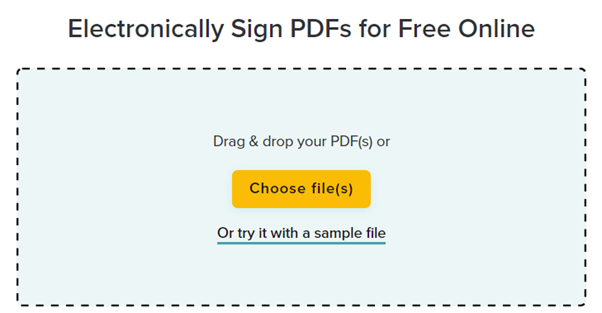
- Upload Your PDF:
- Visit the SignWell PDF Sign Tool and click “Choose file(s)” to upload your PDF.
- You can upload up to three PDFs at a time, which will automatically be grouped into a single document for signing.
- Add Your Signature: In the document preview, drag and drop the signature field to the appropriate location in your PDF. You can create your signature by drawing it with your mouse or stylus, typing your name and selecting a font that best matches your handwritten signature, or uploading an image of your signature. After placing your signature, click “Save & Continue.”
- Download the Signed Document: After signing, SignWell will process your document and prepare it for download. Once ready, click the “Download” button to save the signed PDF to your device.
Signing a PDF online is easy with the right toolset
There are plenty of ways to sign documents electronically, so it comes down to picking the method that suits your needs.
However, as we mentioned earlier, not all methods of signing electronically are considered legally valid. So, make sure you do your research. If you’re collecting an important signature from a third party or signing a contract or other important document, it’s a good idea to use a tool like SignWell that complies with the strictest electronic signature laws.
The more low-tech methods come with a risk, so it’s wise to stick with an online signature tool that is secure, valid, and will protect you in the instance of any legal action.