We Cover How to Create Digital Permission Slips and Easily Collect Parent Signatures
9 mins
This article covers how to create digital permission slips, send them to parents, and collect legally binding eSignatures effortlessly using SignWell. With secure tracking, automated reminders, and seamless workflows, you can eliminate paperwork and streamline approvals. Learn more about PDF e-signature solutions on the SignWell Resources Page.
Keeping track of permission slips shouldn’t feel like a never-ending paper trail. Between lost forms, missing signatures, and last-minute scrambles, relying on traditional methods can be frustrating for both schools and parents. Luckily, digital permission slips make the process faster, easier, and completely hassle-free.
In this SignWell article, we’ll explain how to create digital permission slips, send them to parents, and collect legally binding eSignatures in minutes, so you can focus on what really matters.
But first…
At SignWell, we specialize in making document signing simple, secure, and legally binding. With over 65,000 organizations using our platform, we’ve helped schools, businesses, and nonprofits streamline approvals with digital workflows. Our expertise in eSignatures, compliance, and automation means we know exactly what it takes to transition from paper permission slips to a seamless online process.
A permission slip is a document used by schools, camps, and organizations to obtain parental or guardian consent for a child to participate in an activity. These forms typically outline important details such as:
Traditionally, permission slips were printed on paper and sent home with students, requiring parents to sign and return them. However, paper-based forms can be easily lost, forgotten, or delayed. That’s why many schools and organizations are switching to digital permission slips, which allow parents to review and sign documents online, making the process faster, more efficient, and completely hassle-free.
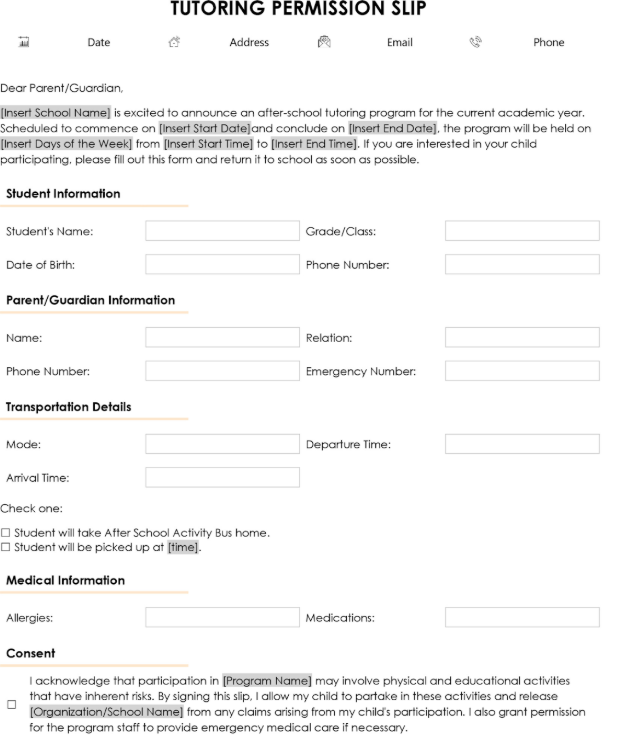
Before you can collect digital signatures, you need to create a well-structured permission slip. This document provides parents with all the necessary details about the activity and ensures they understand and authorize their child’s participation.
Start by using a word processing tool like Microsoft Word, Google Docs, or any other preferred software. This makes it easy to format the document and ensure clarity.
A well-written permission slip should contain the following information:
Once your permission slip is finalized, convert it into a PDF. This ensures that the formatting remains intact and makes it easy to upload into SignWell for digital signatures.
To convert the file:
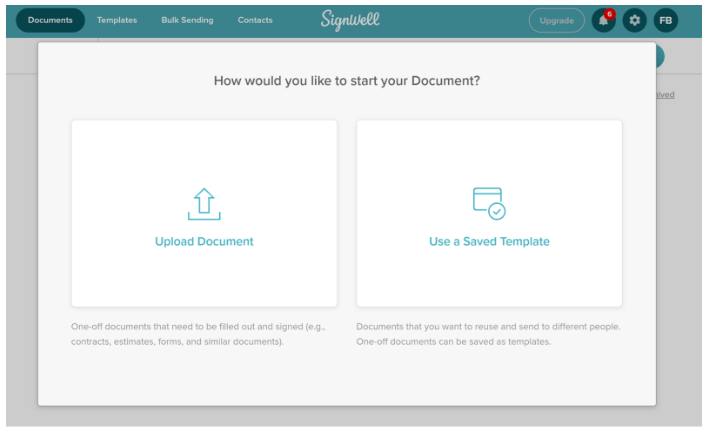
Now that you have a finalized PDF of your permission slip, the next step is to prepare it for digital signatures. Using SignWell, you can quickly transform your static document into an interactive, legally binding e-signature form.
At SignWell, we make the e-signature process simple, secure, and legally compliant. Our platform is designed to help schools, teachers, and organizations collect parent signatures effortlessly. Here’s why SignWell is the best solution for digital permission slips:
Now, let’s walk through the process of making your permission slip fillable and signable.
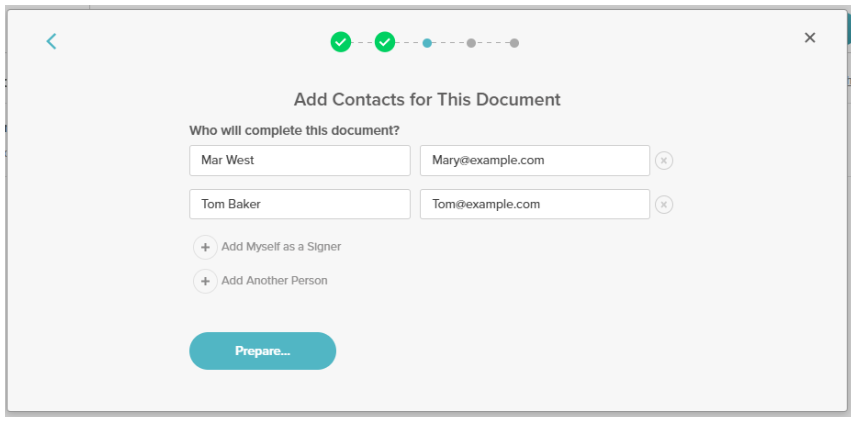
Once your file is uploaded, it’s time to add recipient information and set up fillable fields.
To ensure that the right people receive and sign your document:
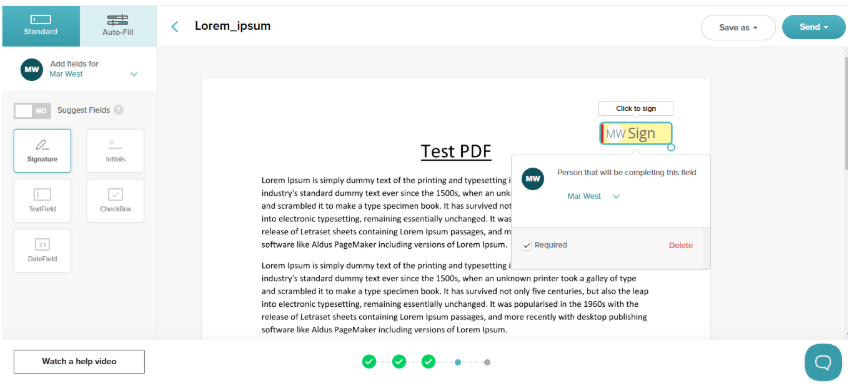
With your document uploaded, you’ll now add fields where parents can input their details and sign digitally. In the SignWell document editor, you’ll see various options on the left-hand side. These allow you to place interactive fields on your PDF.
Here’s how to add each field:

To ensure a seamless signing experience, customize the form fields with the following settings:
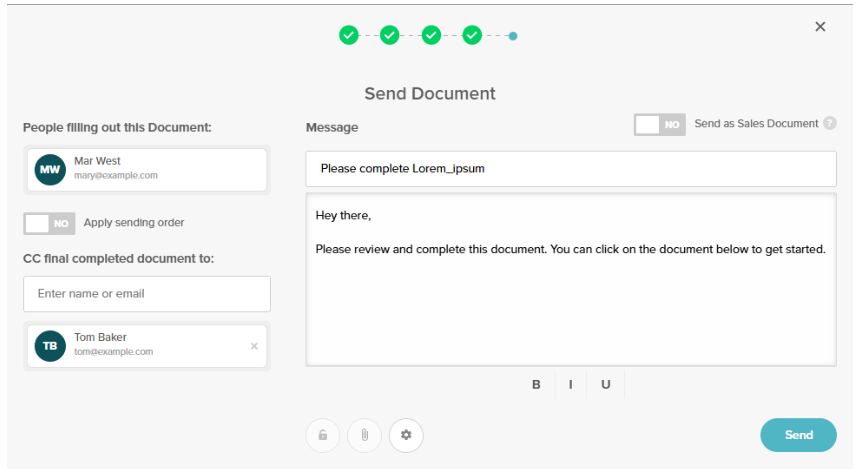
Now that your digital permission slip is set up with fillable fields, it’s time to send it to parents for signing.
Before sending the document, you’ll have the option to personalize the email that parents will receive. This can help ensure clarity and improve response rates.
Write a Clear Subject Line – Example: “Action Required: Sign Your Child’s Permission Slip for [Event Name]”
Add a Personal Message – A short, polite note explaining the purpose of the document, such as:
Dear [Parent’s Name],
Please review and sign the attached permission slip for [Event Name] happening on [Date]. You can complete this securely online using SignWell. Let us know if you have any questions!
Best regards, [Your Name / School Name]
Set a Sending Order (If Needed) – If multiple recipients need to sign in a specific order (e.g., one parent first, then the second), you can enable this feature.
Once your message is ready:
Each parent will receive an email with a secure link to review and sign the document. They can complete the process from any device, no downloads or account creation required.
Once your digital permission slip has been sent, SignWell makes it easy to monitor the signing process and ensure all required signatures are collected promptly. With real-time tracking, automated reminders, and status updates, you stay in control from start to finish.
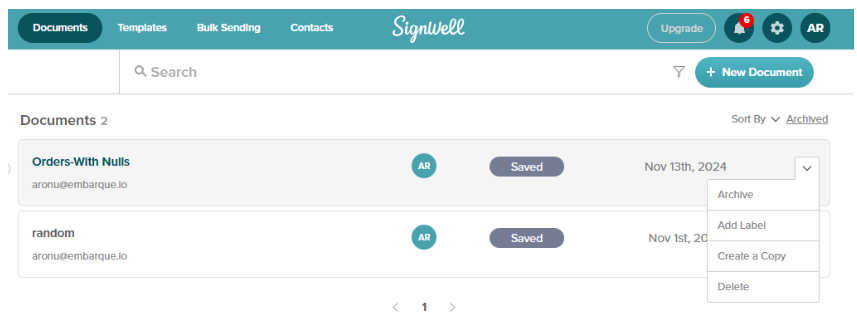
With SignWell’s document dashboard, you can track who has opened, viewed, and signed the permission slip. This allows you to follow up with parents who haven’t completed the form yet and ensure all required signatures are gathered before the deadline.
To stay informed, SignWell provides automated notifications at every stage of the signing process. You’ll receive alerts when:
These notifications help streamline the process, reducing the need for manual follow-ups.
If a parent hasn’t signed the permission slip within a certain timeframe, you can use SignWell’s automated reminder feature to send a gentle nudge. This feature helps speed up the signing process without the need for constant manual outreach.
Once all required signatures have been collected, it’s essential to securely store the signed permission slips for future reference.
After all parents have signed the document, you can download the finalized PDF directly to your computer. To do this:
This ensures you have an offline backup for record-keeping or printing if needed.
For added convenience and security, SignWell allows you to store signed permission slips in the cloud. This eliminates the risk of misplaced documents and makes it easy to access them anytime. To save a signed document in the cloud:
Paper permission slips are outdated, slow, and easy to lose. With digital permission slips, you can streamline the process, eliminate paperwork, and ensure parents can sign quickly from any device.
SignWell makes it effortless to create, send, and collect eSignatures on permission slips. Our legally binding, secure, and user-friendly platform ensures every signature is tracked, every document is stored safely, and every step is seamless. With automated reminders and real-time tracking, you’ll never have to chase down missing signatures again.
Get started with SignWell today and experience a faster, easier way to collect parent signatures.
businesses served
customer support satisfaction
documents signed