

Quick Summary
This guide shows how to combine QuickBooks’ accounting tools for nonprofits with SignWell’s eSignatures to simplify everything from grant approvals to donor agreements. With this direct integration, your team can reduce admin time, stay compliant, and focus more on impact.
Considering QuickBooks to Manage Your Nonprofit’s Accounting?
Managing finances for a nonprofit organization comes with unique challenges that for-profit businesses don’t face. From tracking restricted funds to generating donor reports, nonprofit accounting requires specialized tools and workflows.
QuickBooks has become a go-to solution for many nonprofits, offering features tailored to your specific needs. When combined with SignWell’s electronic signature capabilities, you can create a streamlined system that handles everything from grant applications to donor agreements.
In this SignWell guide, we explain how to effectively manage nonprofit accounting with QuickBooks and automate document signing workflows using SignWell.
But first…
Why Listen to Us
At SignWell, we’ve helped over 65,000 teams, including nonprofits, foundations, and mission-driven teams, simplify how they handle essential documents and get them signed. We’ve seen how finance and operations teams struggle with manual approvals and clunky systems. That’s why our new QuickBooks integration is built from real feedback to reduce admin work and help mission-driven teams move faster.
What is QuickBooks?
QuickBooks is an accounting software platform designed to help organizations manage their finances, track income and expenses, generate reports, and stay compliant, all in one place.
While it’s widely used by small businesses, QuickBooks also offers tools specifically suited for nonprofits, such as donor tracking, grant management, and fund accounting.
You can choose between QuickBooks Online, which is cloud-based and accessible from anywhere, or QuickBooks Desktop, which offers more advanced features for larger teams with complex accounting needs.
What Makes QuickBooks a Smart Choice for Nonprofits?
- It Simplifies Nonprofit Accounting: QuickBooks lets you track income and expenses by program, grant, or funding source, helping you stay transparent, organized, and compliant with nonprofit standards.
- It Handles Donation Tracking with Ease: Automatically records donor contributions, categorizes them correctly, and generates year-end giving statements without manual work.
- It Offers Nonprofit-Specific Reporting: Create essential reports like the Statement of Financial Position or Statement of Activities in just a few clicks, no data wrangling required.
- It Makes Grant Management Easier: Track grant income, monitor how funds are used, and stay on top of reporting requirements, all from one dashboard. And with SignWell, you can collect grant agreements and approvals faster using secure, legally binding eSignatures.
- It Supports Smarter Budgeting: QuickBooks lets you build and compare budgets across different programs or departments so you can manage your resources more effectively and stay aligned with your mission.
How to Get Started With QuickBooks for Your Nonprofit
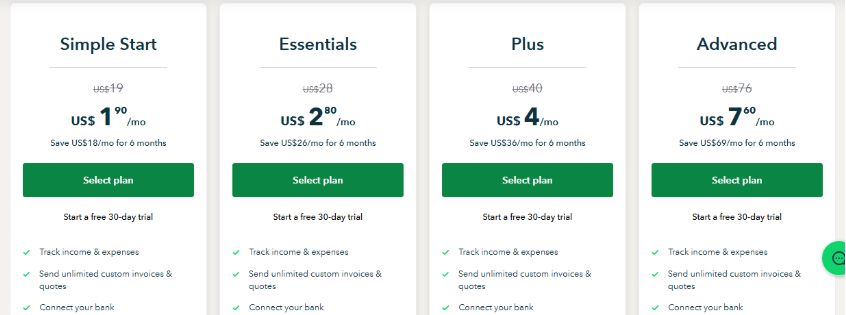
1. Choose the Right QuickBooks Plan
Start by selecting a QuickBooks plan tailored to your nonprofit’s size and complexity. QuickBooks Online is ideal for nonprofits due to its accessibility, affordability, and built-in features like donor tracking and budgeting.
The Plus or Advanced plans are best suited for nonprofit needs, offering tools like class and location tracking, inventory management, custom reports, and support for multiple users, essential for managing restricted funds and preparing board-ready reports.
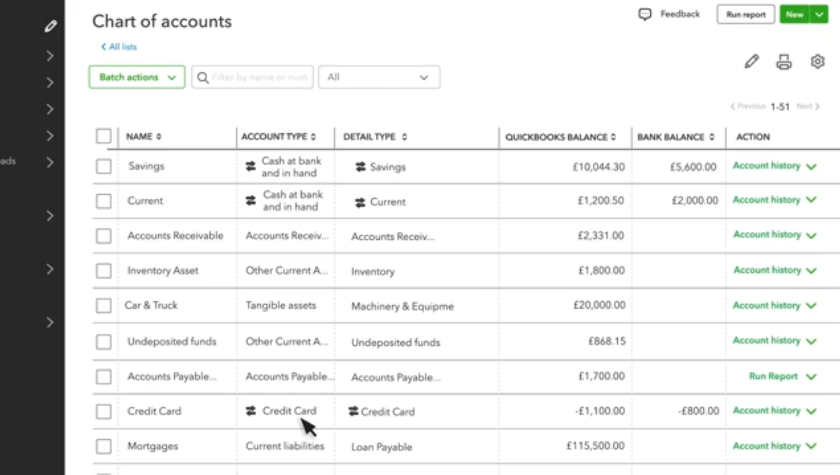
2. Set Up Your Chart of Accounts
Customize your Chart of Accounts to reflect specific categories like donations, grants, program income, and fundraising expenses. This structure helps you differentiate between unrestricted, temporarily restricted, and permanently restricted funds. This is important for both compliance and reporting to donors or grantors.
3. Track Donations and Grants Properly
Use “Classes” and “Tags” in QuickBooks to categorize incoming donations by program or campaign. Create customer profiles for donors and set up recurring donations where applicable. This allows you to segment revenue sources, generate donor reports, and track how grants are being used in real-time.
4. Manage Programs and Fund Activities Separately
QuickBooks allows nonprofits to monitor income and expenses per program using “Classes” or “Projects.” For example, you can separate accounting for your food program from your education program. This not only improves financial clarity but also helps you measure impact and prove funding effectiveness to stakeholders.
Also, consider setting up QuickBooks specifically in nonprofit mode (via company settings), which updates terminology (e.g., “customers” to “donors”) for enhanced clarity and compliance
5. Automate Invoicing and Payment Collection
Save time by setting up recurring invoices for pledges, sponsorships, or grant disbursements. You can link QuickBooks to payment processors to accept credit cards or ACH transfers directly, speeding up collections and ensuring you maintain steady cash flow for operations.
6. Integrate with SignWell for Contract Approvals
For contracts, MOUs, and grant agreements, integrating SignWell with QuickBooks lets you automate signature collection before logging agreements in QuickBooks. This keeps your documentation audit-ready and minimizes bottlenecks. Use SignWell templates to standardize commonly used documents like board resolutions or vendor agreements.
How to Integrate QuickBooks Online With SignWell For Better Document Management
SignWell is currently the only e-signature tool that integrates directly with QuickBooks Online, making it easy to send estimates for signatures and track approvals in real time.
Also, SignWell’s QuickBooks integration is available on all plans, including the free one.
Here’s a step-by-step guide to connect QuickBooks Online with SignWell.
Step 1: Install the SignWell App
- Before you begin, make sure you have a SignWell account. You can create a free one here.
- Visit the QuickBooks App Store and search for SignWell.
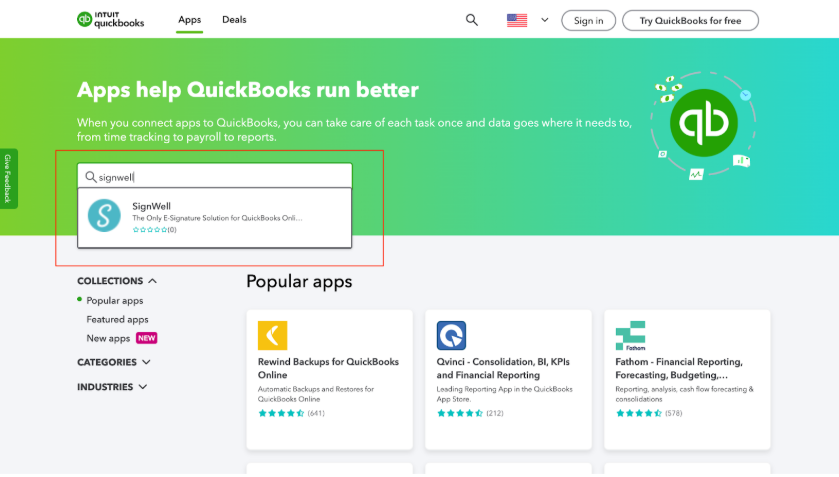
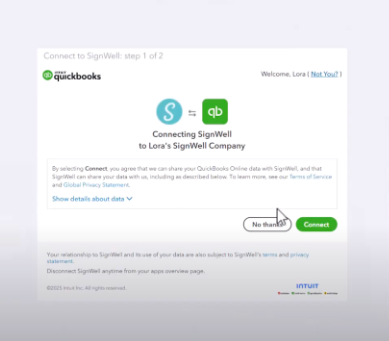
- Click “Get App Now” and log in using your QuickBooks Online credentials.
- Authorize the integration to securely link SignWell to your QuickBooks account.
Step 2: Configure Your Workflow
- Select the documents (such as estimates) you want to send for signature.
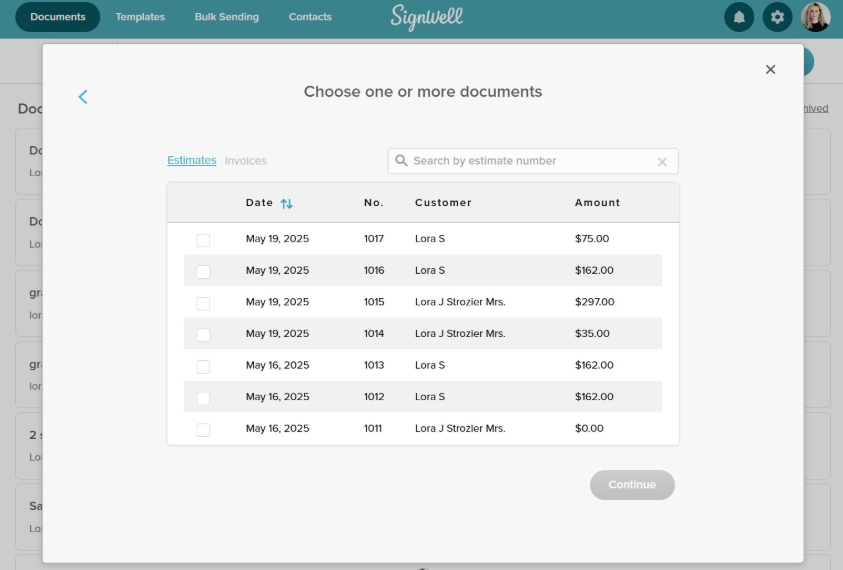
- SignWell will automatically pull client information from QuickBooks to pre-fill document fields, no manual entry needed.
- Once signed, estimates can be instantly converted into invoices inside QuickBooks, saving time and reducing errors.
Step 3: Send Your First Document
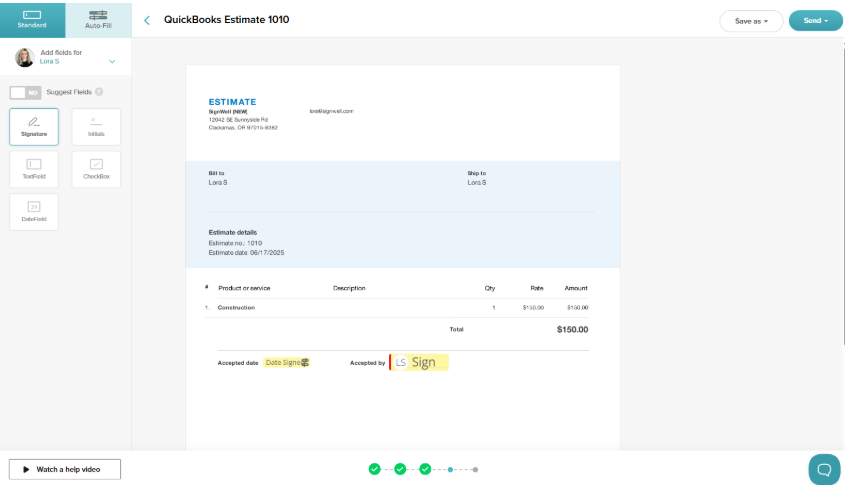
- From within QuickBooks, open an existing estimate.
- Click “Send for E-Signature with SignWell.”
- Add recipients, drag and drop signature fields, and hit send.
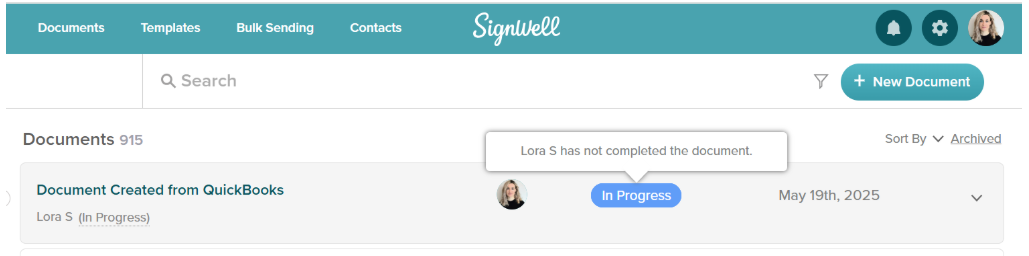
- The signer will receive a secure email link to complete the process, and you’ll be able to track every step right from your QuickBooks dashboard.
How SignWell Enhances QuickBooks for Nonprofits
1. Collect Legally Binding Signatures on Financial Documents
Use SignWell to send and collect signatures on donation receipts, grant agreements, vendor contracts, and financial reports. All signatures are secure, legally valid, and compliant with U.S. and international regulations.
2. Automatically Sync Donor and Vendor Details
SignWell can pull in names, emails, and payment terms from QuickBooks to auto-fill documents, reducing manual entry and ensuring consistency.
3. Turn Signed Estimates into Invoices Instantly
For nonprofits offering paid services or reimbursable programs, SignWell lets you send estimates for approval and then convert them to invoices in QuickBooks the moment they’re signed without re-entering any data.
4. Simplify Recurring Transactions with Templates
Create templates for frequently used forms like grant budgets, vendor terms, or reimbursement requests. With SignWell, your team can reuse these templates and process approvals in minutes instead of hours.
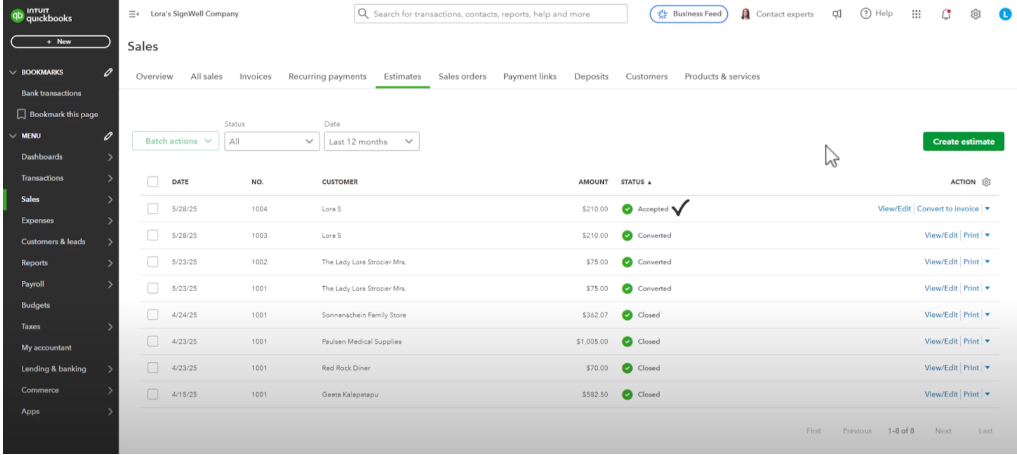
5. Track Document Status in Real Time
QuickBooks helps you manage transactions, and SignWell helps you track every signature. Know exactly who has viewed, signed, or is still pending approval on any budget, agreement, or form with real-time updates.
Real-World Use Cases of SignWell and QuickBooks
- Grant Budget Approvals: Finance teams draft budgets in QuickBooks and send them for board approval via SignWell. Everyone signs from anywhere, and grants get submitted on time.
- Donation Receipts and Acknowledgment Letters: Automatically generate donor receipts in QuickBooks, then use SignWell to collect signatures and email them to supporters.
- Contractor & Vendor Agreements: Whether you’re onboarding a new vendor or renewing a service contract, SignWell lets you prepare, send, and track signed agreements directly from your QuickBooks records.
- Volunteer Expense Reimbursements: Volunteers submit expense claims, which are tracked in QuickBooks and signed off through SignWell. No more lost receipts or delays in reimbursements.
- Recurring Program Invoices: For nonprofits that bill for services (e.g., counseling, education, or training), SignWell can send monthly estimates for signature, then trigger invoice generation in QuickBooks, automating the cycle.
Best Practices for Using SignWell and QuickBooks
1. Use Pre-Filled Templates for Recurring Documents
Instead of building documents from scratch each time, create reusable SignWell templates for frequent documents. Pull contact and payment info directly from QuickBooks to save time and avoid data-entry errors.
2. Set Up Naming Conventions for Easier Syncing
Adopt a clear naming system for documents and files across both platforms, e.g., GrantApproval_OrgName_Date. This ensures consistency, improves searchability, and helps match documents with transactions.
3. Schedule Routine Audits of Signed Documents
Designate a weekly or monthly time to review signed documents in SignWell and reconcile them with your QuickBooks activity. This keeps your financial records accurate and ensures nothing falls through the cracks.
4. Use Conditional Logic for Signatures
Leverage SignWell’s document workflow settings to trigger different approval paths based on document type or amount. For example, grant contracts over $10,000 might require an extra sign-off from your finance director.
5. Use Workspaces to Organize Teams and Documents
Leverage Workspace in SignWell to segment documents and teams by department, program, or project. For example, create separate workspaces for grants, donations, or vendor contracts. You can also invite team members with different access levels, enabling secure collaboration.
Streamline Your Workflows With QuickBooks + SignWell
Managing finances and approvals shouldn’t slow down your nonprofit’s impact. With QuickBooks handling your accounting, it’s time to eliminate bottlenecks in your document workflows, too.
This direct integration between SignWell and QuickBooks lets you send estimates for signature, track approvals in real-time, and convert signed documents into invoices without retyping a thing. It’s fast, compliant, and built for nonprofits that need to move with purpose.
Ready to close the loop between your signatures and your financials? Get started with SignWell today.