

Helpful Summary
- Overview: We explain the process of setting up and sending documents for eSignature using a tool like SignWell.
- Why listen to us: We’ve helped 65,000+ businesses and individuals e-sign 4,000,000+ documents.
- Why it matters: E-signing is significantly more efficient than wet-ink signing, and it’s also more secure and environmentally friendly.
- Action points: Choose a reliable tool, upload your document, add fields, set a signing order, and then monitor document statuses.
- Further research: Check out the SignWell blog for more how-to guides and insights.
Wondering How to Send Documents for eSignature?
Paper forms and wet ink signatures are rapidly being replaced by digital documents and electronic signatures. But how do you go about sending documents for eSignature?
The answer is simple—use a trusted and secure solution (like SignWell!) that’s compliant with U.S. and international eSignature laws. In this guide, we’ll walk you through the steps of sending documents for eSignature so that you can reap the rewards of secure, efficient e-signing.
But first…
Why Listen to Us?
At SignWell, we’ve helped more than 65,000 businesses and individuals e-sign 4 million (and counting!) documents, contracts, and agreements.

The bottom line? We know e-signing inside and out—and we’re here to share that expertise with you.
Benefits of Using eSignatures
- Convenience: eSignatures allow all parties to sign documents from anywhere, at any time, using any device with an internet connection. This eliminates the need for in-person meetings or physical document exchanges.
- Speed: E-signing makes the process of sending, signing, and returning documents significantly faster. Automated reminders and real-time notifications help to expedite the entire workflow, reducing turnaround times.
- Security: eSignature platforms like SignWell use robust encryption and authentication methods to ensure that documents are securely handled and signers’ identities are verified. This reduces the risk of forgery or tampering.
How to Send a Document for eSignature
1. Find a Legally Binding E-Signing Tool
In almost all cases, your goal when e-signing is to create legally binding documents. To do this, you need to use an e-signing tool that collects legally binding signatures.
Start by finding a tool that meets your needs based on:
- Whether it’s legally binding in your state or country
- Whether it’s in your budget
- Whether it offers all the features you need
For almost all e-signing use cases, a tool like SignWell is perfect. Our affordable eSignature solution allows users to collect legally binding eSignatures that comply with US and international e-signing laws (plus several other standards like HIPAA, SOC 2 Type II, etc.).
We also offer a free plan that lets you send up to three documents for eSignatures per month.
2. Upload a Document (or Choose a Template)
The first step in this process is uploading the document you need to be signed. Most eSignature tools (SignWell included) support a wide range of file formats, including:
- PDFs
- DOCs and DOCXs
- JPGs and PNGs
If you already have the document on hand, upload it now. If you don’t, see if the tool you’re using has templates for the type of document you need. For example, we have a library of 35+ contract and agreement templates for all kinds of common scenarios.
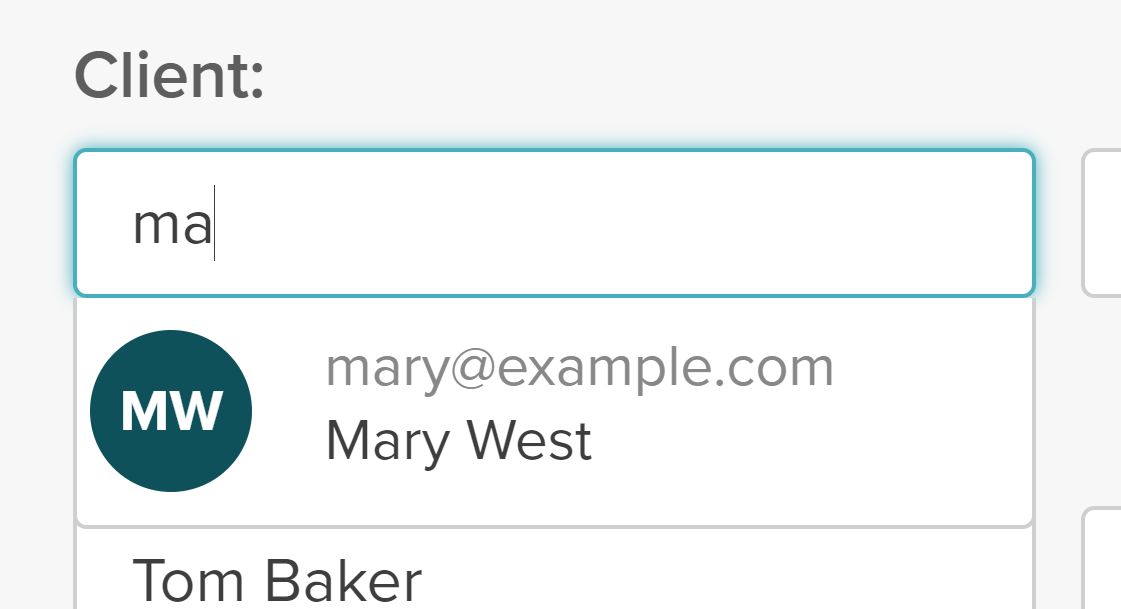
3. Add Contact Info
Next, you need to add the contact info (name and email) of anyone who will be signing the document.
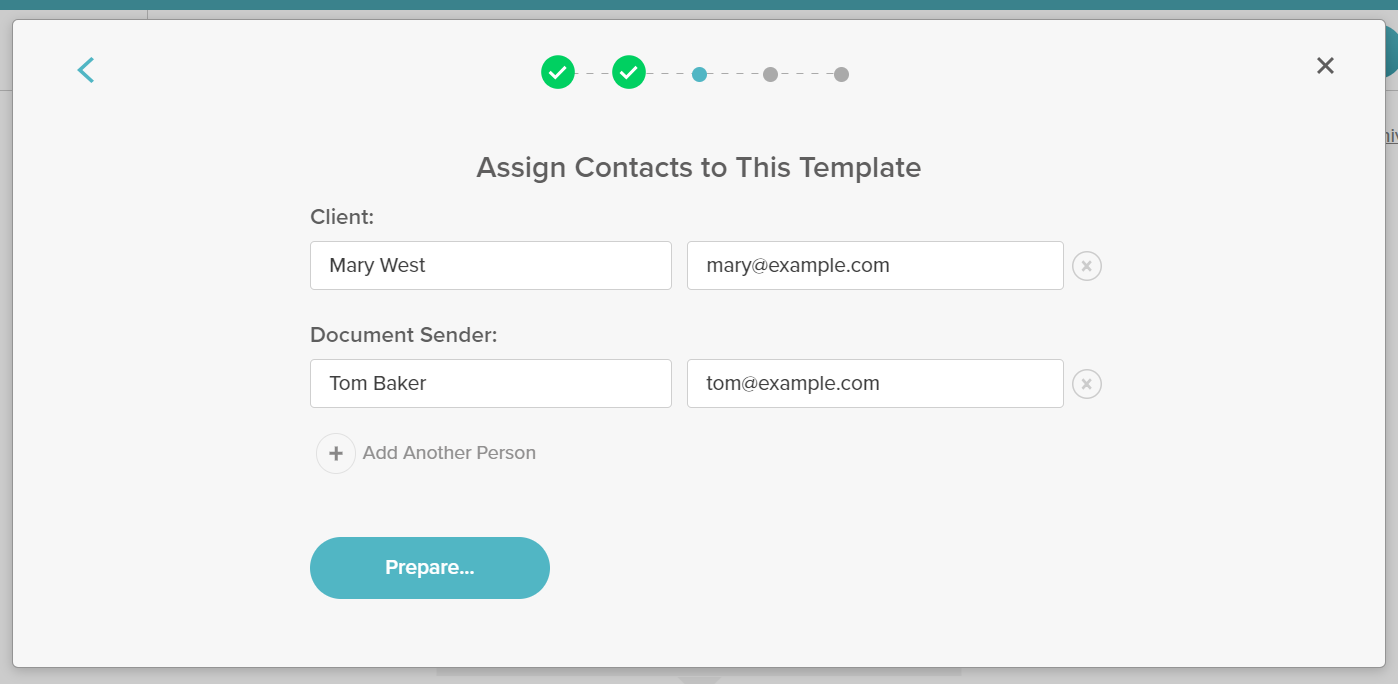
Most eSignature tools let you add more than one signer, so if the document involves multiple parties, don’t worry. Just make sure you have all their contact information handy and that it’s accurate.
If you’re using SignWell, you can save contacts for easy access in the future.
4. Define Document Fields
Next, it’s time to set up the document for eSignature by telling the eSignature tool where the fields need to be filled out. This is usually super easy—most tools have a drag-and-drop system where you can simply click and drag fields onto the document.
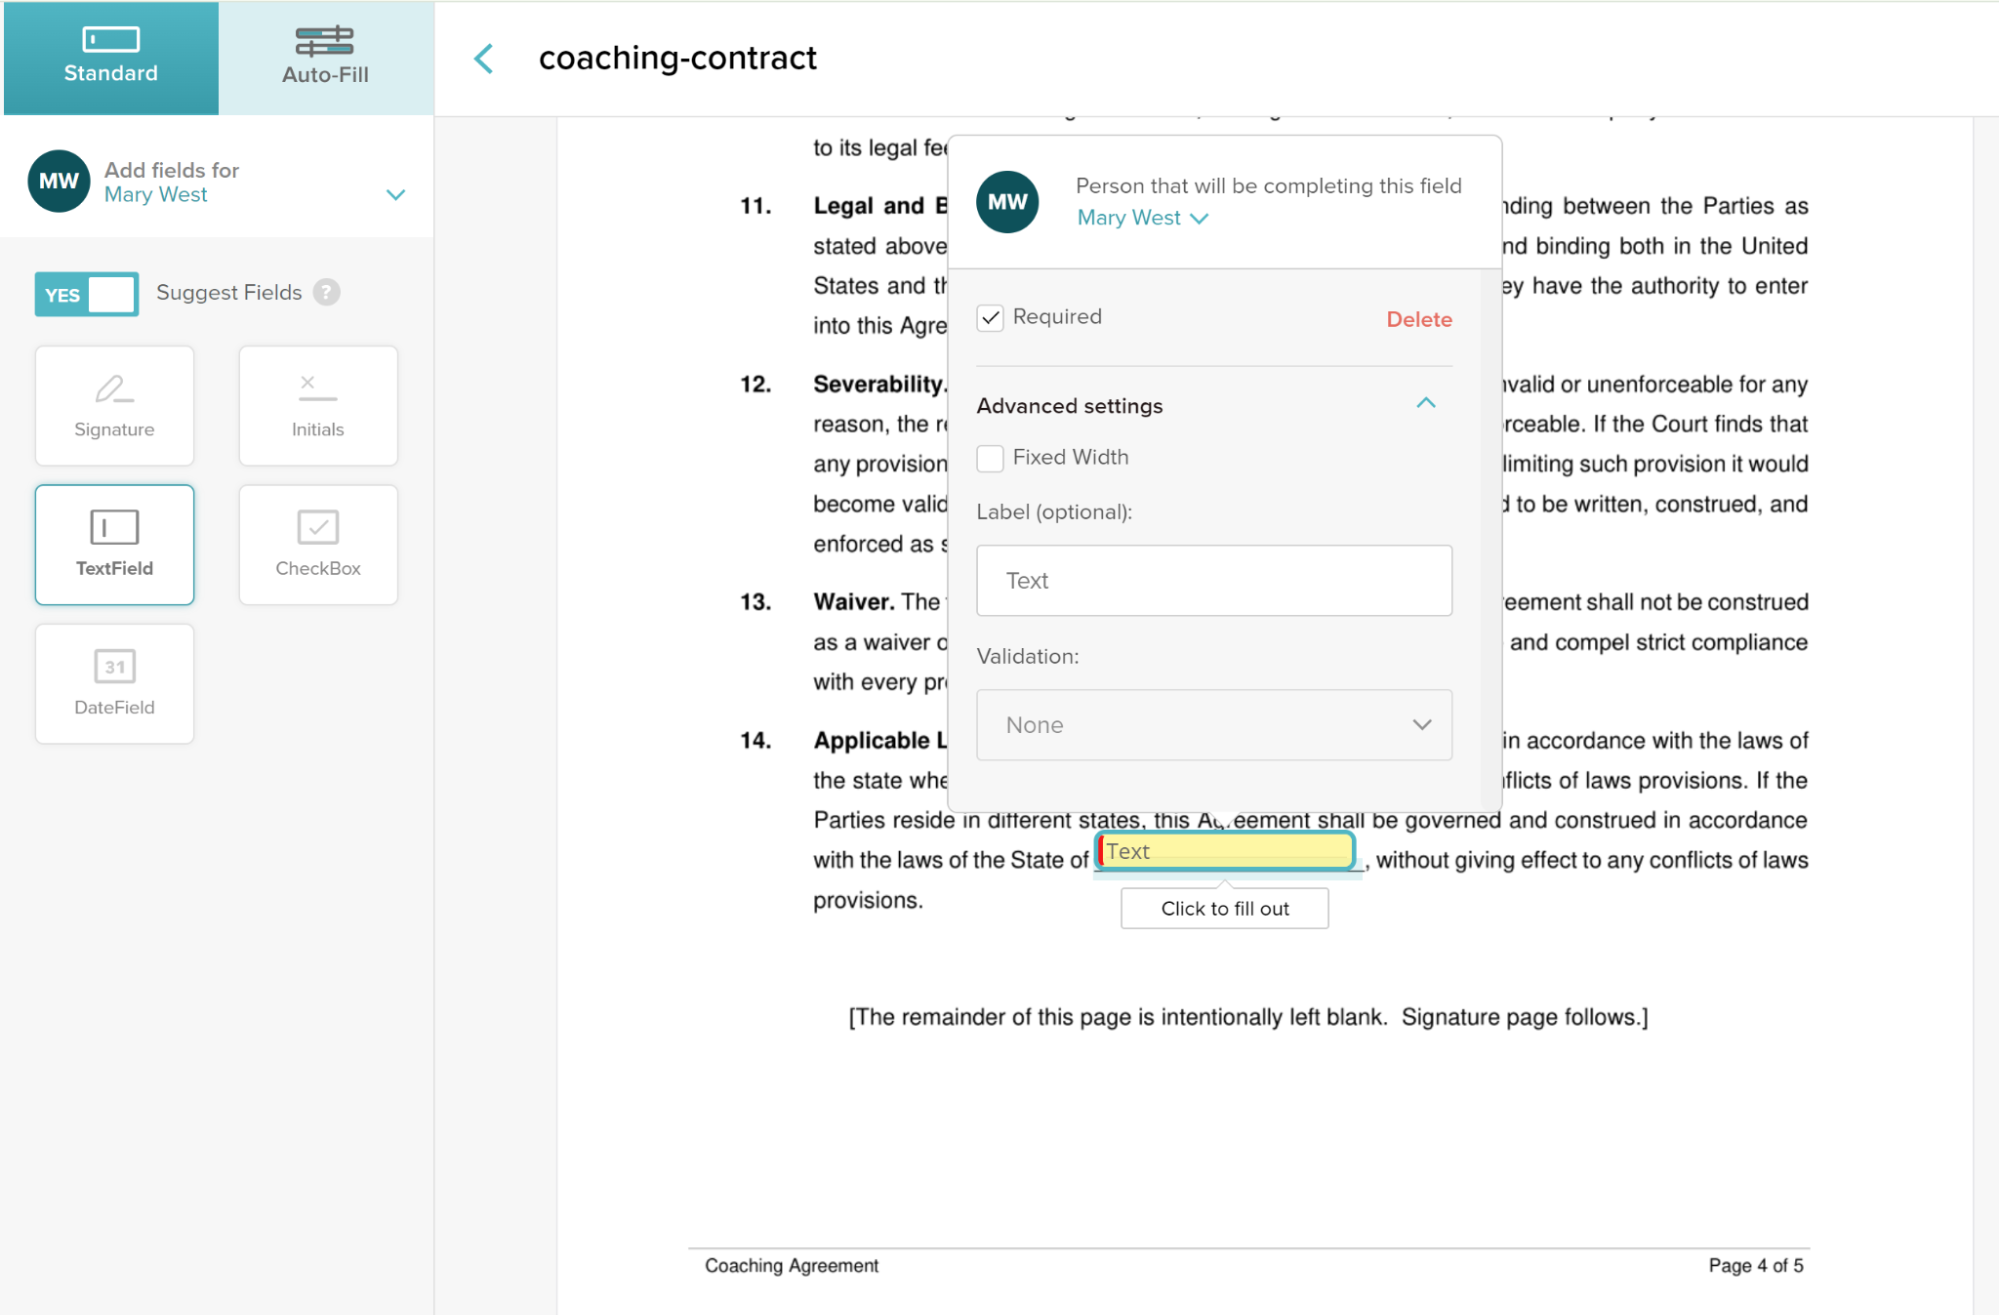
SignWell supports the following field types:
- Text
- Date
- Signature
- Initial
- Checkbox
Every field is tied to a specific signatory so that there’s no confusion about who’s supposed to fill in what. For even more accuracy, you can set up data validation rules that will tell signatories in real time whether they’ve filled in the field correctly.
5. Set a Signing Order
Once you’ve set up the document, it’s time to set a signing order (if your e-signing tool supports this feature). This basically means that you can specify which signatories need to sign the document first, second, third, etc.
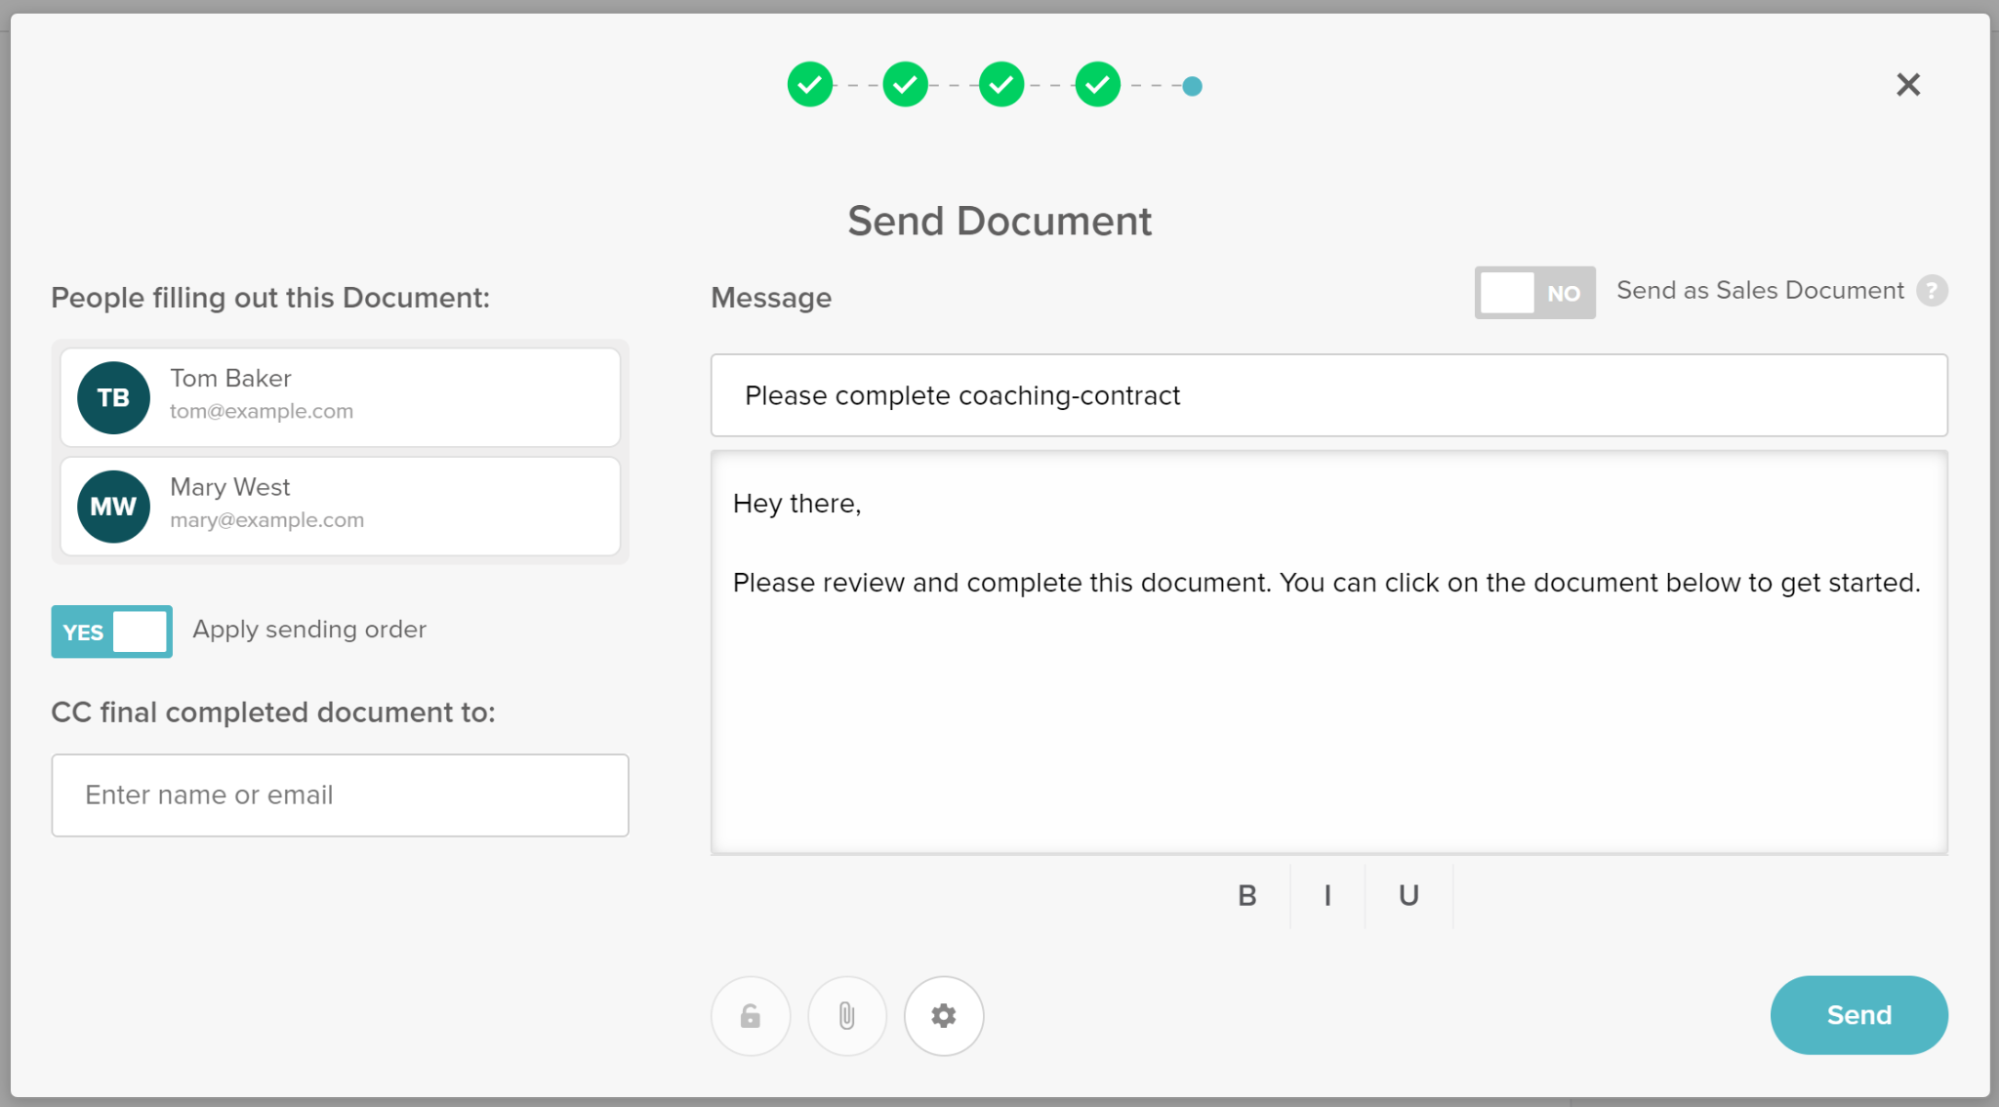
With SignWell, everyone gets a separate copy of the finalized document once the signing order has been executed.
6. Send the Document
This step is an easy one—hit “Send” and your document will be on its way to all the designated signatories via email. This is usually done directly within your e-signing tool, although some tools may let you create signing links that you can send via SMS or messaging platforms.
7. Track the Status and Send Reminders
Once your document is sent, you should be able to track the status via your e-signing tool’s document dashboard.
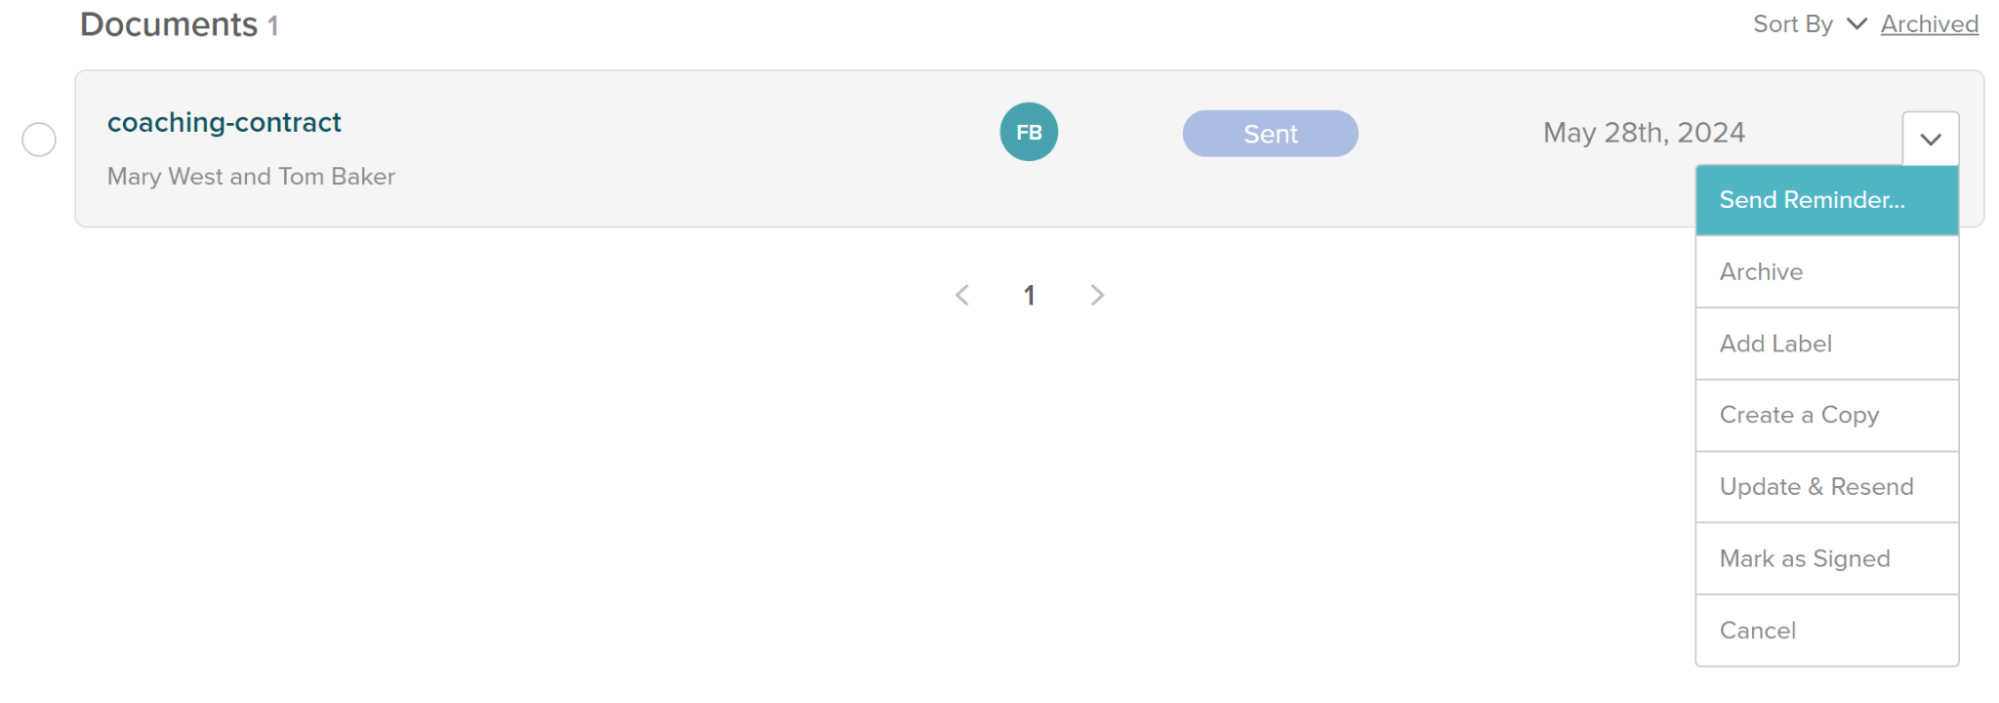
SignWell gives real-time updates whenever someone opens or signs your documents. Plus, you can label documents for easy organization and automate reminders to speed up the process and cut turnaround times.
8. Keep Records
By now, you have a completed document. Nice!
The last step is to save and store your document for future reference. Most e-signing tools will have the option to download a PDF of the signed document, which you can then save to your computer or cloud storage.
Tools like SignWell also generate audit reports that track:
- Timestamps for opening and signing the document
- IP addresses of signers
- Names and emails of signers
These records can be valuable in case of any disputes or legal issues.
Conclusion
Integrating eSignature solutions into your workflow saves time and enhances professionalism and security. Plus, the process isn’t difficult—if you have the right tool in hand.
Looking for quick, seamless eSignatures? SignWell is designed to give you the most intuitive e-signing workflow around. Plus, we offer a ton of time-saving extras like templates, automatic reminders, and in-person signing options.
Try SignWell for free and see the benefits firsthand.