How to Set Up QuickBooks for Manufacturing Workflows: Full Guide
8 mins
This guide shows you how to set up QuickBooks for manufacturing including inventory tracking, BOMs, and production costs. Plus, how to integrate SignWell for faster document approvals as SignWell helps businesses streamline operations and configure QuickBooks for complex workflows. With the right setup, you’ll save time and avoid costly errors. Follow our guide and explore our blog for more business accounting tips.
Trying to manage manufacturing operations with QuickBooks can be a challenge. Originally designed for service industries, QuickBooks wasn’t built to handle the complexities of tracking production costs, managing inventory, or creating a bill of materials (BOM). If you’ve struggled with these tasks, you’re not alone.
Many manufacturers believe they need expensive ERP systems, but that’s not always the case. With the right setup and pricing plan, QuickBooks can support your manufacturing workflows. In this SignWell guide, we’ll walk you through how to streamline your manufacturing accounting and speed up document approvals by integrating with SignWell.
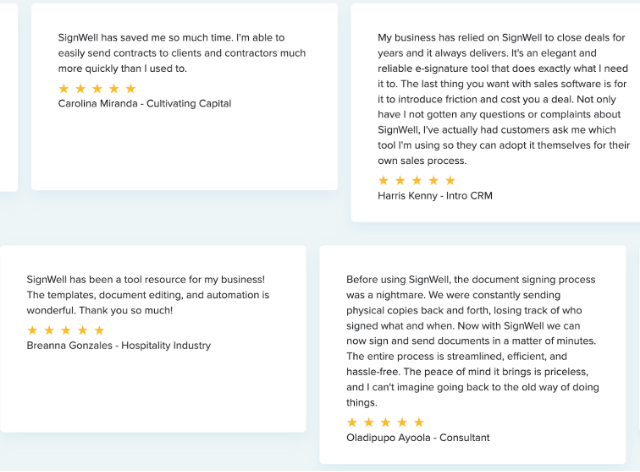
We’ve worked closely with manufacturers using QuickBooks and over 65,000 businesses to manage everything from raw material purchases to production tracking and documentation. Across small shops and growing operations, we’ve seen what works and what causes confusion and reporting errors.
Manufacturing involves complex tasks like managing raw materials, tracking labor costs, and coordinating with vendors, but QuickBooks simplifies these challenges with essential accounting tools and features designed for manufacturing workflows.
Here’s why it works well for production teams:
QuickBooks may not be a full ERP, but when configured properly, it gives small and mid-sized manufacturers the control and visibility they need to grow.
Before doing anything else, choose the version of QuickBooks that matches your manufacturing needs.
To get started:
Choose your plan and start a free trial or subscription.

Next, configure your chart of accounts to reflect key manufacturing activities:
This setup ensures accurate reporting and inventory tracking later on.
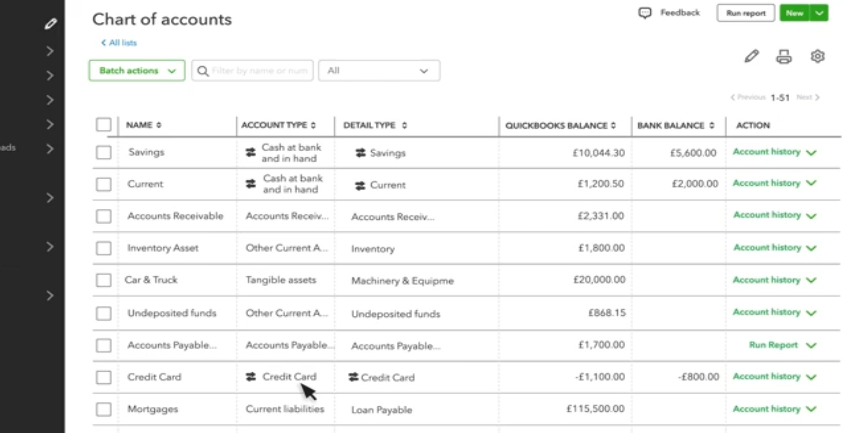
Go to Settings > Account and Settings > Sales, and turn on inventory tracking. This lets QuickBooks adjust stock levels automatically when you buy or sell products.
For QuickBooks Desktop (Premier or Enterprise), use the Advanced Inventory feature to enable inventory tracking. Go to Edit > Preferences > Items & Inventory > Company Preferences, and check Inventory and purchase orders are active. You can also enable FIFO costing and track multiple inventory sites.
Clear inventory tracking is essential to maintaining accurate stock levels, whether you’re selling raw materials or finished goods.
Create product and service items for:
In QuickBooks Desktop, you can create inventory assemblies to define a bill of materials (BOM). Each time you build an item, QuickBooks deducts materials and adds finished stock.
Vendors & Purchasing:
Sales Orders & Invoicing:
Sales orders help you plan production based on incoming demand, even before invoicing.
Assign jobs or customers to expenses, time entries, and payroll. Turn on Class Tracking to tag transactions by department, product line, or team.
This gives you detailed insight into where your money is going and where you’re profitable.
Use reports like:
Customize and export reports to stay on top of margins, stock levels, and cash flow.
QuickBooks is a powerful tool for manufacturing, but it doesn’t support built-in eSignatures. By integrating SignWell with QuickBooks Online, you can send documents for signature directly from your QuickBooks account and get approvals faster, without leaving your workflow.
You can also create templates in SignWell for frequently used documents to save time and ensure consistency.

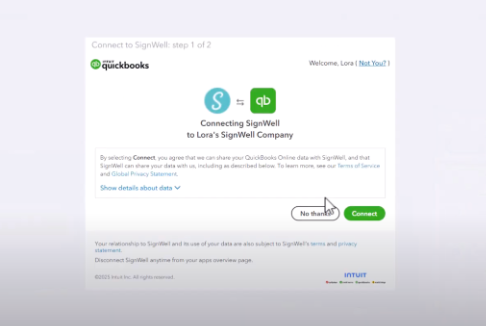
Once connected, SignWell automatically syncs with QuickBooks to streamline your approval process:
Instead of chasing signatures on paper or email, send POs for e-signature directly from QuickBooks. Approvals are faster, and everything is automatically saved alongside your vendor records.
When onboarding suppliers or service providers, use SignWell to send contracts straight from your QuickBooks contacts. Signed agreements are stored securely and linked to your transactions, reducing admin work and risk.
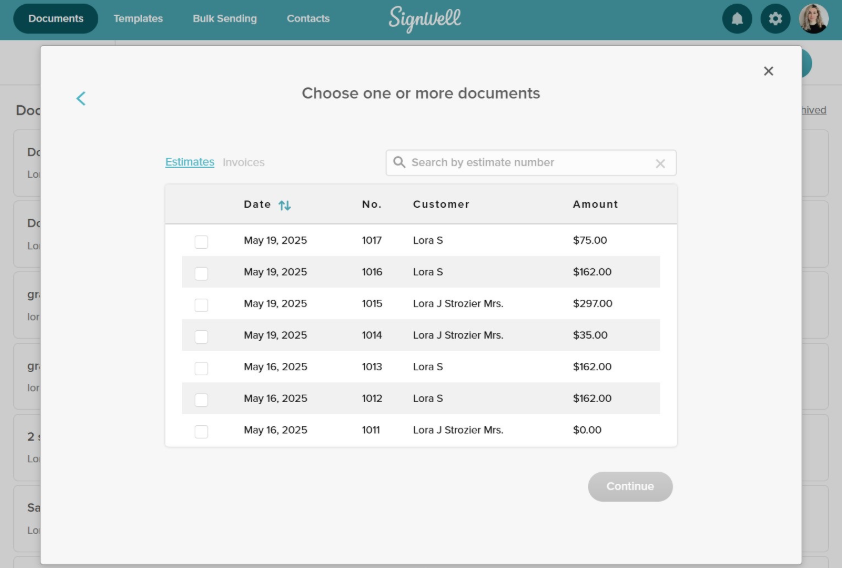
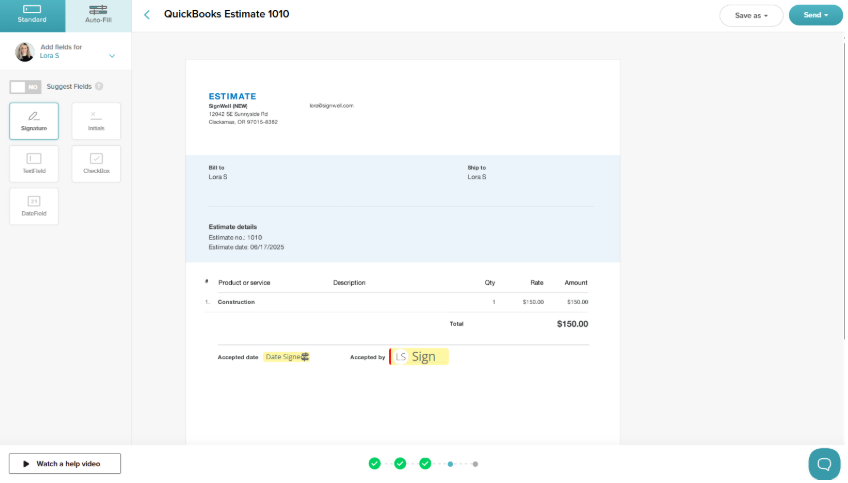
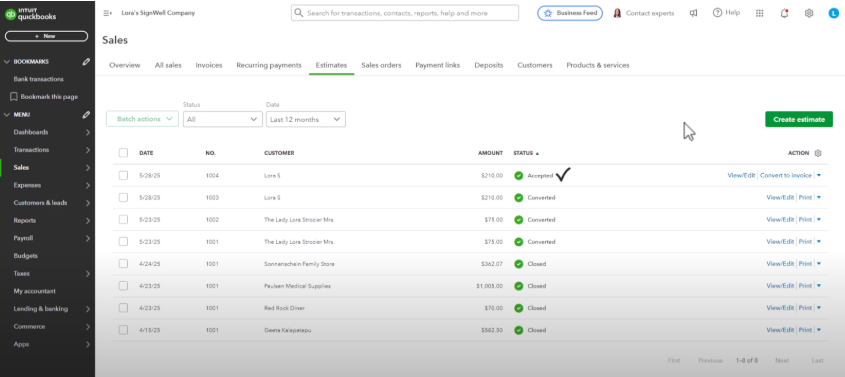
Need client approval before manufacturing starts? Send an estimate with SignWell, collect a signature, and turn it into an invoice instantly in QuickBooks, no duplicate entry required.
Create templates for common forms like BOM change requests, vendor terms, or production contracts. Your team can reuse them in SignWell, saving time and ensuring consistency across the board.
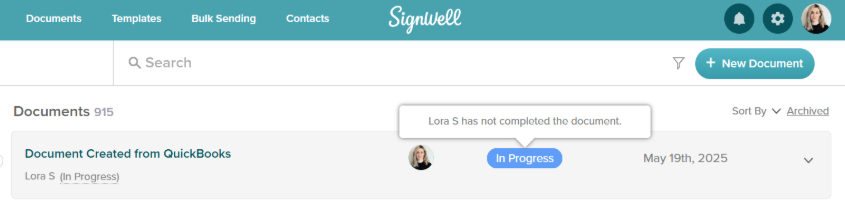
You’ll never lose track of who signed what. From your QuickBooks dashboard, see exactly when a document was viewed, signed, or still pending, so you can follow up and keep production moving.
Together, SignWell and QuickBooks give manufacturers faster approvals, fewer errors, and a clear audit trail for every signed document tied to your financials.
Streamline your manufacturing operations by creating and reusing SignWell templates for frequently used documents like purchase orders, vendor contracts, and bill of materials (BOM) approvals. Pull in client or vendor details automatically from QuickBooks to save time, reduce manual entry errors, and ensure consistent formatting across your entire workflow.
Create a consistent naming structure across QuickBooks and SignWell to keep everything organized. Use formats like PO_VendorName_Date or BOMChange_ProductName. This makes documents easier to search, sort, and track, especially when you’re reviewing signed agreements or matching them to transactions, inventory logs, or financial reports inside QuickBooks.
Dedicate time each month to review your job costing, COGS, and inventory reports inside QuickBooks. At the same time, reconcile signed documents in SignWell to ensure every approval, contract, and PO is correctly accounted for. This dual review process improves financial accuracy and reduces the risk of missed signatures or compliance issues.
Take advantage of SignWell’s approval logic by setting up rules based on document type, vendor, or order value. For example, automatically require dual sign-off for purchase orders exceeding $10,000. These automated workflows reduce delays, maintain compliance, and give you better control over procurement and vendor engagement, without extra admin overhead.
Improve collaboration and data security by creating separate SignWell workspaces for each department, such as production, procurement, and finance. Assign access levels based on roles, so team members can send or approve documents without viewing unrelated or sensitive financial data. This structure aligns neatly with how data flows in QuickBooks.
Managing production is complex enough; your accounting and approval workflows should not add to the chaos. With QuickBooks tracking your inventory, costs, and jobs, and SignWell automating your document approvals, you can focus more on production and less on paperwork.
This integration helps you:
If you’re ready to tighten up your back-office process, start by connecting QuickBooks and SignWell. You’ll speed up approvals, reduce errors, and create a smoother path from purchase order to finished product.
Get started with SignWell and see how we streamline approvals for manufacturing and supply chain industries today.
businesses served
customer support satisfaction
documents signed