Our Step-by-Step Guide on How to Sign an Image (2 Methods)
6 mins
This article provides a comprehensive guide on how to sign an image using two methods: SignWell and Microsoft Paint. It outlines the steps to create, upload, and securely send an image for signing with SignWell, ensuring compliance with international eSignature standards. It also details a manual method using Paint for those seeking a basic approach. Ultimately, SignWell is recommended for its efficiency and ease of use in professional settings.
Adding your signature to an image can instantly transform it, adding authenticity, professionalism, and even personal branding.
Whether it’s a document, a piece of artwork, or a photo, a well-placed signature shows ownership and credibility. With digital signing, this process is seamless and secure, no matter where you use it.
In this SignWell article, we’ll explain each step to help you create, place, and save your digital signature on any image, using simple methods.
But first…
At SignWell, we’ve helped over 65,000 businesses securely manage their digital files, from PDFs to images and other documents. Our platform strictly follows international e-signature standards, ensuring every signed document is secure, authentic, and legally recognized.

With our expertise in digital signatures, you can trust that this guide will provide you with the most effective and reliable steps to sign an image professionally and securely.
Signing an image involves adding your digital signature to an image file, creating a visual mark that can signify ownership, endorse content, or verify authenticity.
Commonly used for photos, artwork, scanned documents, and other digital media, an image signature can serve as a personal or professional identifier without requiring a physical signature.
When you digitally sign an image, you typically use a transparent file format, like PNG, allowing your signature to blend seamlessly into the image.
Unlike manual methods, this digital approach maintains a polished appearance and allows for easy integration across various applications—whether for branding, legal, or security purposes.
At SignWell, we prioritize document security and offer a user-friendly eSignature tool that adheres to international eSignature laws. To get started:
a. Visit the SignWell website.
b. You can either:
After signing up and logging into your account, you’ll see your documents dashboard.
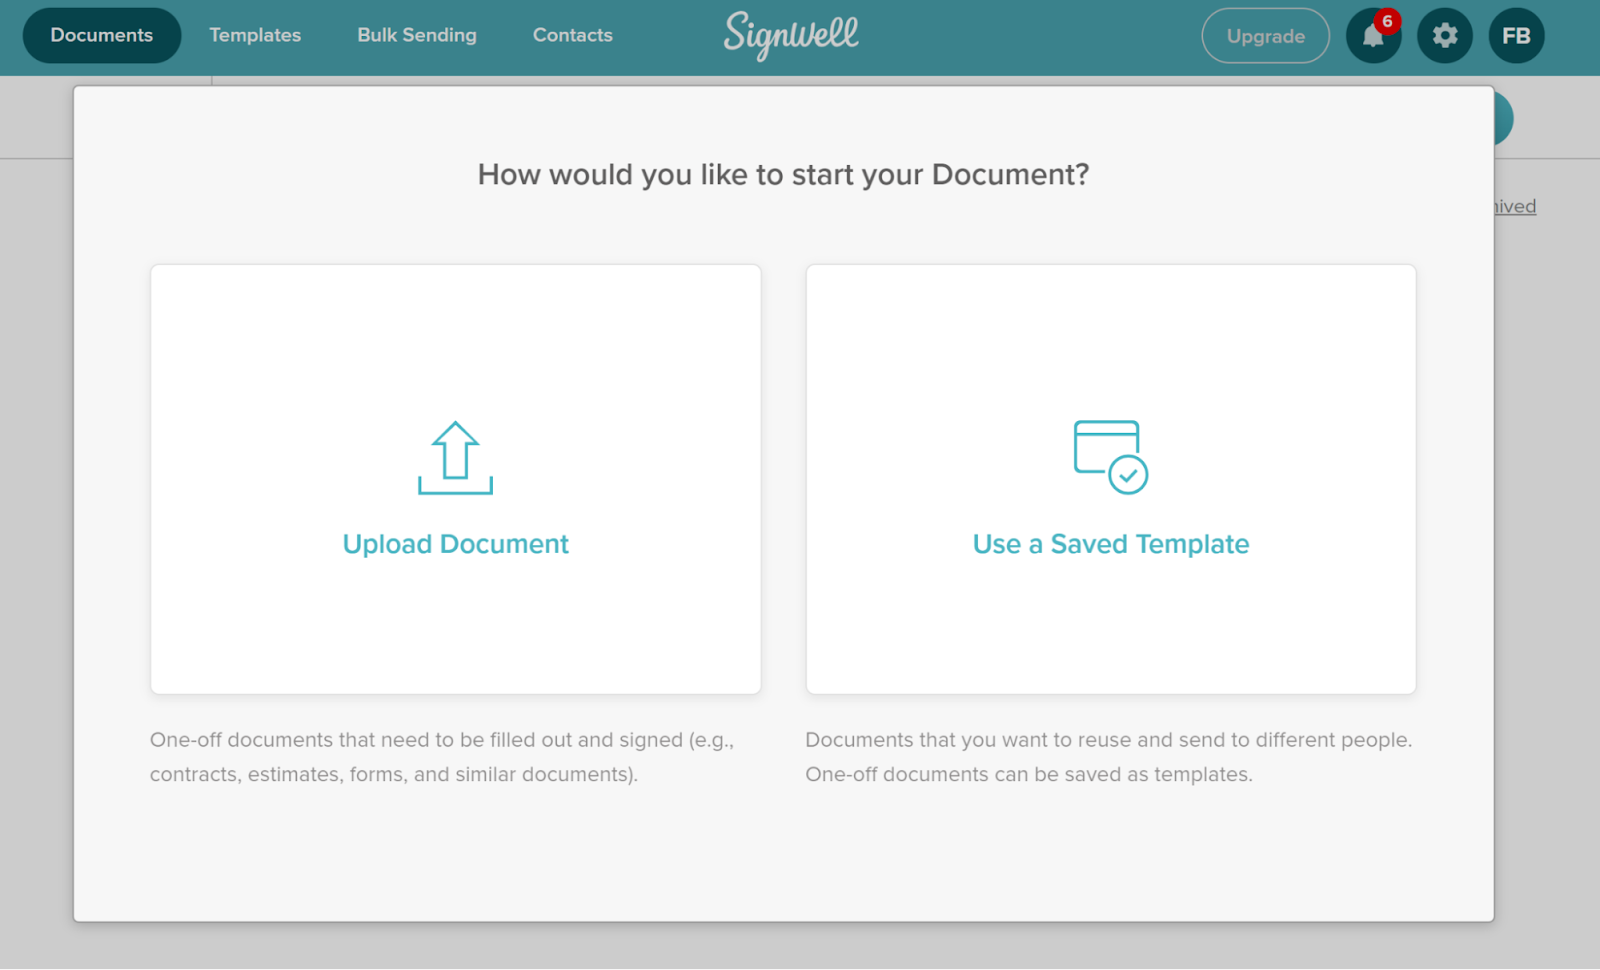
a. Click the “New Document” button.
b. Choose “Upload Document” to upload your image.
c. SignWell supports standard image formats like JPG & PNG.
Once your image is uploaded, you’ll need to add the contact details of the people who will sign it:

a. Enter the names and emails of the recipients.
b. If you need to sign the image yourself, add your own information as well.
c. Once done, click “Prepare” to move to the next step.
Now, you’ll be able to place the necessary fields for signing within the Image:

Once the Image is ready for signing:
a. Click “Send” at the top-right corner of the dashboard.
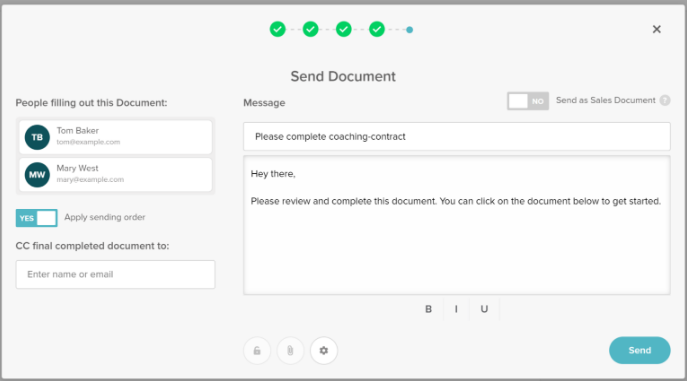
b. A pop-up window will appear where you can:
c. After reviewing, click “Send”, and the image will be emailed to the recipients for signing.
d. Each recipient will receive a copy of the signed image once the signing process is completed.
With SignWell, you can track the progress of your image in real time:

a. Monitor who has viewed and signed the image.
b. Set up notifications to stay informed at each step of the signing process.
c. Use automated reminders to prompt recipients to sign if needed.
Once the image is fully signed:
a. You can download the signed image to your computer.
b. Alternatively, save it to the cloud for secure storage and future access.
To do this, click the “Save As” button, located next to the “Send” button at the top-right corner of your document dashboard.
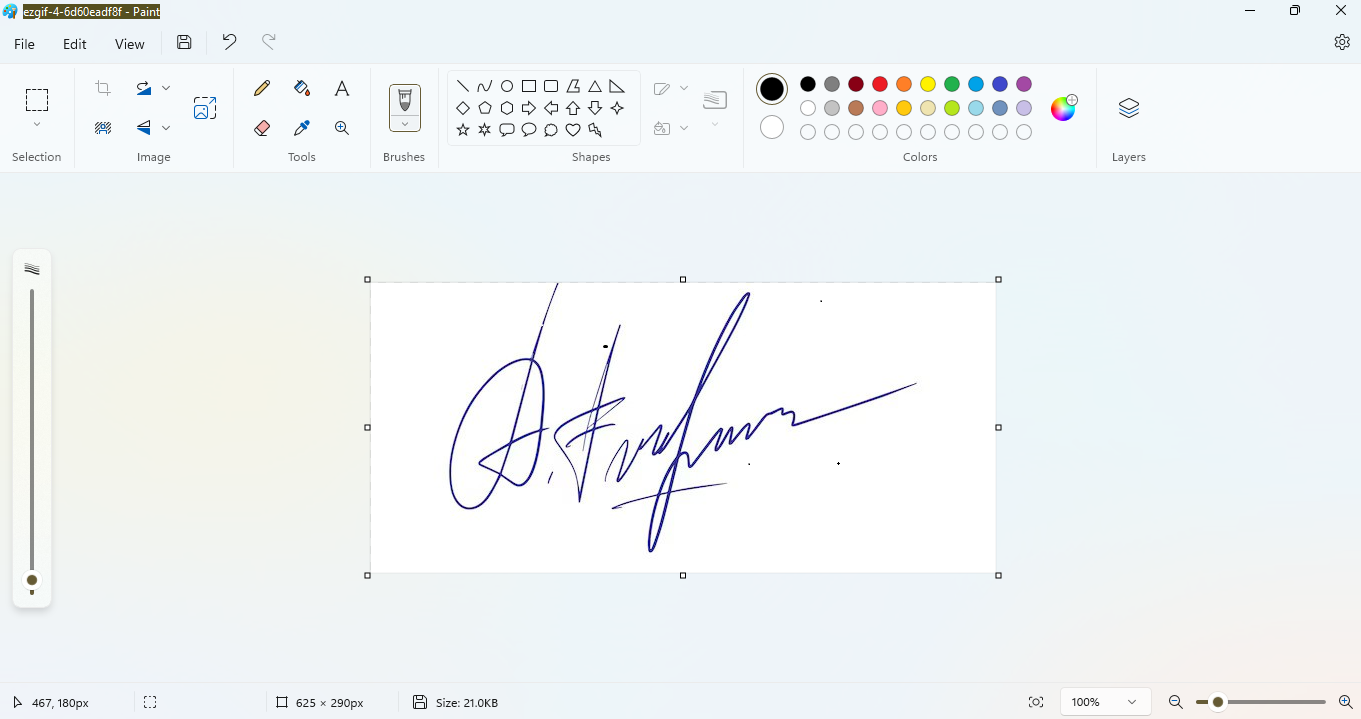
a. Take a piece of plain white paper and write your signature using a fine-point pen.
b. Capture a high-quality digital image of your signature by either scanning it or taking a clear photo. Save this image as a JPEG file.

a. Launch Microsoft Paint and open your signature image.
b. Use the cropping tool to remove any excess white background around your signature.
c. Select the entire signature using the selection tool and copy it.
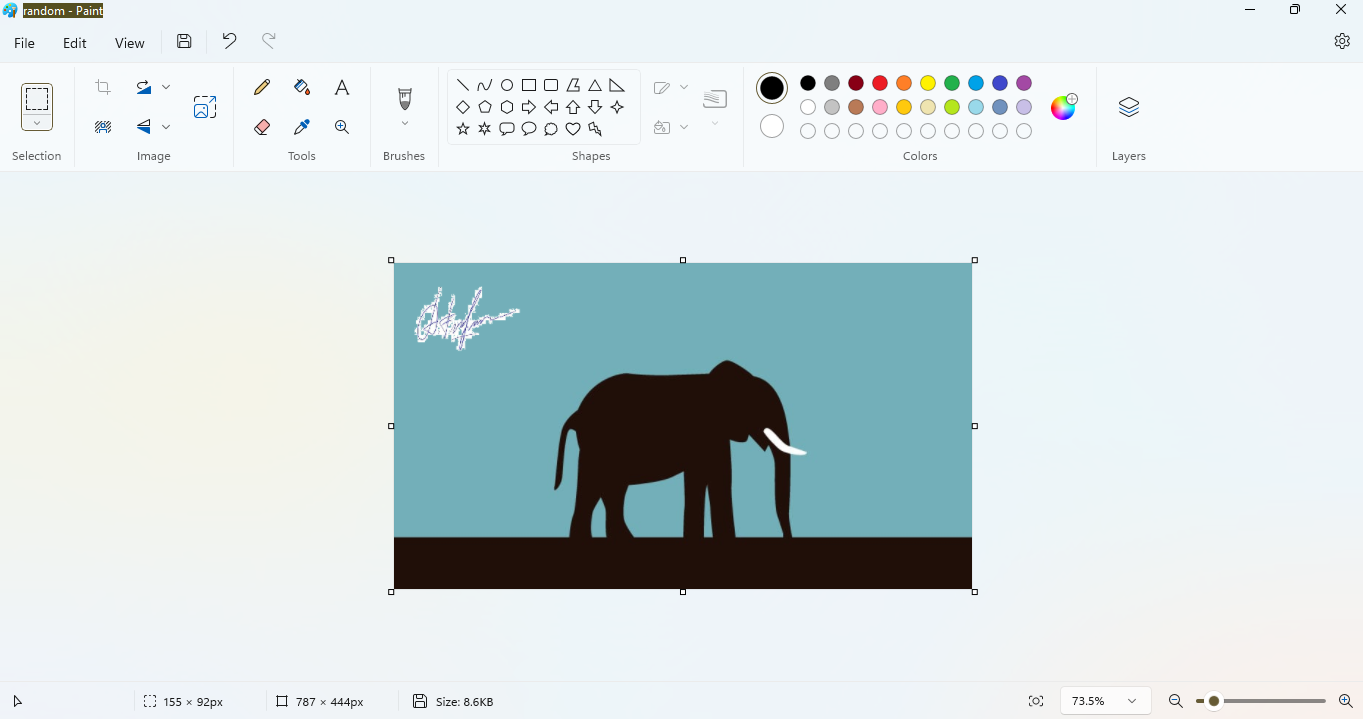
a. Open the image you want to sign in a new Paint window.
b. Paste your copied signature onto the image.
c. With the signature still selected, change the selection tool settings to “Transparent selection” to blend your signature seamlessly with the background.

In this guide, we’ve explored the various methods to sign an image, including using the basic functionality of Microsoft Paint and the more efficient approach with SignWell.
While Paint offers a simple way to manually place your signature on an image, it can be time-consuming and may not produce the highest quality results.
In contrast, SignWell streamlines the image signing process with its user-friendly platform, secure document handling, and adherence to international eSignature laws. By following just a few easy steps, you can upload your image, add signature fields, and send it off for signing—all while maintaining control and tracking the signing progress in real time.
Ready to simplify your image signing experience? Get started with SignWell today!
businesses served
customer support satisfaction
documents signed