How to Add Signatures in QuickBooks Online: Our Complete Step-By-Step Guide
6 mins
Getting signatures in QuickBooks Online doesn’t have to be slow or frustrating. With SignWell’s native integration, you can send, sign, and approve documents right inside QuickBooks, no printing, scanning, or follow-ups required. This guide walks you through setup, best practices, and how to speed up approvals to keep cash flow moving. For more tips and in-depth guides, visit our blog.
Waiting for physical signatures on estimates and invoices can slow down your cash flow and delay important projects. These hold-ups create bottlenecks that can frustrate both you and your clients.
SignWell provides a simple solution with its native electronic signature integration for QuickBooks Online. This seamless connection lets you send, sign, and approve documents quickly and securely, all within QuickBooks. It removes the need for manual follow-ups and speeds up your entire workflow.
In this SignWell guide, you will learn how to set up and use SignWell with QuickBooks Online. You’ll also discover how to streamline approvals, reduce delays, and keep your business running smoothly.
SignWell has helped over 65,000 teams, from small businesses to growing companies, simplify document workflows and cut down on manual approvals. We understand the frustration of slow, disconnected processes. That’s why our QuickBooks integration is designed to save time, lighten admin tasks, and keep your business running seamlessly.
SignWell’s integration with QuickBooks Online is a native solution that allows you to send documents for electronic signature directly from your QuickBooks dashboard. Unlike third-party tools that require manual document transfers, SignWell simplifies the process with seamless data flow between both platforms.
Key features of the integration include:
SignWell also meets SOC 2 Type II certification, ensuring secure, legally binding signatures with full audit tracking.
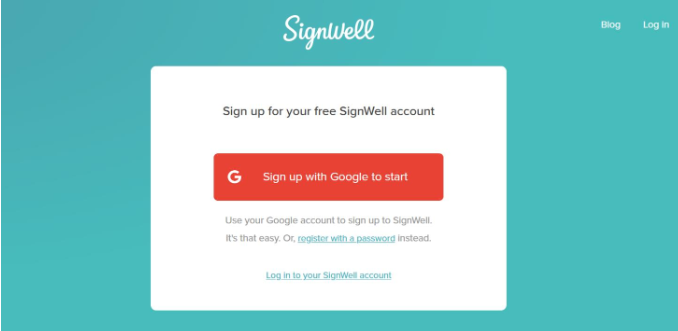
If you don’t already have a SignWell account, head over to the SignWell website and sign up. You can register with your Google account for quick access or use an email and password. Once logged in, it’s worth taking a few minutes to customize your profile:
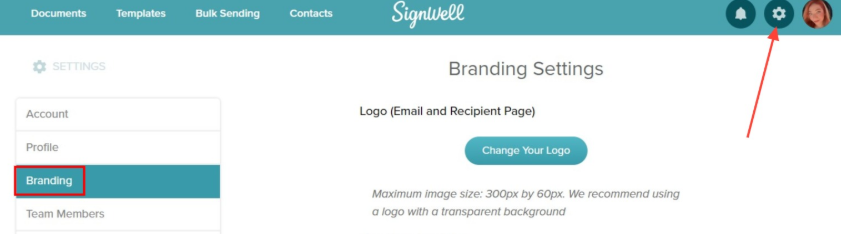
This preparation ensures your integration with QuickBooks will be smooth and your documents will look consistent from the start.

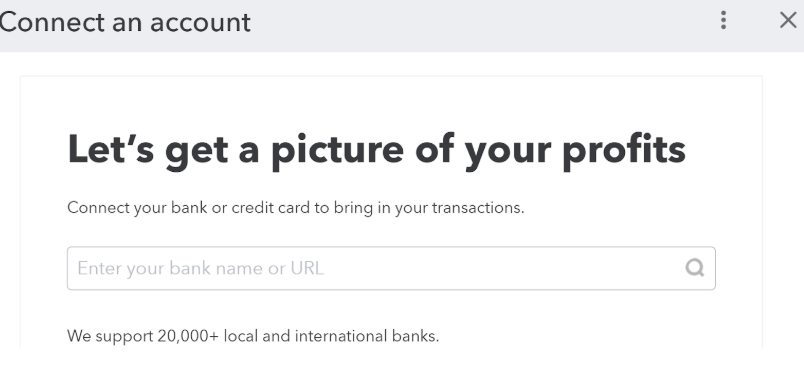
Before connecting to SignWell, make sure QuickBooks Online is ready to go. Log in and confirm that your account is set up with the correct company information. You’ll also want to:
The more complete your QuickBooks setup, the more seamless your signing workflow will be later.
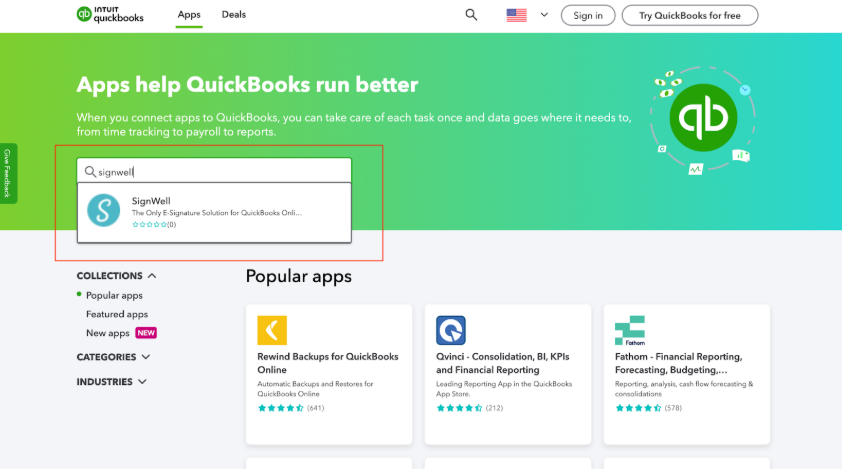
With both accounts ready, you can link them:
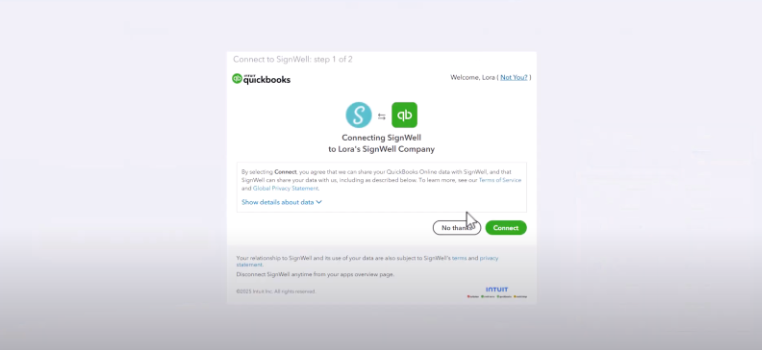
This integration lets SignWell pull client and document data directly from QuickBooks, so you don’t have to re-enter information. It also ensures completed, signed documents can be stored alongside your accounting records.
Once connected, you can start sending documents for e-signature without leaving QuickBooks. For example, if you’ve just created a new estimate:
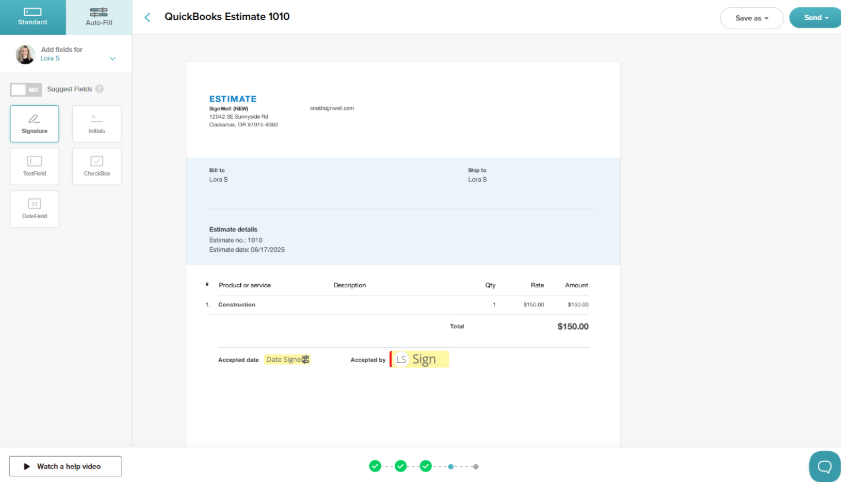
This process works for a variety of business documents, proposals, waivers, policy updates, contracts, and more.
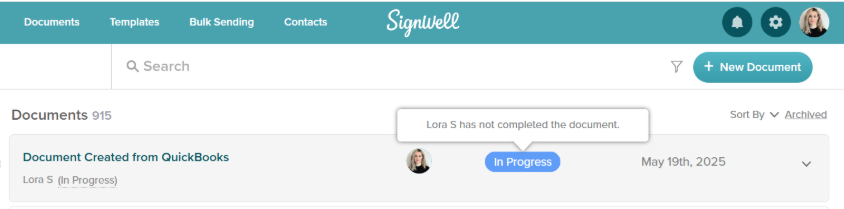
After sending, you can track progress from your SignWell dashboard. The status will show whether a document is pending, in progress, completed, or overdue. If a client hasn’t signed by the due date, you can send an automatic reminder with just one click.
When the document is signed, SignWell provides a complete audit trail, including timestamps, IP addresses, and signer details. This is useful for compliance and recordkeeping. You can also download the signed document and re-upload it into QuickBooks for permanent storage, keeping all financial and legal records in one place.
To get the most out of your integration:
By integrating SignWell with QuickBooks Online, you’re not just adding convenience; you’re building a more professional, organized, and efficient document management system.
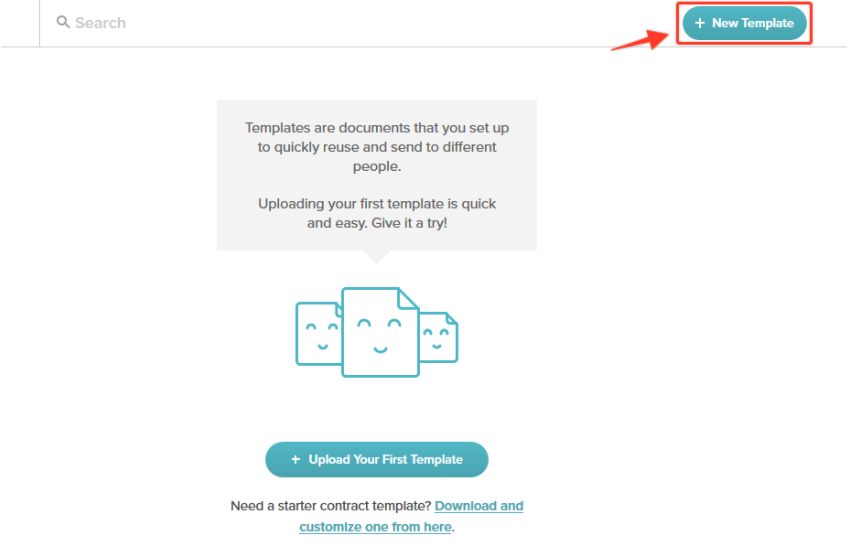
Standardized templates help maintain a consistent, professional look for all your business documents. Place signature fields logically, and add clear instructions so signers know exactly where and how to sign. Review and update templates regularly based on client or team feedback to improve turnaround times. Make sure they’re easy to access and reuse so you can create new agreements faster in the future.
Set expectations with clients by explaining the e-signature process upfront. Automating reminders and follow-ups ensures documents are signed on time, while training your team on how to handle and track signed files keeps the workflow smooth. Maintain consistent communication throughout the process to create a professional, reliable signing experience for clients.
Ensure your e-signature process meets SOC 2 Type II standards for secure storage and audit tracking. Review access permissions regularly so only authorized team members can send documents for signing. Stay informed on electronic signature laws in your region, and put document retention policies in place to meet industry-specific compliance requirements.
Compare signed documents in SignWell with QuickBooks invoices on a regular basis to ensure accuracy. Monthly audit reports can confirm that all agreements are linked to their corresponding payments. Keeping a central archive of signed files makes dispute resolution faster, while quarterly reviews can highlight patterns in delays or missing signatures.
Use automation to instantly convert approved estimates in QuickBooks into invoices and trigger payment reminders as soon as a document is signed. Workflow rules can automatically route documents to the right team members, and syncing client details between platforms reduces manual data entry. This not only speeds up your process but also minimizes errors.
Consistent branding across all your QuickBooks and SignWell documents reinforces credibility and trust. Add your company logo, brand colors, and standard legal disclaimers to every template so that clients have a unified experience from estimate to payment. Branded e-signature requests not only look more professional but also help your business stand out in a crowded inbox.
Integrating SignWell with QuickBooks Online transforms the way you handle document approvals. It streamlines your workflows, speeds up estimate approvals, and makes invoice processing faster than ever. By removing the delays of paper signatures, you keep projects moving and cash flowing.
The native integration also improves accuracy and consistency. Automated reminders, real-time tracking, and instant document conversion help reduce manual work while ensuring every signed agreement is linked to the right financial record. Your team spends less time chasing paperwork and more time serving clients.
Ready to experience the combination of speed, security, and automation this integration offers?
businesses served
customer support satisfaction
documents signed