Helpful Summary
- Overview: The article provides a comprehensive guide on how to sign an NDA, detailing the necessary steps, best practices, and how electronic signature tools like SignWell can streamline the process.
- Why you can trust us: SignWell has assisted over 61,000 businesses with electronic signature needs, including signing NDAs. Our platform is backed by positive user reviews highlighting enhanced efficiency and trust in business relationships.
- Why it matters: Understanding how to sign an NDA properly is crucial for protecting sensitive information, maintaining confidentiality, and ensuring legal enforceability. This knowledge helps safeguard business interests, and fosters trust in professional dealings.
- Action points: Understand the purpose of the NDA, identify the parties involved, review definitions and obligations, check durations and exclusions, and seek legal counsel before signing the agreement. Employ SignWell’s e-signature solutions for streamlined contract management.
- Further research: Explore specific NDA requirements and legalities in your jurisdiction.
Signing an NDA Is Easier With E-Signature Tools
Non-disclosure agreements (or NDAs) are a somewhat controversial yet widely used tool in business.
If you’ve been asked to sign an NDA, you probably have questions. What exactly is an NDA? What can I speak about without breaking the agreement? How long does it last? And what’s the best way to sign the document?
In this SignWell guide, we’ll answer these questions and more and provide valuable resources to help you navigate the NDA process.
But first…
Why Listen to Us?
At SignWell, we’ve helped tons of individuals and businesses complete the contract signing process quickly and efficiently. Over 61,000 users trust our tool to handle their e-signing and document management tasks.
Our first-hand experience with all kinds of contracts, agreements, and NDAs has given us valuable insight into how to handle them with ease. Now, let’s dive into the content and get you up to speed on everything you need to know about NDAs.
What Is an NDA?
Non-disclosure agreements (NDAs) are legally enforceable contracts.
They create a confidential relationship between a person or party that owns sensitive information and another person who will gain access to that information. A confidential relationship means that one side or both have a duty not to share or misuse that information.
Here’s an example. You own a software company and need a freelance developer to work on a new feature. But… this means giving them access to your codebase. If they like what they see, they could use your work for their own company or sell it to a competitor.
However, if you have them sign an NDA:
- The freelancer agrees to keep your codebase and feature plans confidential.
- You can safely share your code and new feature specifications with the developer.
- The agreement provides legal protection if the freelancer misuses or shares your code.
- You can collaborate without risking your intellectual property or competitive advantage.
Common Use Cases for NDAs
- Business partnerships
- Employee onboarding
- Mergers and acquisitions
- Product development
- Client relationships
- Investor negotiations
- Outsourcing projects
- Trade secret protection
- Software licensing
- Medical research collaborations
How to Review and Evaluate an NDA
We’ll cover signing your NDA in the next step. First, we need to cover something equally important—what to look for in an NDA before you sign it.
1. Figure Out What Counts As Confidential Information
First, figure out what exactly the contract defines as confidential. This should be spelled out clearly somewhere at the beginning of the NDA, usually in a section titled “Confidential Information” or “Definition of Confidentiality.”
Some red flags to look out for:
- Vague terms and definitions (e.g., “…business information”)
- Retroactive coverage (e.g., “…all information in the past 12 months”)
- Independent information coverage (e.g., “all information related to [technology]”)
That last one is a big one as it may prevent you from taking advantage of ideas or insights that you develop completely independently.
2. Check the Duration
NDAs typically have a set duration for protecting confidential information.
When reviewing this part:
- Make sure the timeframe is reasonable and fits the project.
- Consider your entire project timeline—from kickoff to implementation.
- Be prepared to discuss adjusting the duration.
For example, say you’re partnering with a tech startup on a new app. The NDA specifies a three-year confidentiality period.
This makes sense if:
- You expect development and launch to take about two years
- The company wants an extra year of protection post-launch
However, if your project is likely to be much shorter or longer, the company may be trying to use the NDA to gain an unfair advantage. It’s ultimately up to you to decide whether you think the duration is fair, reasonable, and, most importantly, realistic.
3. Evaluate Exclusions
Most NDAs constitute exclusions—kinds of information that aren’t considered confidential. The reason for this is that without exclusions, NDAs become almost impossible to enforce.
An example? You’re a developer who signed an NDA before working on a new feature. Years later, you’re at a conference where the company presents the same feature. You join the discussion with other attendees, only to be hit with a lawsuit for violating the NDA.
The bottom line? Look for reasonable, fair exclusions like:
- Public information
- Information you developed on your own
- Retroactive breaches of the NDA
4. When in Doubt, Speak with a Legal Advisor
If you have any doubts or lingering questions at this point, we highly recommend speaking with a qualified legal advisor. They’ll be able to clear up any confusion and help you understand what it is you’re actually agreeing to.
This is the best way to make an informed decision and ensure your rights are protected.
How to Sign an NDA With SignWell
1. Log Into SignWell
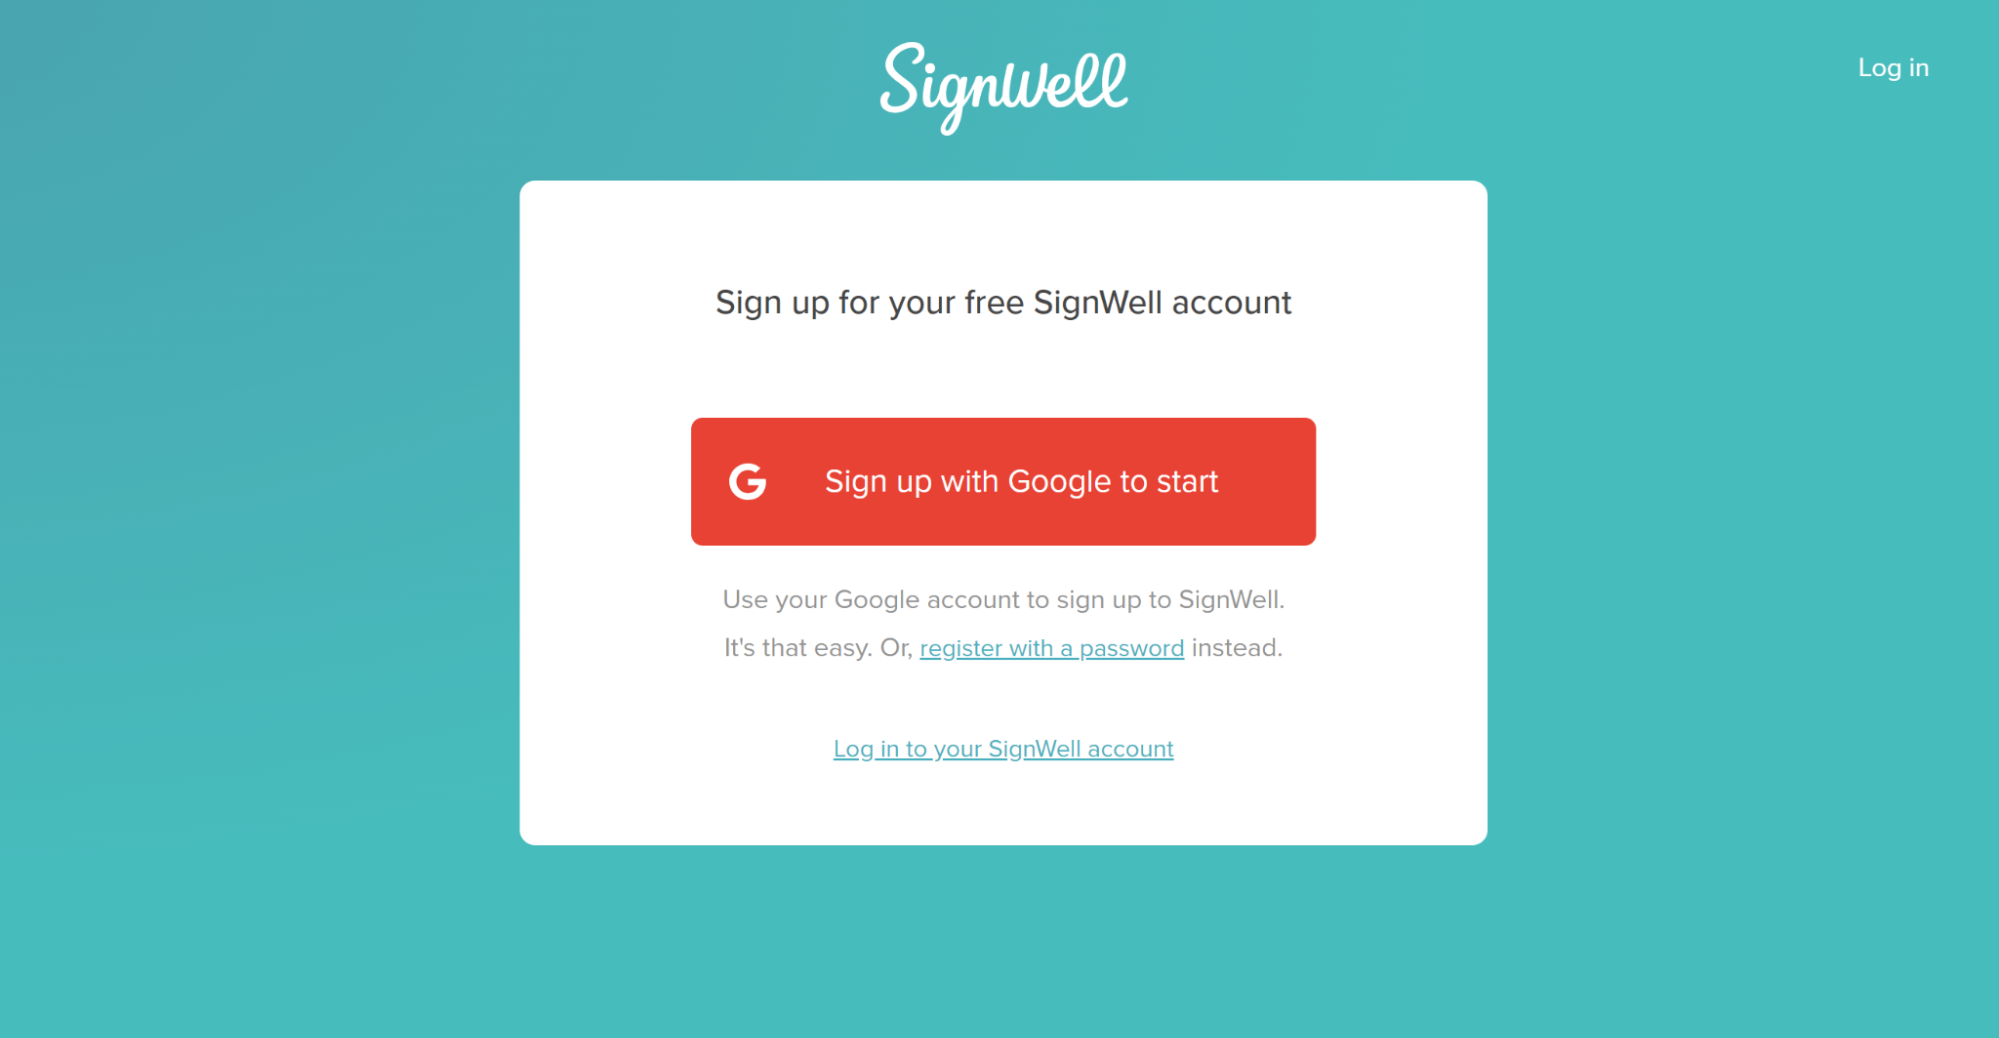
To get started, you’ll need to sign up for SignWell (if you haven’t already done so) and sign in. Don’t worry—you can create a free account and sign up to three documents every month.
2. Upload the NDA
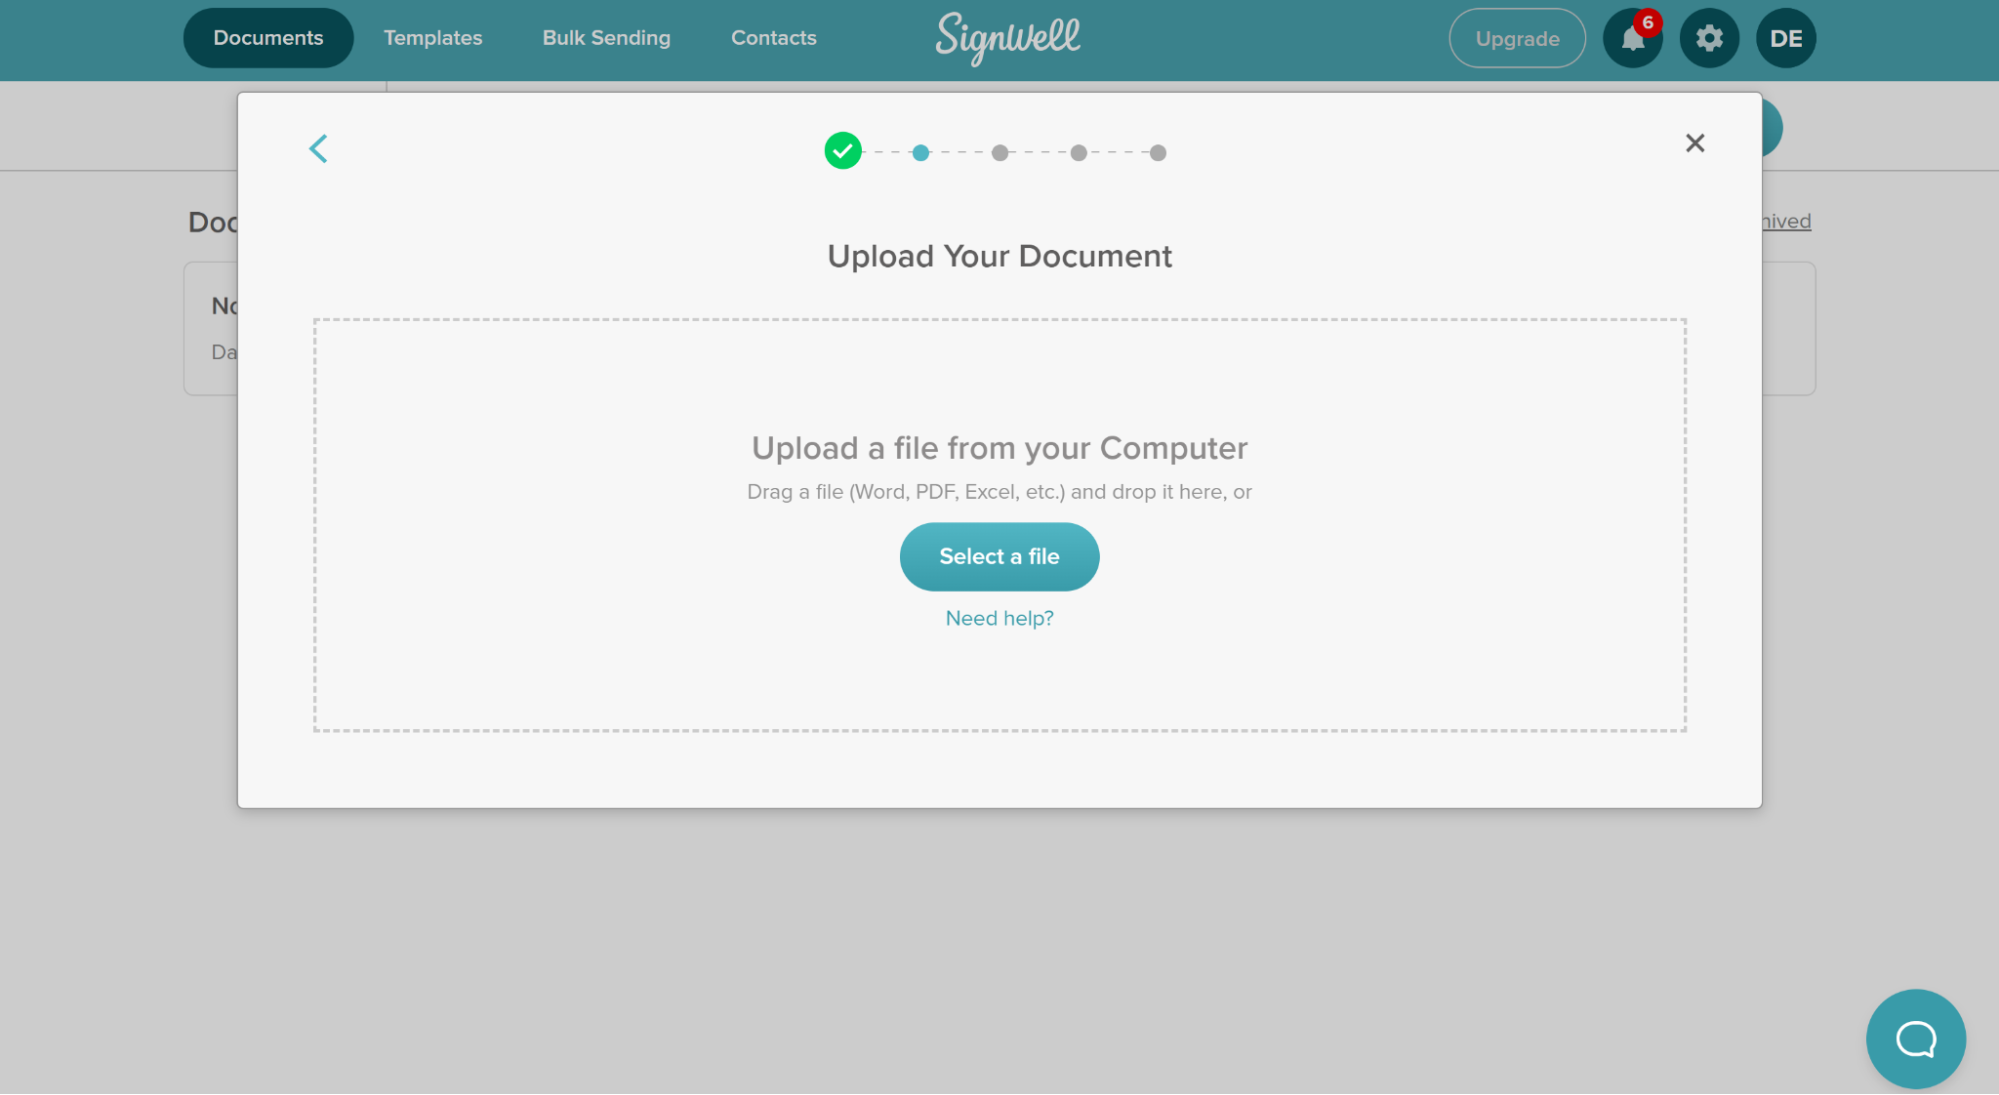
From the dashboard, click the “New Document” button to upload a copy of your NDA. Select the file from your computer (we support .doc, .pdf, .docx, .jpg, .xls, and more) and click “Upload.” Wait a second for the document to process.
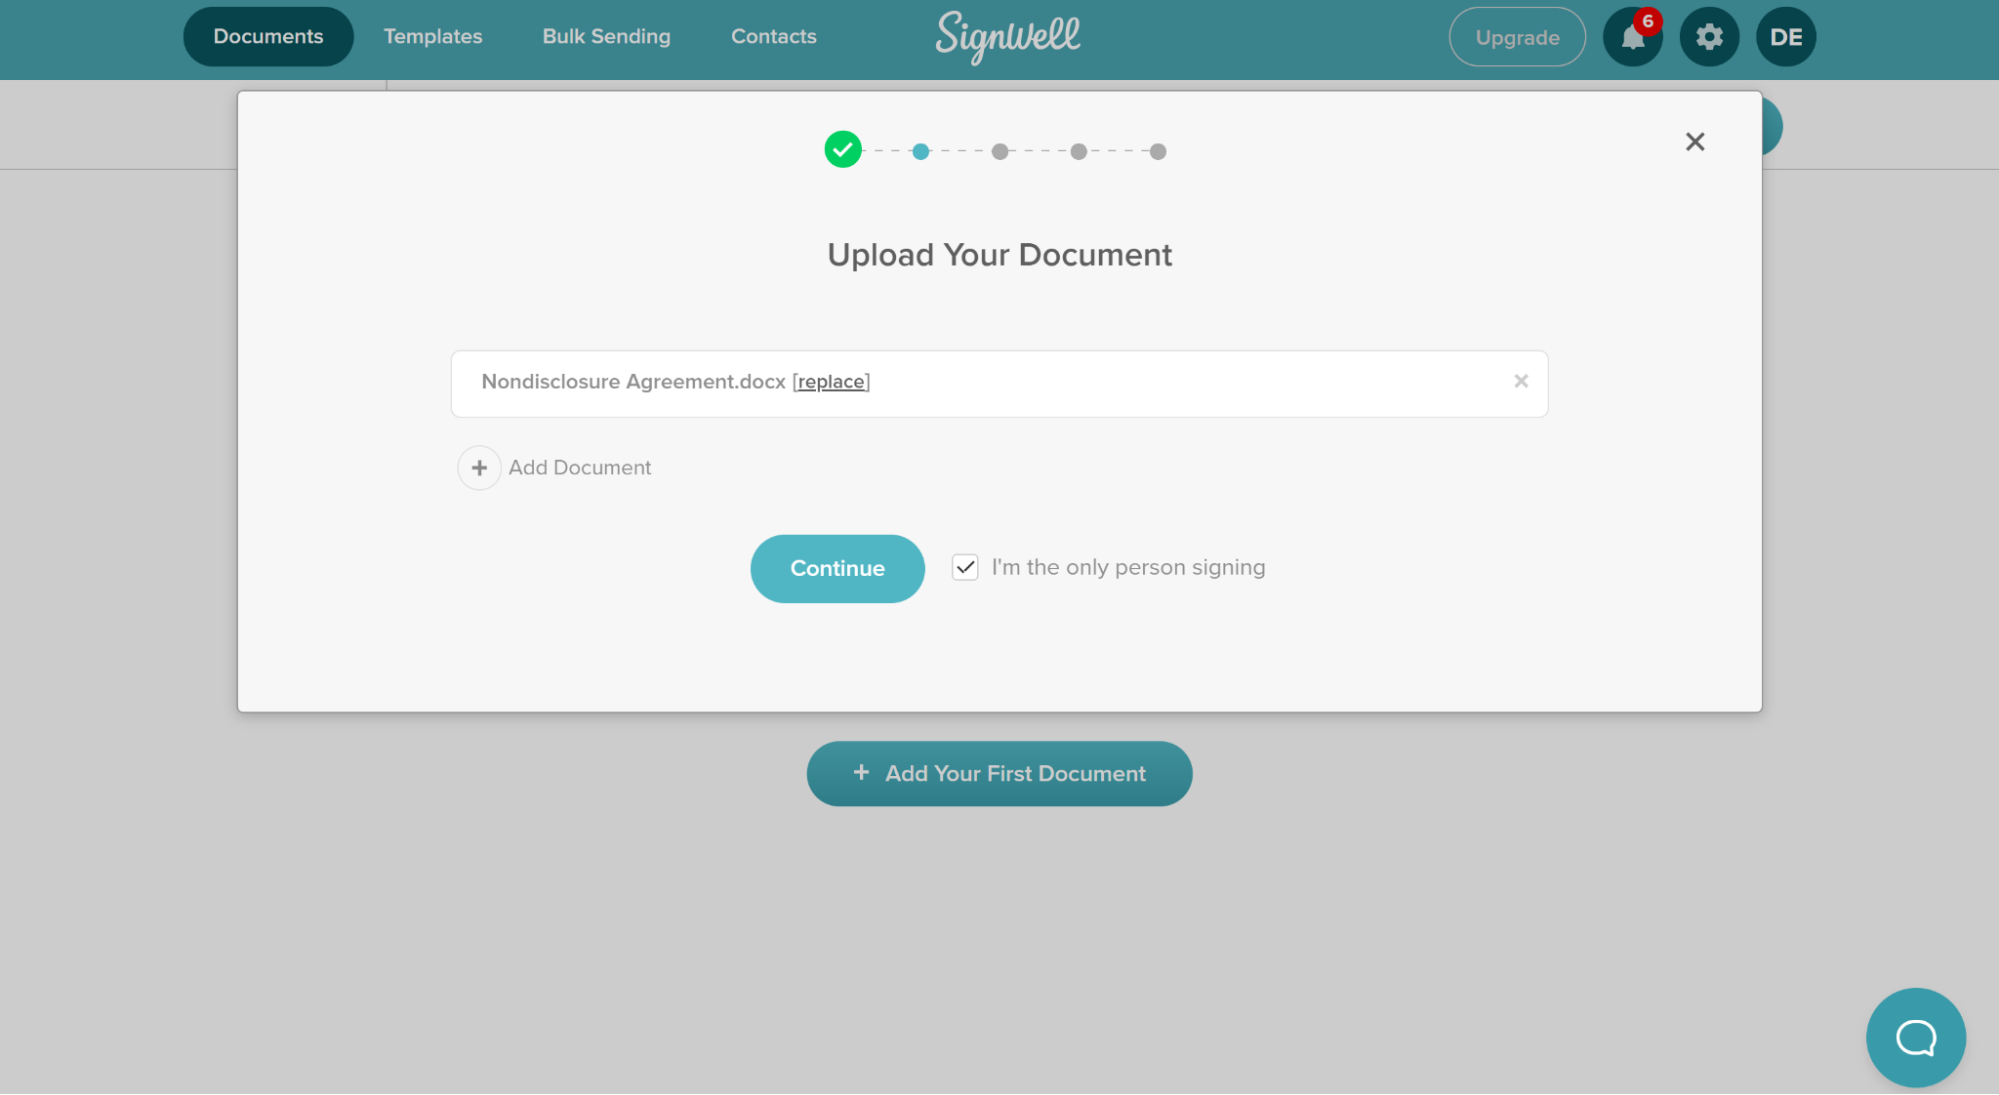
Soon, the NDA’s file name will appear. Check the “I’m the only person signing” box and then click “Continue.”
3. Sign the NDA
You will be directed to the electronic document. On the left-hand side of the document, you’ll see five different field options:
- Signature
- Initials
- Text
- Checkbox
- Date
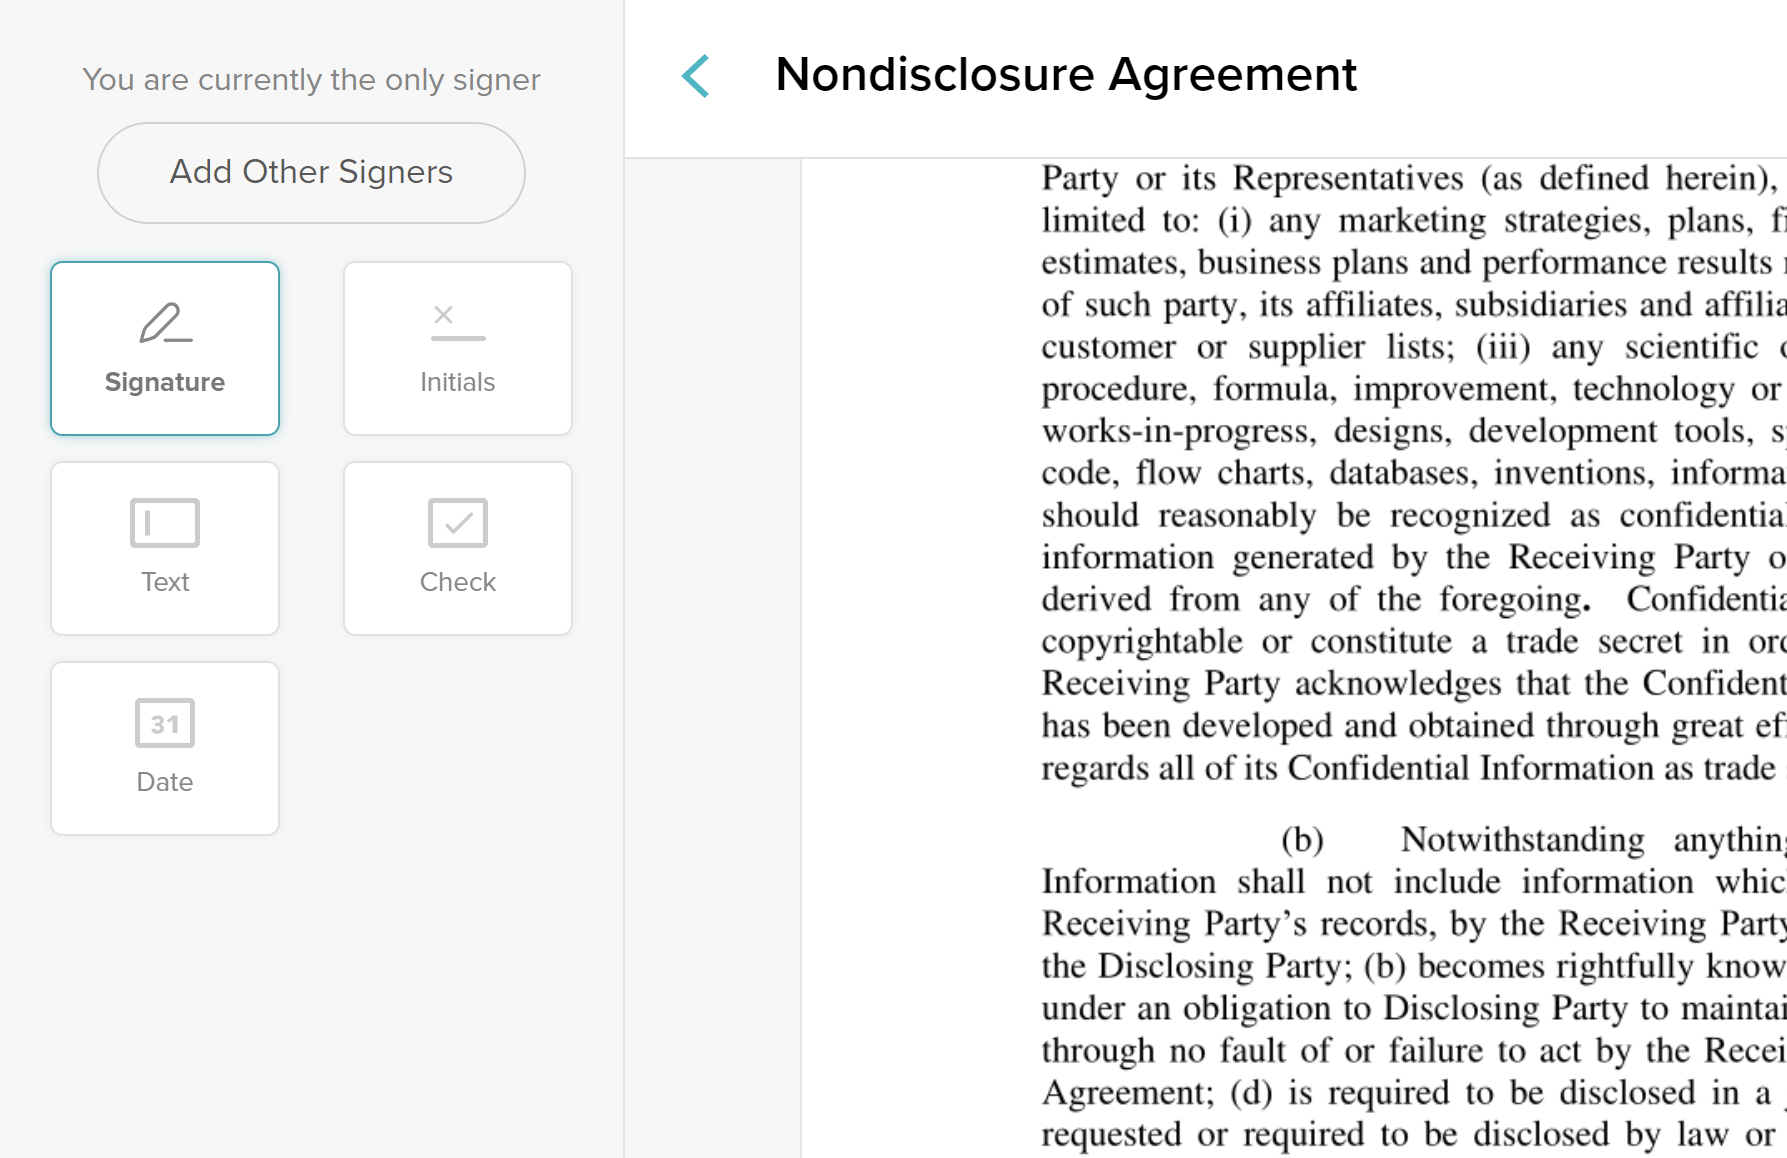
For an NDA, you may only need the signature field. However, if there are other kinds of blank fields in the document for you to fill in, these options come in handy. To add them to the document, click them in the sidebar and then click the place in the document where they need to go.
When it’s time to add your signature, you can choose to:
- Type it
- Draw it
- Upload a photo
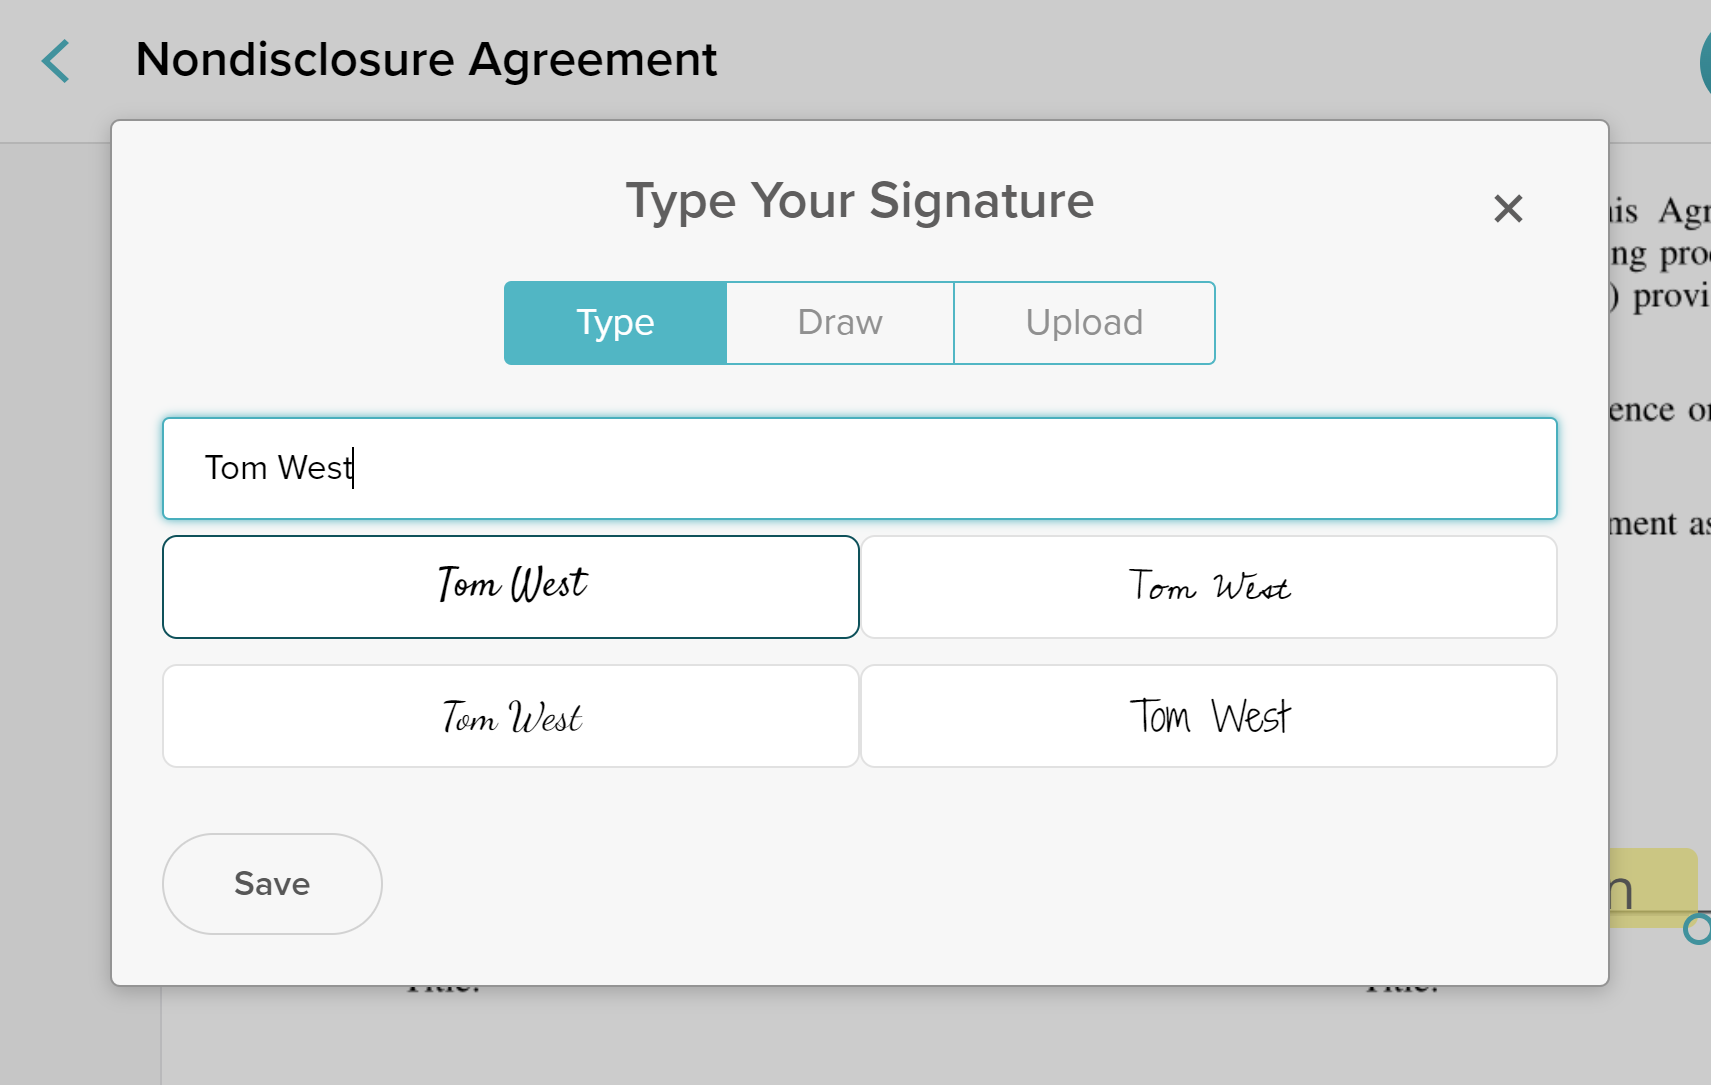
4. Save and Send the NDA
This last step covers two very important tasks:
- Saving the NDA for your records
- Sending the NDA to the disclosing party
To save the document, click “Share” in the upper right-hand corner of the editor and then click “Download.” A PDF should open in your browser, and you’ll be able to print or download it using the options in the upper right.
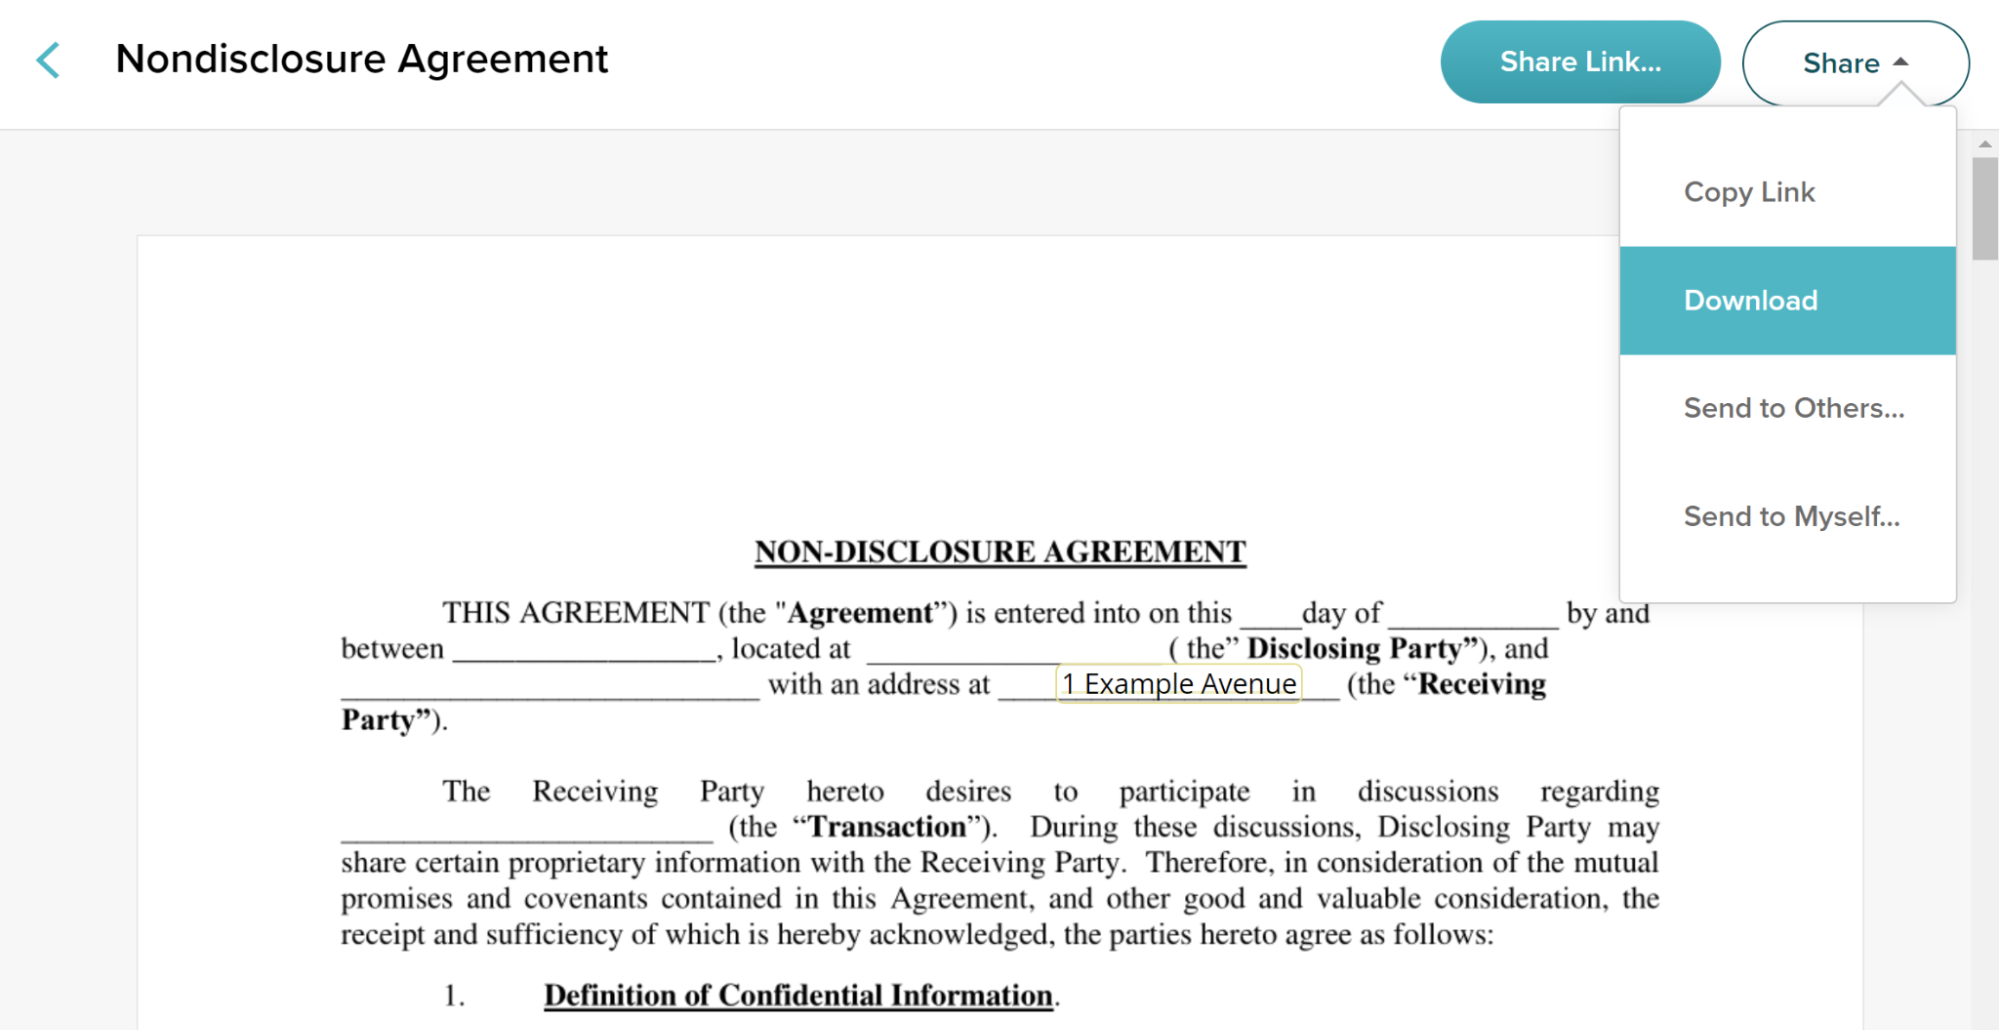
You have two options to send it. You can either click “Copy Link” to send the NDA as a link or “Send to Others” to send it directly through email. Whichever method you choose, make sure the recipient has access to the document.
SignWell will send you automatic notifications when the NDA is accessed, and all the details are stored in an audit trail for extra security.
Conclusion
Signing an NDA is one of the first requirements before their terms can be enforced. NDAs are important as they protect confidential information from being revealed to unauthorized parties. This helps a business maintain its competitive edge by keeping valuable information secret.
Common situations that require NDAs include:
- Beginning a new job with an employer
- Starting a work contract with a new client
- Negotiating a business partnership, collaboration, tie-up, or joint venture
- Merging with or acquiring a business
- Exploring an investment opportunity
To streamline the NDA signing process, use SignWell. Our tool allows you to sign any legal document easily via electronic means. We also offer features to track documents, reuse and resend them, and access detailed audit reports. Plus, SignWell integrates seamlessly with over 5,000 of your favorite apps.
Get started today—sign up for free.